4.17.2019

Summer Quilt for "Quilts and More"


(Image Used with permission from Quilts & More magazine. ©2019 Meredith Corporation. All rights reserved.)

I am super excited to share the latest mini quilt I designed for the magazine "Quilts and More".
This Summer themed mini quilt is the second of four seasonal quilts.
The issue is filled with adorable projects and definitely a must buy.
You can find more info about the issue at the Quilts and More website [HERE]
You can find the Summer issue of Quilts and More magazine on newsstands this Friday!
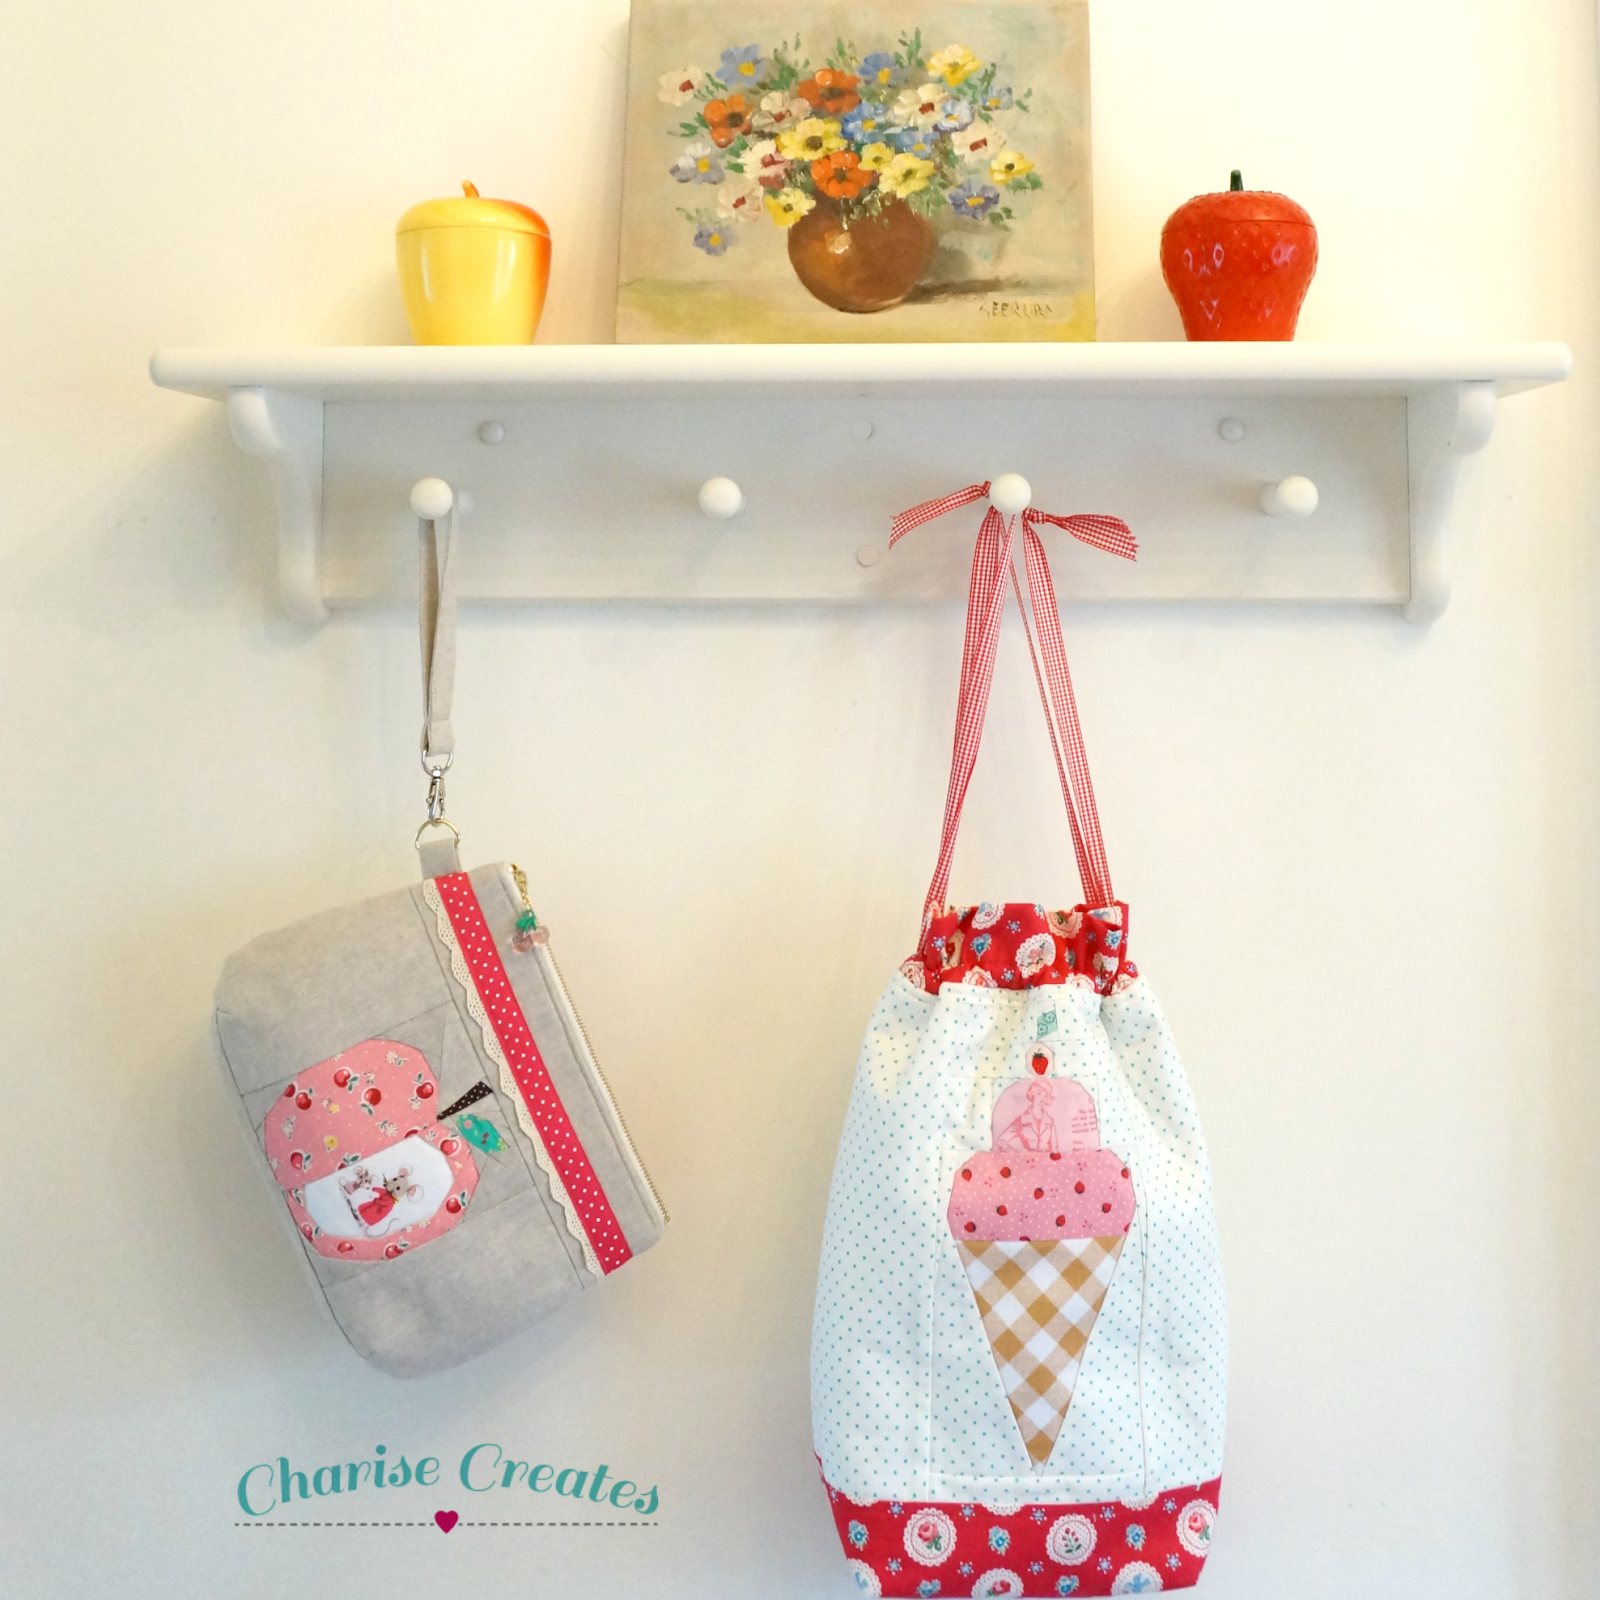

Each block is paper pieced and they are perfect for small projects as well as the mini quilt.
The project bag on the right was made with my Ice Cream Cone Block.

If you are new to paper piecing, I have a beginning paper piecing  pattern and tutorial [HERE]


(Image Used with permission from Quilts & More magazine. ©2019 Meredith Corporation. All rights reserved.)

All the fabrics for this quilt are from Riley Blake Fabrics.
You can find the fabric details at the bottom of this post.

I am looking forward to making more projects with these Summer themed blocks!

Happy Sewing
xo
Charise


Background - Swiss Dot on White - Aqua
Borders - “Serendipity Strawberries” by Minki Kim - Aqua 

Corner Blocks - “Gretel” Heart Yellow by Amy Smart
Binding - White Swiss Dot on Raspberry

Sunglasses -
Lenses - “Seaside” Main White by Tasha Noel 

Frames - White Swiss Dot on Peacock

Vintage Swimsuit -
Yellow Swimsuit Fabric - “Gretel” Wreath Yellow by Amy Smart 

Red Dot - White Swiss Dot on Red

Beach Umbrella
Pink Print - “Gretel” Lattice Pink by Amy Smart 

Red Dot - White Swiss Dot on Red
Brown Dot - White Swiss Dot on Nutmeg


Ice Cream Cone
Pink Print - “Bake Sale 2” Cherry Pink by Lori Holt
Pink Gingham - 1/8” Small Gingham Check Hot Pink
Brown Gingham - “Sew Cherry 2” Nutmeg gingham by Lori Holt


2.26.2019

Vintage Dresses Pattern


Hope you are having a lovely day!
The sun is shining though it is cold here in Seattle.  My favorite weather - sunny and brisk!

I have been updating one of my favorite patterns - Vintage Dresses.
The Cap sleeve dresses are now revised.  
The design is exactly the same but the pattern has less pieces! 


You can find the pattern in my Etsy shop.
Did you know the bodice and skirt portions are interchangeable?
They are!

I had fun coloring these up - so many options : )


Happy Sewing!
xo
Charise

2.01.2019

Happy February!

Hi Peeps!
Happy February!


I designed this fun Fussy Cut Heart last year.  
If you follow my blog, you know how much I love fussy cutting!


This pattern is the perfect fussy cutting project.   If you need some help to learn this technique, you can find my Fussy Cutting tutorial [HERE] 

I also have a video tutorial on the Martingale blog [HERE]


The block would make an adorable quilt.  
It is also great for small projects like this Macaroon Pouch with a fussy cut heart as the focal point.  (I shrunk the fussy cut heart to fit the center of the pouch)

You can find the pattern for my Fussy Cut Heart and Macaroon Pouch in my Etsy shop [HERE]

Happy Sewing!
xo
Charise

1.28.2019

Vintage Spool Pattern

  Hello!
Today I'm sharing my new pattern - Vintage Spools.
It is a fun pattern and is made with squares and rectangle, no templates needed!

Each Spool is 3" finished or combine 4 spools and you have a cute 6" block.


I had fun finding the perfect fabrics to fussy cut for the thread portion!
If you'd like to have a copy of my Vintage Spools pattern, just sign up for my
Newsletter.  You can find the sign up to the right of this post.

I love to see what you make.  If you post to any social media sites, please use the hashtag #ChariseCreates so I can see you creations.

Happy Sewing!
xo
Charise


1.23.2019

Spring Mini Quilt in Quilts and More


Used with permission from Quilts & More magazine.
©2019 Meredith Corporation. All rights reserved.


Hi and Happy Wednesday!
I hope you are having a good week so far.

I have been working on a project for months that I can finally share.
Quilts and More has asked me to design four seasonal themed mini quilts!  
The first "Festive Foundations" quilt is Spring themed and includes three fun blocks. 

Used with permission from Quilts & More magazine. ©2019 Meredith Corporation. All rights reserved.

 The blocks include the tulip, butterfly and bird house and are all foundation paper pieced.
The individual blocks would also be perfect to use on individual projects such as a tote bag or pillow.


This project uses fabrics from my stash with some fun fussy cutting opportunities.
If you haven't paper pieced before, check out his video from Joanna at Quilts and More as she takes you through the process.  


She also shares my method of Fussy Cutting so you can perfectly isolate a motif as I did for the cherry center on the tulip.

Used with permission from Quilts & More magazine. ©2019 Meredith Corporation. All rights reserved.

Physical copies are on newsstands until April 19th and you can also get the digital issue [HERE]

Happy Sewing!
Charise

12.31.2018

Happy New Year!


Happy New Years Eve!
I have spent the day in my studio cleaning and organizing, hoping a clean studio will help me
prioritize my work in 2019.

And of course I had to find out my Best Nine photos on Instagram for 2018 : )

I love all these photos but thought it would be fun to pick some of my favorites. 


Here are my favorites:
From top left clockwise, center picture last
1) Dress pattern from my book "Super Cute Paper Piecing" 
2) Baby Patchwork Zipper pouch which is a free tutorial on the blog 
3) Windmill paper pieced pattern which I hope to have in my Etsy shop soon! 
4)  Watering can from my book "Super Cute Paper Piecing".  
This is part of my Spring Blossoms Sew Along. 
6)Apron from my book "Super Cute Paper Piecing" 
7) Macaroon Pouch with my Apple pattern from "Super Cute Paper Piecing" 
8) A new pattern - Summertime Fruit  
9) Mini Hexie Flower for one of my clasp pure for the Purse Clasp Sew Along

Thanks for a lovely 2018!
Here's to a wonderful 2019.

Happy Sewing
xo
Charise

12.20.2018

Apple Pouch - a new pattern

 Hello!
Christmas is just around the corner and I am finishing up Holiday preparations.
I will be making Christmas cookies this weekend and doing a bit of last minute shopping.

I created this apple pouch as a gift and I am offering the pattern for sale in my 
Etsy shop.  It is an easy make and a fun gift if you have a bit of time to do some holiday gift sewing.


Another fun project to use up fabrics from your scrap stash, the squares are just 2"!


I also made this cute little apple needle book that goes so well with the pouch.
I modified this pattern from the book Heart Felt Holidays. 


Here is a picture of the back.  I used a fancy zipper found on Etsy, but it would be equally
as cute with a coil zipper and fun zipper pull.


 I will leave you with a few pictures of my favorite Christmas tradition - cutting down our Christmas tree.


Every year we go up to the mountains and cut down our tree and this year the weather was beautiful!
Lots of snow and sunny to boot.  It couldn't have been more perfect!

Happy Sewing
xo
Charise

12.10.2018

Holiday Gift Sewing ~ Lavender Sachets


I have been doing lots of sewing the past week!

  
 Trying to get as many Holiday gifts sewn as possible!
I used some Liberty florals, text prints and some button from my stash.


You can find the tutorial [HERE]
with a link to purchase lavender buds for the project.

Happy Sewing!
xo
Charise

12.04.2018

Holiday Gift Sewing ~ Scrappy Patchwork Coasters

Hello!  Hope you week is going well.

I have been in Holiday sewing mode and thought it would be fun to share a free pattern with you.
I designed the coasters pictured above last year as a way to use some of my favorite scraps of fabric.
It is a quick make and pairs nicely with a cute mug filled with goodies for a lovely Holiday gift.

The pattern includes instructions for both a 9 patch version and a 16 patch version.
You can find the pattern [HERE] on my original blog post


I like to make my own bias tape to finish off the coasters.  You can find my instructions for making bias tape [HERE]

If you make a coaster or two, please use the hashtag #ChariseCreates and #ScrappyPatchworkCoasters so I can see you makes.

Happy Sewing
xo
Charise


11.29.2018

A new project


Hi Peeps
I have been woefully absent here and I plan to make more time for this space.

I just finished a 4 month design contract at a local Seattle clothing company so I haven't spent much time in my studio.
My goal this week is to create a schedule for myself ( I definitely get more done with a bit of structure! )
Getting to the gym, creating home cooked meals and spending time with my boys as well as sewing daily is on my list of to dos for the upcoming months!

I spent a bit of time organizing files on my computer and found this gorgeous pattern designed by Lady Harvatine.   She created it for the LA Modern Quilt Guild.

The fabrics are from Art Gallery fabrics - "Sonata" by Amy Sinabaldi.  I adore this fabric line and treated myself to a FQ set.


I hope you find time to do something you love today.

Happy Sewing
xo
Charise : )


11.25.2018

Cyber Week Sale at Charise Creates on Etsy


Hi There!

I wanted to let you know that I am discounting all items in my Etsy shop by 25%!
The sale starts tomorrow and ends Friday.


You can find patterns


and my book "Super Cute Paper Piecing" all for 25% off.

A great time to buy a new pattern if you are planning on sewing  holiday gifts.

See you soon : )

Happy Sewing
Charise


9.23.2018

Hexie Sewing & Farmer's Wife blocks


Happy Sunday Peeps!
It has been a very long time since I posted here.  
Instagram has been my preferred method of sharing projects these days due to time constraints,  but I do miss this space!

My sewing time is limited these days as I am in the middle of a 3 month contract position designing women's clothing at a Seattle company.
It has been 9 years since I have had a corporate design job!  
I have tried to fit in some sewing time, but it has been a challenge juggling the 9-5 work day (actually 8-6 counting the commute time) and family life.

I have pulled out my hexie stash so I have a bit of hand sewing, which I love to do during the Fall.
I am not sure what to make with them....any ideas?
I'd love to hear your suggestions!


I have also unearthed my Farmer's Wife 1920's blocks.  These were made years ago for the original Farmer's wife sew along.
There is a new epp Farmer's Wife sew along for those who'd like to hand sew the blocks.
Machine sewing is my preferred method : )


If you want to read more about the original Farmer's Wife journey, you can find it [HERE]


Happy Sewing!
xo
Charise


7.23.2018

Lavender Sachet Tutorial

It's lavender harvesting time of year in my garden.
I have lots of plants and love to make sachets with the dried buds.
They are great for scenting closets and drawers, and also make fun gifts.


Years ago I created a tutorial to make your own lavender sachet.  The pattern uses 2 1/2" squares and is a great way to use up your fabric scraps.  I used some favorite Liberty fabrics and text prints.
I also use some buttons from my stash.   Some of the buttons are vintage and others are new.

If you'd like to make your own sachet tutorial, you can find it [HERE]

Happy Sewing!
xo
Charise


7.13.2018

Summertime Fruit ~ a new paper piecing pattern!


Hello and Happy Friday the 13th!


I found this cute lemon slice  when I was cleaning out my sewing studio.
It was intended for a coaster......
so I made one!


The lemon is part of my Jam Jars and Fruit Pattern but it is such a cute stand alone pattern!

Sometimes it is fun to refresh a pattern that was released years ago!

The pattern include two sizes for the citrus slice - 3" x 3 3/4" 
and a much larger one that measures 6" x 7 1/2".


The pattern includes a strawberry which comes in three sizes - 2 1/2" square, 4 1/2" square and 8" square, all charm pack and layer cake friendly!
 I'm thinking the 8" strawberry will become a pillow and maybe even a quilt for myself.


The lemon is such a fun pattern for fussy cutting!


Those "sassy lemon ladies" are pretty darn cute.  The fabric is from Lake House and has some really cute motifs.

You can find the pattern in my Etsy shop.

Happy Sewing!
xo
Charise

7.01.2018

Baby Patchwork Zipper Pouch Tutorial


My pencil pouch is a bit "worse for wear" so I decided to make a new one! 
This design requires 80 - 1 1/2" squares so I thought it would be a good time to raid my scrap bin for some patchwork squares. 

I am calling this pouch the "Baby Patchwork Zipper Pouch" because the 1" finished squares are as tiny & as cute as a baby : )


Materials  

80– 1 1/2” squares assorted print fabric1" x 1 1/2" print fabric
for zipper end
1/4 yard  Print fabric for the liningMatching thread
1/4 yard muslin or solid cotton backingPins
1/4 yard batting9” coil zipper 
Zipper FootMarking Pen,  pencil, or Hera Marker (for quilt marking)
Cut

2 - pieces of Batting 6” x 9”
1" x 1 1/2" print fabric for zipper end
2 pieces of muslin or other cotton (it will be hidden) 
6” x 9”
2 rectangles lining 5 1/2” x 8 1/2"
80 – 1 1/2” squares assorted print fabric
Zipper Pull (optional)                                        I found the cute flower pull at SunnyDayFabric.com

Notes:
~All seam allowances are 1/4" unless otherwise noted
Finished Size:
4" tall x 8" wide


1) Arrange  the 40 print squares that make up a panel in 5 rows of 8 across. 
    Stitch each row together.
    Press the seams in opposite directions.


 2) Stitch the rows together, nesting the seams in each row.  
     Press seams open.
     Repeat for the other side side of the pouch.

3) Make a quilt sandwich:

Place the backing fabric wrong side up.  Place the batting square on top.  
Place the top panel right side up at the very top.  
    Baste all layers together. 

4)  Quilt diagonal lines on the patchwork panel:
     The outside quilting lines should start 1/4” in from the edge. 
     Mark the stitching lines with a hera marker or removable pen or pencil.
     Trim the panel to 5 1/2” x 8 1/2”.  
     Repeat for the other side.

5) Shorten the zipper to 7 1/2" measuring from the top of the zipper head to 
     the bottom of the zipper.

6) Fold under the 1" side of the zipper tab 1/4" to the wrong side. Press.
    Press in half wrong sides together.


7) Place the bottom end of the zipper so that it is against the folded edge of the tab.
    Pin in Place.
    Stitch the folded edge with an edge stitch.


8)  Fold back the zipper tape on the top edge of the zipper to the wrong side.
     Glue baste or machine baste in place.


9) Place the zipper to the pouch right sides together with the top edges of the pouch
     and zipper tape matching.
    Center the zipper on the pouch panel.  Stitch the top edge with
    a 1/4" seam allowance   back tacking at ends.

10) Place the lining right sides with the pouch panel matching the top raw edge.
      Pin in place.


The zipper will be sandwiched in between the pouch and lining panels.
Stitch the top edge with a 1/4" stitch back tacking at ends.


11) Press the pouch and lining panels away from the zipper.  Press.
     Top stitch 1/8" away for the seam line starting and stopping your stitching 3/8"
     from the raw edge.

~Repeat for the other side~


12) Separate the lining pieces from the pouch pieces.
     Place the pouch pieces right sides together, matching seams and raw edges.  
     Pin in place.

     Place the lining pieces right sides together, matching seams and raw edges.  
     Pin in place.
     The zipper teeth should face towards the lining.
     Make sure the zipper is open.
     Sew around the perimeter  leaving a 4" opening on the bottom lining side.

13) Box the corners:
      Place the bottom and side seams right sides together at the bottom corner 
      with seams pressed open.
      Mark 1" up from the bottom corner.  Stitch on the marked line back tacking at ends.
      Trim the seam 1/4" beyond the stitching.  Repeat for the other bottom corner.

Repeat for the lining.

14)  Turn right side out and press.
        Machine stitch or hand stitch the opening in the lining closed.

Congrats!   You have made a "Baby patchwork zipper pouch"

Happy Sewing.
xo
Charise