Showing posts with label riley blake fabric. Show all posts

3.12.2024

Tulip Cottage Zipper Pouches & a Free 6" Zipper Pouch Pattern

Today I am sharing the cute zipper pouches I made with the adorable new fabric line Tulip Cottage by Melissa Mortenson for Riley Blake Designs.


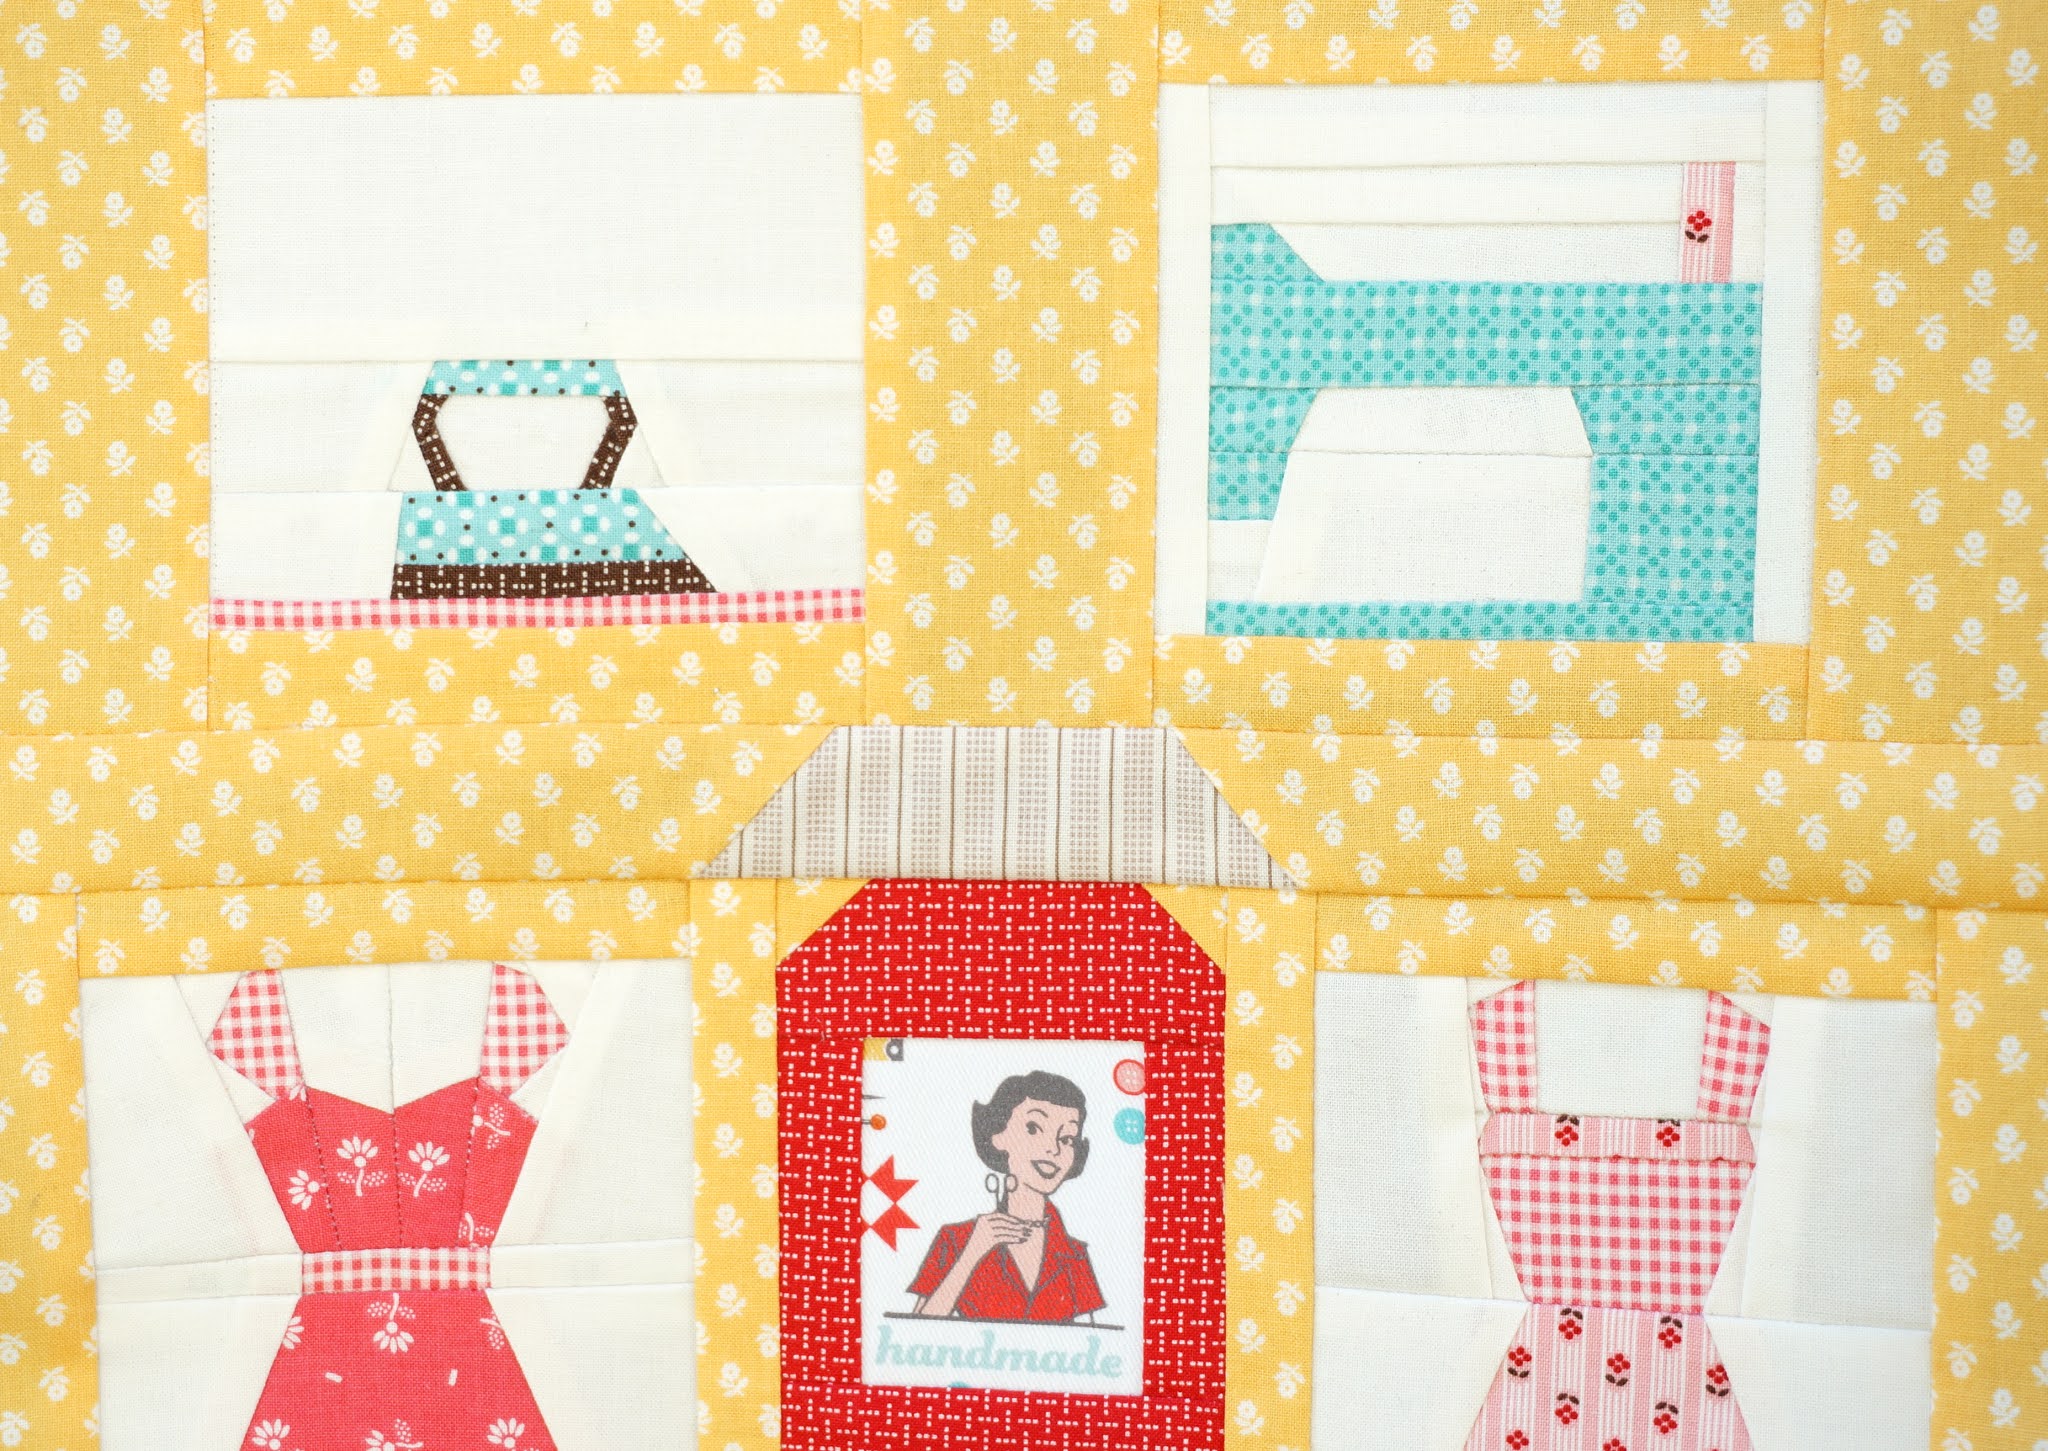
The first pouch I made uses my Free Tulip paper piecing pattern for the focal point on my "Home Sweet Home" boxy zipper pouch.  The zipper pouch can also be used to hold fat quarters : )  

Find the Tulip pattern [HERE]

Find the Home Sweet Home Boxy Zipper Pouch [HERE]


The fabric line is perfect for fussy cutting.  Those rabbits and cows are just adorable!

I love the zipper charm from at Sew Be!


On the back of the Boxy Zipper pouch I used "Pink Flower Fields" print.


I also made a Cottage zipper pouch!  The pouch is made with my Cottage paper piecing pattern.  

The pouch is a free pattern you can find at the bottom of this post!


If you make any projects with Tulip Cottage fabric be sure to tag your photos on social media with the hashtags:

#ILoveRileyBlake #RileyBlakeDesigns #TulipCottageFabric

I love to see what you make : )

Happy Sewing!

xo

Charise

6" Quilt Block Zipper Pouch

Find the Pattern [HERE]

Notes: ~All seam allowances are 1/4". 

    Back stitch at the beginning and end of each seam.

Finished Size:  6" tall x 8" wide

Materials:

~ 6" finished / 6 1/2" unfinished quilt block

~ 1/4 yard shell fabric

~1 - 1" x 1 1/2" Print for the zipper tab

~ 1/4 yard lining

~ 1/4 yard batting

~ 1/4 yard muslin or canvas

Supplies:

~Zipper Foot
~Matching Thread
~Pins
~9" or longer coil zipper 
~Marking pen, pencil or Hera Marker for quilt marking

Cut:

~ Shell (background) Fabric: 2 - 6 1/2" x 2 3/8" rectangles, 1 - 1 1/4" x 8 1/2" , 1- Main     Panel 

~Print Fabric for zipper tab:     1 - 1" x 1 1/2" 

~Fusible Batting     ~2  Main Panel

~Muslin or Canvas  ~2  Main Panel
~Lining                      ~2  Main Panel


Sewing Instructions:

1.  Stitch the 6 1/2" x 2 3/8" shell fabric rectangles to the left and right side of the quilt block.  Press.

Stitch the 1 1/4" x 2 1/2" strip, centered, on the bottom of the block. Press.


2.  Place the pattern on the panel and trim to size.  Fuse the Batting to the back of the panel.

Place the muslin or canvas Main Panel on the back.  

Quilt through all layers as desired.   

Repeat for the Back Pouch Panel.


3. Trim the zipper to 7 1/2" measuring from the top of the zipper head to the bottom of the zipper.

4. On the 1" side of the zipper tab, fold 1/4" to the wrong side. Press.

    Press in half wrong sides together.


5.  Place the bottom end of the zipper so that it is against the folded edge of the tab.
    Pin in Place.
    Stitch the folded edge with an edge stitch.


6. Fold back the zipper tape on the top edge of the zipper to the wrong side. 
     Glue baste or machine baste in place.


7. Place the zipper to the pouch right sides together with the top edges of the pouch
     and zipper tape matching.
    Center the zipper on the pouch panel.  Stitch the top edge with
    a 1/4" seam allowance.


8. Place the lining right sides with the pouch panel right side matching the top raw edge.
      Pin in place.
The zipper will be sandwiched in between the pouch and lining panels.
    Stitch the top edge with a 1/4" stitch.

9. Press the pouch and lining panels away from the zipper.  Press.
     Top stitch 1/8" away from the seam line.

~Repeat for the other side~


10.
 
Separate the lining pieces from the pouch pieces.
     Place the pouch pieces right sides together, matching seams and raw edges.  
     Pin in place.

     Place the lining pieces right sides together, matching seams and raw edges.  
     Pin in place.
     The zipper teeth should face towards the lining.
     ****Make sure the zipper is open.
     Sew the sides and bottom of the shell and lining,  leaving a 4" opening on the       bottom lining side.
Press the seams open.


11. Box the corners:
      Place the bottom and side seams right sides together at the bottom corner 
      with seams pressed open.
      Stitch the seam.
      Repeat for the other bottom corner.
Repeat for the lining.

12.  Turn right side out and press.
        Machine stitch or hand stitch the opening in the lining closed.


2.19.2024

"To Grandmother's House" Ruffle Basket


Hi! I'm so thrilled to share  a new project made with the adorable new fabric, “To Grandmother’s House” designed by Jennifer Long for Riley Blake Designs.


“To Grandmother’s House” has the most adorable prints and many of the prints are perfect for fussy cutting. If you have followed me on Instagram or here on my blog, you know how much I love a good fussy cut print. 

Grandmother, Little Red and the Wolf were perfect for the windows of my “Cottage Block” Pattern which is the feature of this basket.

You can find the Cottage Block and Ruffle Basket Patterns in my Etsy shop.


I made another cute little basket with my “Curvy Basket” pattern and featured “Through the Woods” print. 

I love how it turned out. You can never have too many cute storage containers for your sewing room : )


I hope my projects inspire you to sew with "To Grandmother's House"

If you do make a project with this adorable fabric, be sure to tag your photos on social media with the hashtags:

#IloveRileyBlake #RileyBlakeDesigns #ToGrandmothersHouseFabric

I love to see what you make!

Happy Sewing

xo

Charise : )


12.04.2020

Easter Egg Hunt and A Petite Tote Tutorial


Easter Egg Hunt is a new line of fabric designed by Nàtalia Juan Abelló for Riley Blake Fabrics.
I decided to make a cute little tote bag which would be a perfect Easter basket.


I used my Cozy Cottage Pattern to show off all of the cute little fabric details.  Look at those adorable bunnies as well as the Easter egg on the front door and the pretty floral motifs.
You can find the pattern in my Etsy shop [HERE]


The tote is made with my 12" Cozy cottage block and is the perfect size for a shopping trip or would be adorable for an easter egg hunt this April.
You can find the tutorial

I used Riley Blake Kisses for the background and roof of the house.
The beautiful shade of yellow for the house is Riley Blake Confetti Cottons in Color Beehive. 


For the back of the tote, I used the Floral Mint and quilted the panel in a 2" diagonal pattern.  

The lining is Riley 1/8" gingham in color Coral.


There are so many adorable prints in this collection!

The possibilities are endless!

Please tag your projects on social media with the hashtags:


#EasterEggHuntFabric

#RileyBlakeDesigns

#ILoveRileyBlake


Happy Sewing

xo

Charise

7.16.2020

Prim fabric in my Dress Boutique pattern


Hello!  I hope you are getting some sewing time in : )
I have been working on this fun paper pieced pattern!


 I used the new line of fabric "Prim" designed by Lori Holt for Riley Blake Designs. for my new "Dress Boutique" pattern.
I absolutely love this line!  The prints are very small scale and lend themselves to paper piecing patterns.


I just love that teeny tiny flower on the fabric spool on the sewing machine : )


The fussy cut window and door prints are from "My Happy Place" also designed for Riley Blake Designs by Lori Holt.  

My Dress Boutique pattern finished at 12" x 18".  It would make a perfect mini quilt.
You can find the pattern in my Etsy shop


If you use Prim in a project be sure to use the following hashtags in your social media posts
#ILoveRileyBlake
#RileyBlakedesigns
#PrimFabric

I love to see what you make

Happy Sewing!
xo
Charise


3.18.2020

Singing in The Rain


Hello Lovely peeps!
It has been quite a week and I hope you are all holding up OK with the corona virus self quarantining going on!
This seems like the perfect time to calm anxiety with self care and some selfish sewing.
If you are able, support your favorite local quilt shop by placing an online order.
And I have just the perfect "must have" fabric.........

Today I am sharing a project I made with the new fabric "Singing In the Rain" by Riley Blake.
The fabric line is designed by Beverly McCullough of Flamingo Toes.


The fabrics are adorable with umbrella, galoshes, rain drops and lovely coordinating floral and ticking stripe prints.


I made a tote bag with the pinks from the line and paired it with Swiss Dots and 1/8" gingham in Hot Pink both also from Riley Blake.


One side has the fun nine patch block and the other side has a zipper pocket with a pretty lace zipper.
I found the lace zipper on Etsy.


I have listed the pattern in my Etsy shop at a substantial discount (the pattern is only $2.25 through Sunday March 22nd.)

Be sure to head on over to the Riley Blake Blog to see inspirational projects, and tag your makes on social media with the hashtags #RileyBlakeDesigns #SingingInTheRainFabric

Happy Sewing
xo
Charise


3.02.2020

Liberty Winterbourne Fabric


Happy Monday!

I absolutely love Liberty fabric and this collection is no exception.  The pinks and grey shades are absolutely beautiful together.
"Inspired by an exquisite Arts and Crafts period house, the collection draws upon the interior and the family who once lived there."


I designed the fun Granny style bucket bag (pattern coming soon!)  and just had to make a 
fun little zipper pouch to match : )

The front of the zipper pouch has a cute little dress from my Vintage Dresses 2 pattern.


The back of the pouch is a patchwork of some of my favorite prints from the Winterbourne collection.


The fun little Heart charm is from Sunny Day Supply which I just had to add since it matches
the fabric so well!

Be sure to head on over to the Riley Blake Blog for more fun projects.
Please tag pics of projects made with Winterbourne with the hashtags #WinterbourneFabric
#RileyBlakeDesigns and #ILoveRileyBlake

Happy Sewing
xo
Charise


1.14.2020

I Love Gingham 💙💙💙


I love using gingham in the items I make, so when I had the opportunity to use Riley Blake's gingham I jumped at the chance!  I made this Adrienne blouse from Friday Pattern company with Woven Gingham sleeves in Peacock and the body is made with their Stretch Jersey knit in Aqua.  

 The Woven Gingham is incredibly soft and perfect for garments.  
The knit is also soft and dreamy to sew with.
I love the way it turned out.  It will be perfect for Spring!

I also made this cross body bag with the same Woven Gingham and Riley Blake Linen in color Aqua.
This will be available as a pattern to purchase - soon!


Can you tell I am dreaming about sunny weather and planning my Spring Wardrobe?  😍


Be sure to head on over to the Riley Blake Designs blog for more projects and inspiration.
And don't forget to tag your photos on social media with #RileyBlakeDesigns #ILoveRileyBlake and #RileyBlakeGingham  

💙I love to see what you make 💙

Happy Sewing!
xo
Charise