12.12.2023

Apple Zipper Pouch Pattern and Tutorial


Hello and Happy Holidays!

Today I'm sharing a pattern for an adorable Apple Zipper Pouch.  It would make a great gift and is a perfect size for credit cards, makeup essential and anything that would fit into a petite zipper pouch : )

Enjoy!

Apple Zipper Pouch

4 1/2"  x  5 1/2" 

Fabric:

A Left Front: 10" square

B Right Front: 10" square

C Back: 1/4 yard

Apple Stem: 3 1/2" x 2"

3/8" double fold Bias strip - 22 1/2"  (To make your own binding, see my tutorial HERE)

Fusible Fleece: 6" x 14"

Materials:

1/2" D ring

9" coil zipper (You can also use a 4" metal zipper which can be found [HERE]

Cute zipper pull (optional)

Cut:

Light Print - 1 -A, 1 -B

Dark Print - 1 -A, 1 -B

Print for Back - 2 - C

Fusible Fleece - 1 -A, 1 -B, 1- C

Apply the Fusible Fleece

Apply the fusible fleece to A, B and C following manufacturer directions

Find the Pattern [HERE]


1. Trim the coil zipper to 4 1/2" measuring from the top of the zipper head.  Stitch along the bottom of the zipper 1/4" from the edge and the top 1/4" from the edge.


2. Place the unfused Fabric Apple C wrong side up.  Place the fused Fabric Apple C on top, right side up.  Pin layers together.

Quilt the Apple as desired.  I used a 1" diamond grid pattern.


3.

A. Fold the 3 1/2" x 2" strip in half wrong sides together along the long side.  Press.

B. Unfold the strip.  Match the raw edge to the center crease and press.

C. Repeat for the second side.  Press

D. Press in half.

E. Edge stitch both sides of the strip.

4.  Thread the strip through the D-ring.  Baste along the top edge 1/4" from the edge.


5. Place the strip on the back Apple centered at top, matching raw edge.  Baste in Place 1/4" from the raw edge,


6. Place the zipper right sides with the Left Fused Fabric Apple.  Pin in place.  Stitch with a 1/4" stitch.

Place the Light Fabric Right Apple on top - sandwiching the zipper.  Stitch with a 1/4" stitch.


7.  Press the  Apple away from the zipper.  Top stitch 1/4" from the edge.

Repeat for the Apple B - Right side.

Quilt the Left and Right Panels as desired.


8.  Place the Zipper Panel on top of the back panel matching raw edges.  Baste around the perimeter 1/4" from the raw edge.


9.  Fold under 1/4" on one short edge of the bias binding strip. Place the binding at the bottom of the back apple matching raw edges.  Pin the binding around the perimeter of the apple.


10. Stitch around the perimeter with a 1/4" stitch.  When you reach the starting point, stitch 1/2" beyond the folded edge back stitching at the end.  Trim the bias tape close to stitching.


11. Fold the bias to the front side just covering the stitching and pin in place.  Edge stitch the binding in place.


I love to see your creations!  Please share your makes on social media with the hashtags:

#ChariseCreates #ChariseCreatesPattern #ApplePouch


Happy Sewing!

Charise


12.05.2023

Floral Gardens - Curvy Purse and Macaroon Pouch


Hi!   Today I am sharing a few projects I made with the new line of fabrics – “Floral Gardens” by The Royal Horticultural Society.

I love to garden so I was delighted to make a few projects with this garden inspired line of fabric. The line includes large scale florals that are absolutely stunning so I picked a projects that featured the large floral print.


My Curvy Purse has two outside pockets and I used the large scale floral – “Floral Gardens Main” in color Sky and bordered it with “Floral Gardens Blossom” in color Sky. The beautiful rose florals are the star of the show! 


The pattern calls for piping so I made my own using “Garden Tiles” print in color Navy and also used the Tiles print for the adjustable purse strap.


My second project is my large Macaroon Pouch. I used the Floral Gardens Linen Floral for the center panel. The Floral Blossoms print in color pink is the perfect border.


“Garden Tile” in color pink is the perfect print for the handle on the Macaroon Pouch.

I love to see your projects! Please be sure to include the following hashtags on your projects using Floral Gardens Fabric

#ILoveRileyBlake #RileyBlakeDesigns #FloralGardensFabric

Happy Sewing

Charise : )

11.03.2023

Afternoon Tea Fabric - Granny Purse and Curvy Zipper Pouch


 I had the pleasure of working with "Afternoon Tea" designed by Beverly at Flamingo Toes. The line includes lovely florals, a gingham and lovely tea themed fabrics.

Now that it is Fall, I'm enjoying a steaming cup of tea in the afternoon so this is a perfectly timed fabric collection.

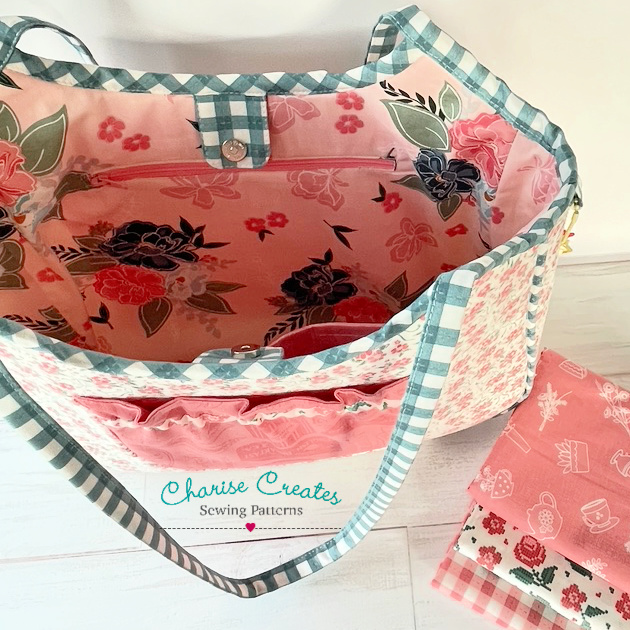
My "Granny Bag" was the perfect project project for this adorable fabric line. It is the perfect size for all your fall sewing and knitting projects. 

There are two functional and cute outside pockets and two inside pockets for lots of storage. The large floral is such a lovely pop for the inside of the purse.

My "Tea Time" paper pieced pattern was the perfect motif to use for the outside pocket.


The patch pocket on the opposite side of the purse has a gathered detail and features the cutest print featuring "Afternoon Tea Labels" in color Salmon.


The selvage on the fabric is so adorable and I just had to find a way to use it in a project.


It was perfect for the top edge of the gathered pocket on my Curvy Zipper pouch. 


Aren't the tea pots and tea cups adorable on the selvage adorable?!


This adorable fabric line required a cute storage option so I made my Large Curvy Basket to store my "Afternoon Tea" fabric. I stitched up my "Tea Cup" pattern to adorn the basket. I love how it turned out!

It was so much fun to stitch up projects with "Afternoon Tea" fabric.

I'd love to see what you make with this lovely fabric. Be sure to tag your photos on social media with the following hashtags:

#AfternoonTeaFabric #RileyBlakeDesigns #ILoveRileyBlake

Happy Sewing!

Charise


10.30.2023

Storytime 30s - Apple Projects including Two new patterns!


Hi friends!

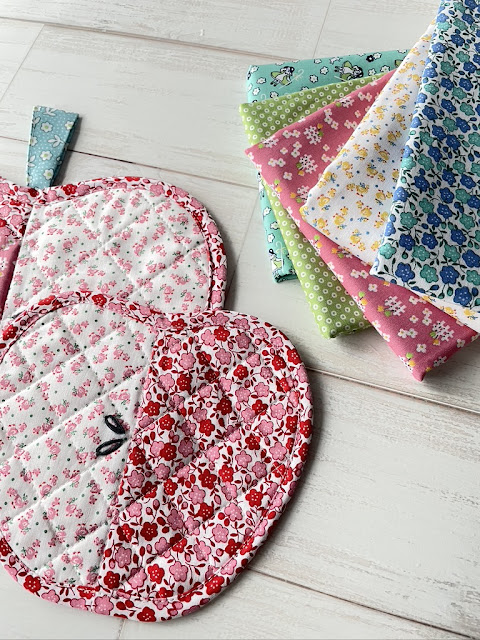
Today I am sharing projects that I made with the new line of fabric - "Storytime 30s" designed by Riley Blake Designers for Riley Blake. As you will see, they are all Apple themed projects.

The fabrics are 1930 feed sack inspired prints in bright, fun colors.


My Apple Orchard Hot Pad was a perfect project for the pink and red prints. The pattern is available in my Etsy shop - Charise Creates.


I was so inspired by this adorable fabric that I designed a new pattern - My Apple Coaster! It is a simple pattern that is meant to let the fabric shine!


You can find the pattern in my Etsy shop - Charise Creates.


I designed this Apple Apron which features an adorable apple pocket!


The waistband is trimmed with a jumbo ric rac for a sweet scalloped edge.


The apron is trimmed with the sweet pink and red floral. I love to have a cute apron to wear in the kitchen because I am an extremely messy cook : )

Find the Apple Apron Pattern [HERE]


Be sure to share your projects made with "Storytime 30s" fabric on social media with the hashtags:

#ILoveRileyBlake #Storytime30sFabric #RileyBlakeDesigns

Happy Sewing!

Charise : )

9.30.2023

Let's Create - Fabric Baskets and A Petal Bowl Tutorial


Hi! Charise here from Charise Creates sharing some fun projects I made with the new line of fabric - Let's Create by Echo Park Paper Co.

The collection is sewing themed and includes the "Let's Create Hoops" print shown in the fabric baskets as well as an adorable scissor print and pretty floral prints.

My Curvy Basket Trio seemed a perfect match for the sewing themed prints. The baskets nest and are perfectly sized for sewing notions. The largest basket can hold 16 Fat Quarters.


In keeping with the sewing theme, I decided to design a larger basket and included my 6" Vintage Featherweight Sewing Machine block as the focal point on the large basket. The Large Curvy Basket can also be found in my Etsy shop.

The Featherweight Pattern can be found HERE


The piping and bias trim are Riley Blake Design Bee Ginghams in Cassidy Coral and Cassidy Jade. Both ginghams complement the line perfectly!


In keeping with the "pretty storage" theme I made a Petal Bowl. It is a lovely way to keep sewing notions handy or would be a lovely way to display jewelry on a dressing table.


You can find the Free pattern and tutorial on my Blog - Charise Creates. 

Please be sure to share your projects made with "Let's Create" fabric on social media with the hashtags #LetsCreateFabric #IloveRileyBlake #RileyBlakeDesigns

I love to see what you create!

Happy Sewing 

xo Charise


9.29.2023

Petal Bowl


I'm always looking for creative storage solutions and the cuter the better!  I created this Petal Bowl which was inspired by the Nesting Bowl set I designed for Stitch Magazine.  You can see the bowls I designed for Stitch Magazine HERE


This version is much simpler with very little hand stitching.  Use extra care when cutting out the pattern and stitching around the petals to achieve the best result. 

You can find the pattern [HERE]

If you'd like a PDF of the Instructions and pattern, you can purchase it in my Etsy shop [HERE]

Petal Bowl
Size: 7 1/2"
Fabric used: Let's Create for Riley Blake Designs

Materials:
Fabric:
    Inside Bowl - 9" square
    Outside Bowl - 9" square
    Center Hexagon - 5" square

Interfacing: 
    9" square Fusible fleece
    9" square Light Weight Interfacing
    5" square Heavy Weight Interfacing

Notions:
    Matching Thread
    Fabric Marking Pen or pencil
    Fabric Starch

Note - 
* 1/4" seam allowances
* Back stitch at the beginning and end of each seam

1. Fuse the 9" fusible fleece to the wrong side of the Inside bowl fabric


2. Place the Shell Pattern on the fused fabric square  and mark around the Perimeter.  
    Cut out the Petal Bowl.

3.  Place the Hvy Wt Interfacing Hexagon on the center back of the Fabric Hexagon.  
        Fuse in place following manufacturer directions.

4. Apply fabric starch to the seam allowances on the fabric hexagon.  Press the seam allowance 
    over the edge of the Interfacing hexagon on all sides.


5. Place the hexagon on the center of the inside Petal Bowl using the pattern as a guide.   
    Glue or  pin in place.
    Edgestitch around the hexagon back stitching at the beginning and the end of the seam.

6. Turn the Petal to the wrong side.  
    Mark the dotted lines - darts - on the wrong side using a marking pen or pencil.

7. Stitch the darts.

8. Create the outside of the Petal Bowl: 
    a)Fuse the 9" square of Light Weight Interfacing to the 9" square Petal Bowl Outside Fabric     following Manufacturer directions.
    b) Trace around the left and right sections of the Petal Bowl Outside and cut out.

9. Stitch the long straight edge together leaving and opening as indicated on the pattern.
    Press seam open.

10. Stitch the darts.

11.  Place the Inside and Outside Petal bowl sections right sides together.  Stitch around the 
    perimeter.
    Trim the fabric around each petal.  Clip close to the stitching  in between each petal.
    Press seams open. 

12. Turn right side out.  
    I like to use a curved Hera Marker to help push the seam allowances to the edge.  Press.

    Stitch along the darts between petals on the inside of the Petal bowl through all layers.

    Hand Stitch the opening along the Outside Petal Bowl closed.

I hope you enjoyed this tutorial.
You can find the pattern pieces [HERE]

If you'd like a PDF copy of the pattern, You can find it in my Etsy shop

Happy Sewing
xo
Charise