I'm excited to share my latest project made with the new fabric line from Lori Holt – “Piece and Plenty” for Riley Blake Design.
The fabric collection consists of vintage inspired florals, geometric prints and a lovely text print.
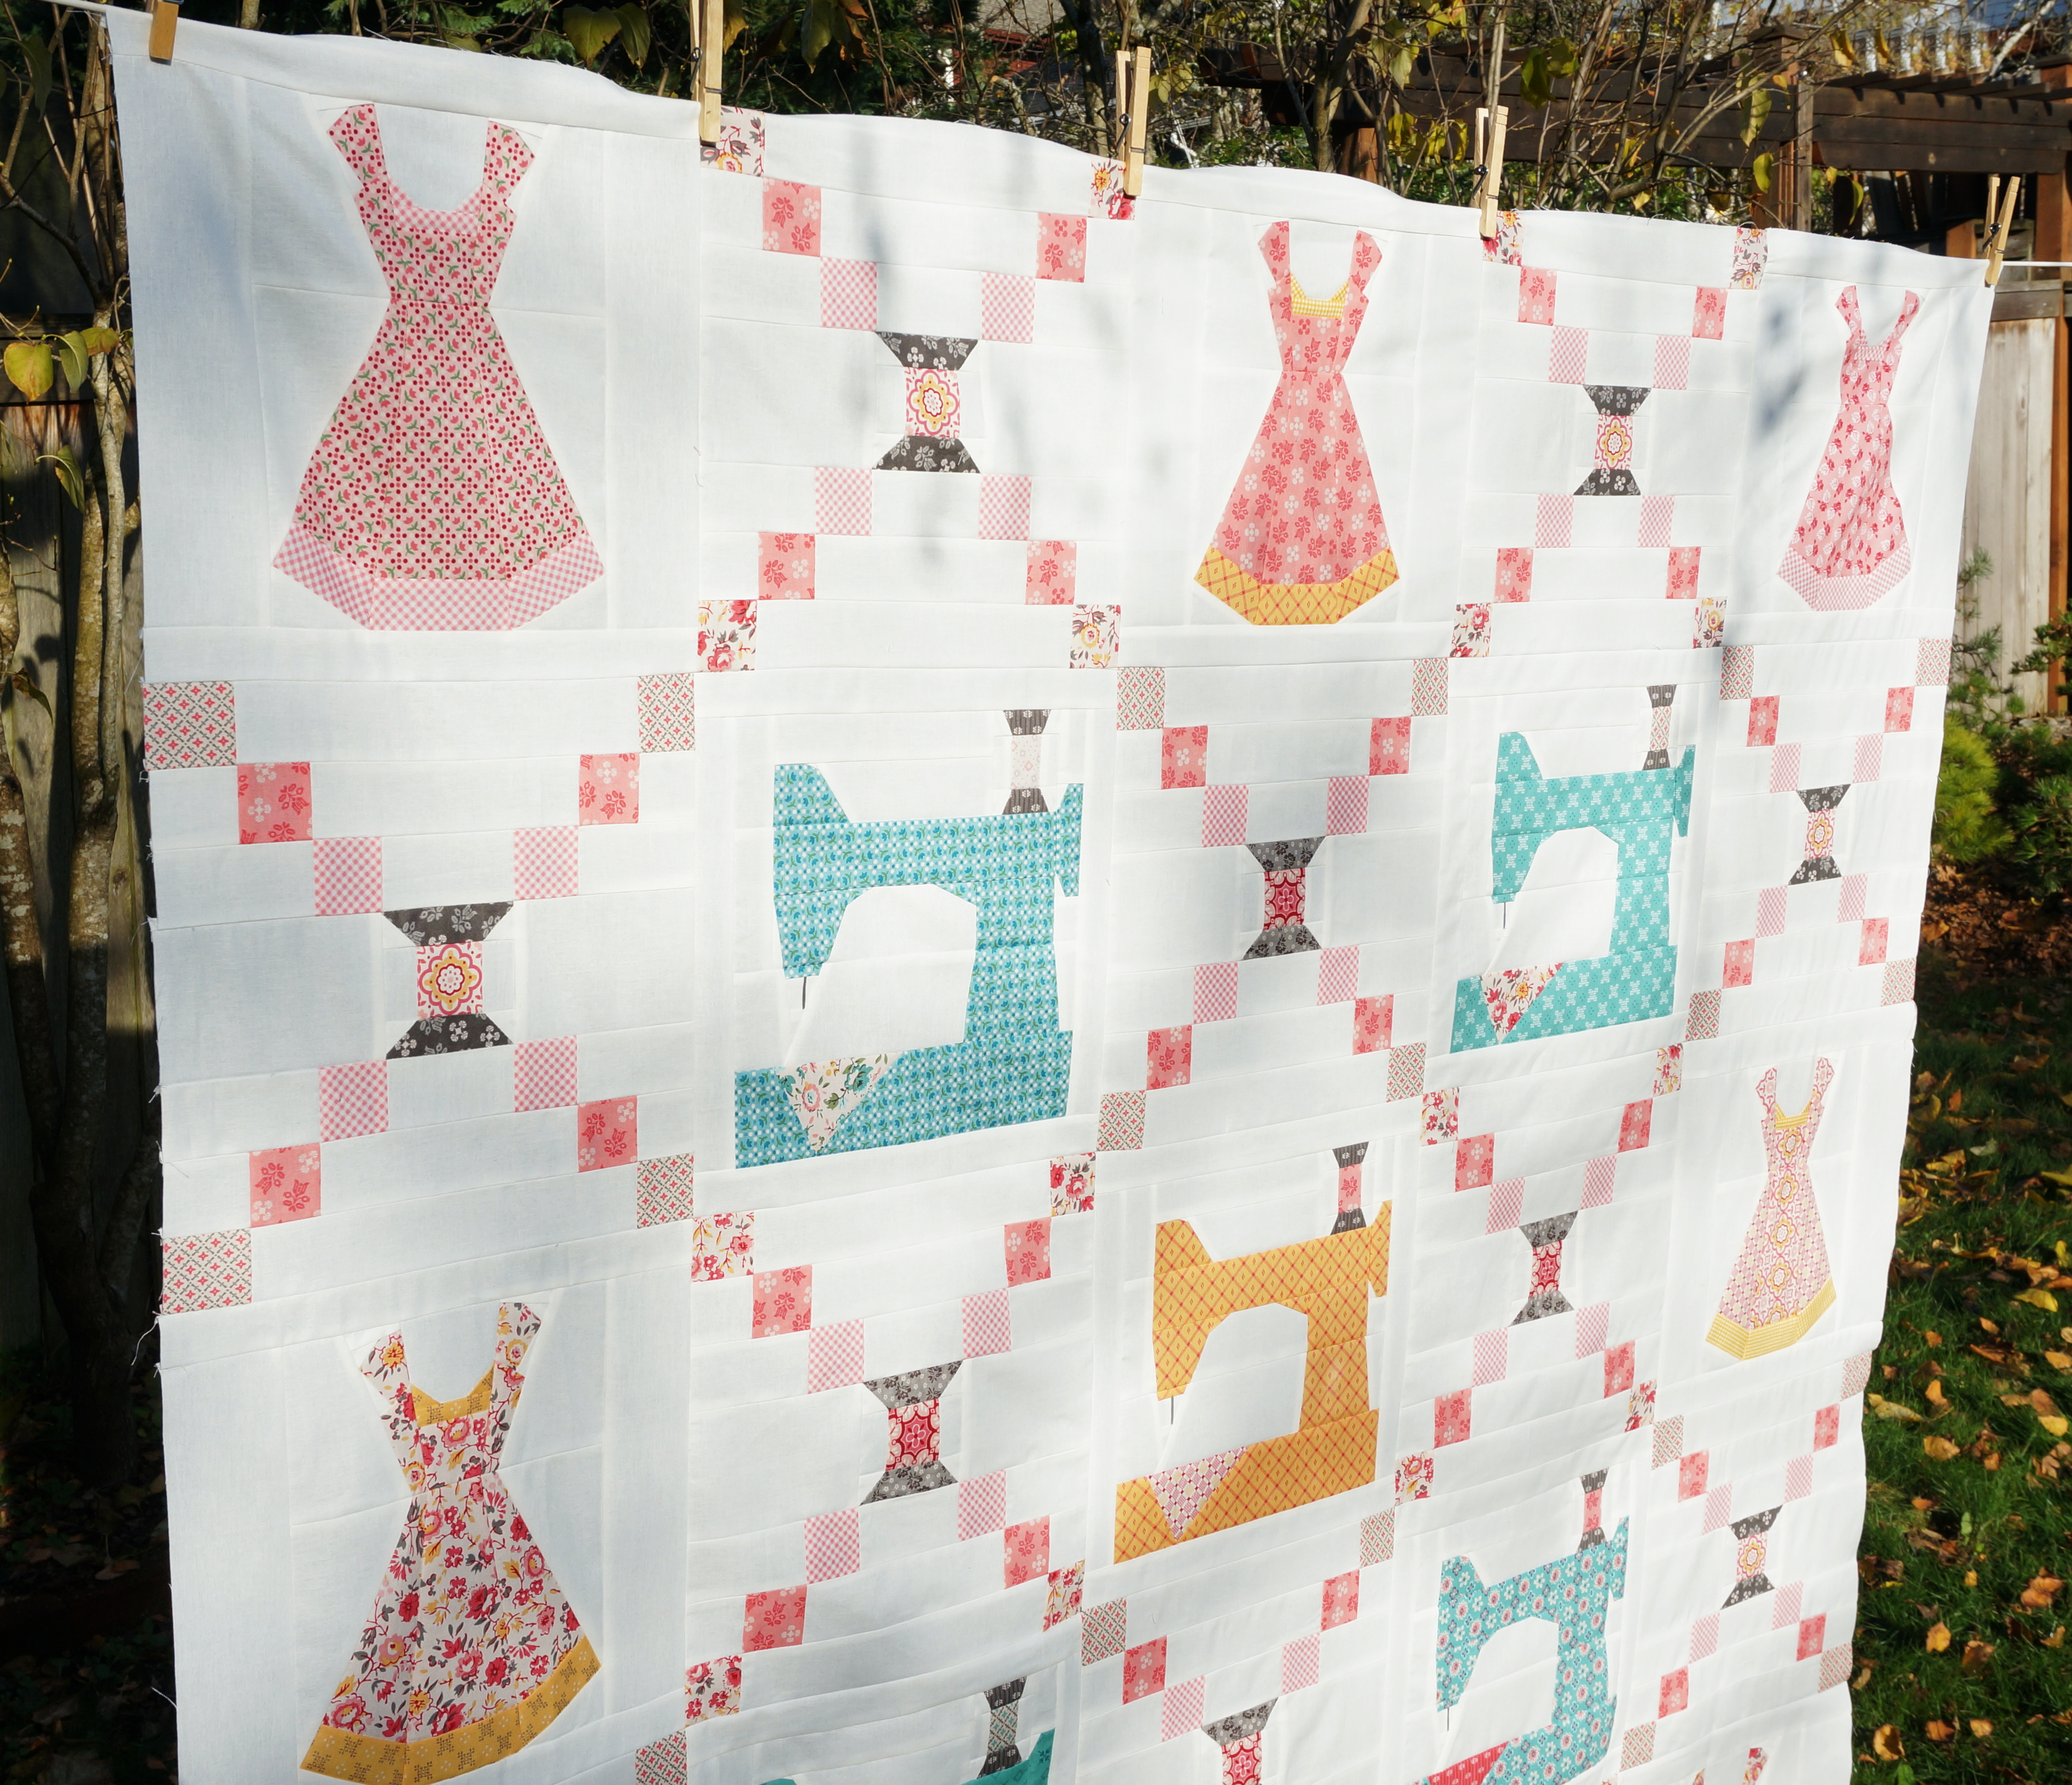
I thought my Vintage Dresses Pattern & Vintage Sewing Machine pattern made into "My Happy Place Quilt " would be a perfect match.


The blocks are offset with an Irish chain pattern with a thread spool center. I love the way it turned out!


The pattern is in the works and will be available in 2025, but you can find my Vintage Sewing Machine and Vintage Dresses patterns in my Etsy shop.
Find the Sewing Machine Pattern [HERE]
Find the Vintage Dresses Pattern [HERE]


I hope you make a project with “Piece and Plenty” fabric!
Happy Sewing!
Charise : )