12.08.2020

Fifteen Patch Zipper Pouch Tutorial - Mini charm pack friendly!


This Holiday season I decided to treat myself and purchased a sewing themed advent calendar from Stitch Supply Company.

It has been so much fun to open a little sewing themed gift for myself every day.  

Last week I got this adorable Flurry mini charm pack.  It didn't take me too long to figure out that a patchwork pouch would be the perfect project.

I decided to write a tutorial for you! It is a great gift item and fun to fill with goodies for a special someone. (That includes you!) 

If you don't have a charm pack, any cute little 2 1/2" squares will do : )

You can also use any panel of fabric that is 6 1/2" x 10 1/2" if you want to forego the patchwork. 


Fifteen Patch Zipper Pouch
a tutorial by Charise Creates 

Notes:
~All seam allowances are 1/4" 
Finished Size:
5" tall x 10" wide

Materials
~ 30 - 2 1/2" squares assorted print fabric (a mini charm pack works well)
    or 2 - 6 1/2" x 10 1/2" fabric rectangles if you want to skip the patchwork
~1/4 yard Lining fabric
~1/4 yard muslin or solid cotton
~1/4 yard batting 

Supplies:
~Zipper Foot
~Matching Thread
~Pins
~9" or longer coil zipper - OR- a metal zipper that measures 
     9" from the top of the zipper head to the zipper stop.
~Zipper Pull (optional)
~ 1/2" x 3" long ribbon
~Marking pen, pencil or Hera Marker for quilt marking

Cut:
~2 pieces of batting 7" x 11"
~2 pieces of muslin 7" x 11"
~2 pieces of Lining 6 1/2" x 10 1/2
~1 - 1" x 1 1/2" Print for the zipper tab


1) Arrange  the 15 print squares that make up the panel, in your desired design. 


2)  Stitch each row together.  Press seam allowances to one side, each row in the opposite direction.


3) Stitch the top row to the center row.  Press the top/center to the bottom row. 
Press seams open.
Repeat for the other side side of the pouch.


4) Fuse the batting to the wrong side of the patchwork panel.
Place the muslin on the back of the batting, baste in place.
  Quilt diagonal lines on the patchwork  panel. 
Your lines will be approximately 1 3/8” apart.
Trim the panel to 6 1/2” x 10 1/2”.  Repeat for the other side.


5) If you are using a zipper that is longer than 9", shorten the zipper to 9 1/2" measuring from the top of the zipper head to the bottom of the zipper.

6) Fold under the 1" side of the zipper tab 1/4" to the wrong side. Press.
    Press in half wrong sides together.


7) Place the bottom end of the zipper so that it is against the folded edge of the tab.
    Pin in Place.
    Stitch the folded edge with an edge stitch.


8)  Fold back the zipper tape on the top edge of the zipper to the wrong side. 
     Glue baste or machine baste in place.


9) Fold the ribbon in half, wrong sides together and place on the right side of the pouch panel
   2 1/4" from the top edge.
   Baste in place.

10) Place the zipper to the pouch right sides together with the top edges of the pouch
     and zipper tape matching.
    Center the zipper on the pouch panel.  Stitch the top edge with
    a 1/4" seam allowance, back stitching at ends.


11) Place the lining right sides with the pouch panel right side matching the top raw edge.
      Pin in place.
The zipper will be sandwiched in between the pouch and lining panels.
    Stitch the top edge with a 1/4" stitch back tacking at ends.


12) Press the pouch and lining panels away from the zipper.  Press.
     Top stitch 1/8" away for the seam line starting and stopping your stitching 3/8" 
     from the raw edge.

~Repeat for the other side~


13) Separate the lining pieces from the pouch pieces.
     Place the pouch pieces right sides together, matching seams and raw edges.  
     Pin in place.

     Place the lining pieces right sides together, matching seams and raw edges.  
     Pin in place.
     The zipper teeth should face towards the lining.
     Make sure the zipper is open.
     Sew around the perimeter  leaving a 4" opening on the bottom lining side.


14) Box the corners:
      Place the bottom and side seams right sides together at the bottom corner 
      with seams pressed open.
      Mark 1" up from the bottom corner.  Stitch on the marked line back tacking at ends.
      Trim the seam 1/4" beyond the stitching.  Repeat for the other bottom corner.

Repeat for the lining.

15)  Turn right side out and press.
        Machine stitch or hand stitch the opening in the lining closed.

Congrats!   You have made a  Fifteen Patch Zipper Pouch.

Happy Sewing.
xo
Charise


12.04.2020

Easter Egg Hunt and A Petite Tote Tutorial


Easter Egg Hunt is a new line of fabric designed by Nàtalia Juan Abelló for Riley Blake Fabrics.
I decided to make a cute little tote bag which would be a perfect Easter basket.


I used my Cozy Cottage Pattern to show off all of the cute little fabric details.  Look at those adorable bunnies as well as the Easter egg on the front door and the pretty floral motifs.
You can find the pattern in my Etsy shop [HERE]


The tote is made with my 12" Cozy cottage block and is the perfect size for a shopping trip or would be adorable for an easter egg hunt this April.
You can find the tutorial

I used Riley Blake Kisses for the background and roof of the house.
The beautiful shade of yellow for the house is Riley Blake Confetti Cottons in Color Beehive. 


For the back of the tote, I used the Floral Mint and quilted the panel in a 2" diagonal pattern.  

The lining is Riley 1/8" gingham in color Coral.


There are so many adorable prints in this collection!

The possibilities are endless!

Please tag your projects on social media with the hashtags:


#EasterEggHuntFabric

#RileyBlakeDesigns

#ILoveRileyBlake


Happy Sewing

xo

Charise

11.18.2020

GRL PWR!!!


GRL PWR is the new line of fabric from  Amber Kemp-Gerstel for Riley Blake Fabrics.

I absolutely love this fabric line and it couldn't have come at a more perfect time with the first female Vice President elect!!!

The line consists of the cutest Girl print as well as some fun coordinating prints in geometric, florals and representational prints.

I chose to make my Gathered Pouch Trio and I absolutely love how the pouches turned out.  Such great Fussy Cutting opportunities!

You can find the pattern in my Etsy shop HERE


All the zippers are from Sunny Day Supply and coordinate so well with the fabric.


I made a wrist strap for the largest pouch so it could be used as a clutch purse.  If you want to make a pouch into a clutch purse check out my "Create a Clutch - Wrist Strap Tutorial" HERE

I just had to share the cute little prints fussy cut for the zipper stops : )

Last but not least, I just had to make a fun little coaster with all the cute gals.  

You can find a tutorial for the coaster HERE.  

I think a set of these would be a perfect gift and Christmas is right around the corner!

Be sure to share your creations with GRL PWR on social media using the hashtags:

#ILoveRileyBlake

#RileyBlakeDesigns

#GrlPwrFabric


Happy Sewing

xo

Charise


11.05.2020

Riley Blake "Dahlia" Designer Rayon


Hello!  I am very excited to share a new fabric from Riley Blake Designs.  This Dahlia Grenadine Designer Rayon designed by Corri Sheff is absolutely beautiful.  I seriously LOVE this fabric.  It has an amazing drape and the print is gorgeous.   It has a boho vibe and it was begging to be made into a dress.

I have been seeing lots of versions of McCalls 7969 on Instagram and knew this would be the perfect style for this fabric.


I love the way it turned out!  It is an easy make and those Sleeves!  They are just stunning!


The Dahlia print is also available in this Stone color way which is equally as lovely!

Be sure to tag your photos on social media with the hashtags:

#ILoveRileyBlake #DahliaFabric #RileyBlakeDesigns

Happy Sewing!
xo
Charise

10.26.2020

Riley Blake Chambray "Anna Blouse"


I was so excited to have the opportunity to sew with the new Chambray fabric from Riley Blake Designs.

My Anna blouse turned out to be the perfect design for this beautiful fabric.

I used the Chambray Dot Blue for the body and sleeves, and trimmed it with the Chambray Light Indigo.  I pre-washed both fabrics and they are so nice and soft. 


I am so pleased with how this Anna turned out.  Perfect to wear now with a cardigan, skinny jeans and boots and the Light Indigo Chambray would be perfect for some wide leg pants.


There are two more colors that are equally as beautiful and perfect for your sewing projects!

Be sure to head on over to the Riley Blake Blog to find more inspiring projects.

Don't forget to tag your pictures on social media with the hashtags 

#ILoveRileyBlake #RileyBlakeDesigns #RileyBlakeChambrayFabric


Happy Sewing

xo

Charise


10.12.2020

September Projects

Hope you are well!  I haven't posted in a long time and thought it may be fun to do a little recap of my September.

I finished a BIG deadline a few days ago, but did find time to join the 2020 Strawberry lovers party which was hosted by Amber Leigh Crafts on Instagram!  

She suggested a project each week to make with strawberry themed fabric.

I have lots of strawberry themed fabric and a couple strawberry patterns in my Etsy shop so I had to make some cute little strawberry themed projects.

🍓For the project above, The paper pieced strawberry is from my Summer time fruit pattern. The pouch is the Bon Bon pouch from the new book by @eliseandemelie ❤️


I made a fun little Strawberry Pouch! The paper pieced strawberry is from my Jam Jars and Fruit Pattern which you can find in my Etsy Shop, Charise Creates. The fun drawstring bag is designed by @lizAtBroderie on instagram, Broderie on Etsy.  This is the - It's in The Bag pattern. 
I love this pattern. A fun and easy make!⁠⠀
The strawberry fabric is from Riley Blake Designs - "Flutter and Shine" Fabric. The linen and gingham fabrics are also from Riley Blake.⁠⠀


You can find the boxy zipper pouch pattern in my Etsy Shop, Charise Creates link in profile.

The paper pieced strawberry ice cream cone is from the book Patchwork Patterns 318 which can be found at Sew Me a Song on Etsy


Oh and this happened!  19 years with this guy.  I am a lucky girl!

Happy Sewing!

xo

Charise

8.18.2020

Liberty Winter Flower Show


I LOVE Liberty Fabrics and I had the wonderful opportunity to work with the new line of Liberty Fabric - Winter Flower Show from Riley Blake Fabrics.


The florals are absolutely beautiful.  I decided to make pillows in a floral checkerboard, buffalo check inspired pattern.


The pillows are made with 4" finished squares with a 3/8" bias trim.
I quilted the pillow panel diagonally with white cotton 40 weight thread.
Pillow inserts are 20" from IKEA.
They are a very easy and satisfying project.


I love how the pillow look on my wicker outdoor chairs!


If you make a project with Liberty Winter Flower Show, Please tag your photos on social media with the hashtags:


#WinterFlowerShow

#RileyBlakeDesigns

#ILoveRileyBlake

And be sure to head on over to the Riley Blake Blog for some inspiring projects!

Happy Sewing

xo

Charise 


7.27.2020

Beauty and the Beast in my Home Sweet Home Zipper Pouch


Happy Monday peeps!  I hope the summer is treating you well and you have found some time to sew!
I have been working with the most adorable fabric - "Beauty and the Beast" from Riley Blake Designs designed by Jill Howarth.


It is such a fun fabric line and I love it because not for just the adorable illustrations but also for the fussy cutting motifs!

I decided to make my "Home Sweet Home" boxy zipper pouch and use the cute little elements for the doors and windows.

The Swiss dots, gingham and pink "kisses" are also from Riley Blake Designs.  Such perfect basics!

 
The other side of the pouch also uses "Beauty and the Beast" fabric in a 6" block entitled Maple Star.  You can find a tutorial for the block at Hello Melly Designs.


You can find the Home Sweet Home zipper pouch, which includes the fun house block, in my Etsy shop.
The pouch is such a great boxy shape and the front and back panels are both 6" finished so it is a great pattern to use up some orphan 6" quilt blocks!
Or to make some new 6" blocks with Beauty and The Beast Fabric : )


If you make a project with Beauty and the Beast Fabric, Please tag you photos on social media with the hashtags
#BeautyAndTheBeastFabric
#ILoveRileyBlake
#RileyBlakeDesigns

I Love to see what you make!

Happy Sewing!
xo
Charise


7.16.2020

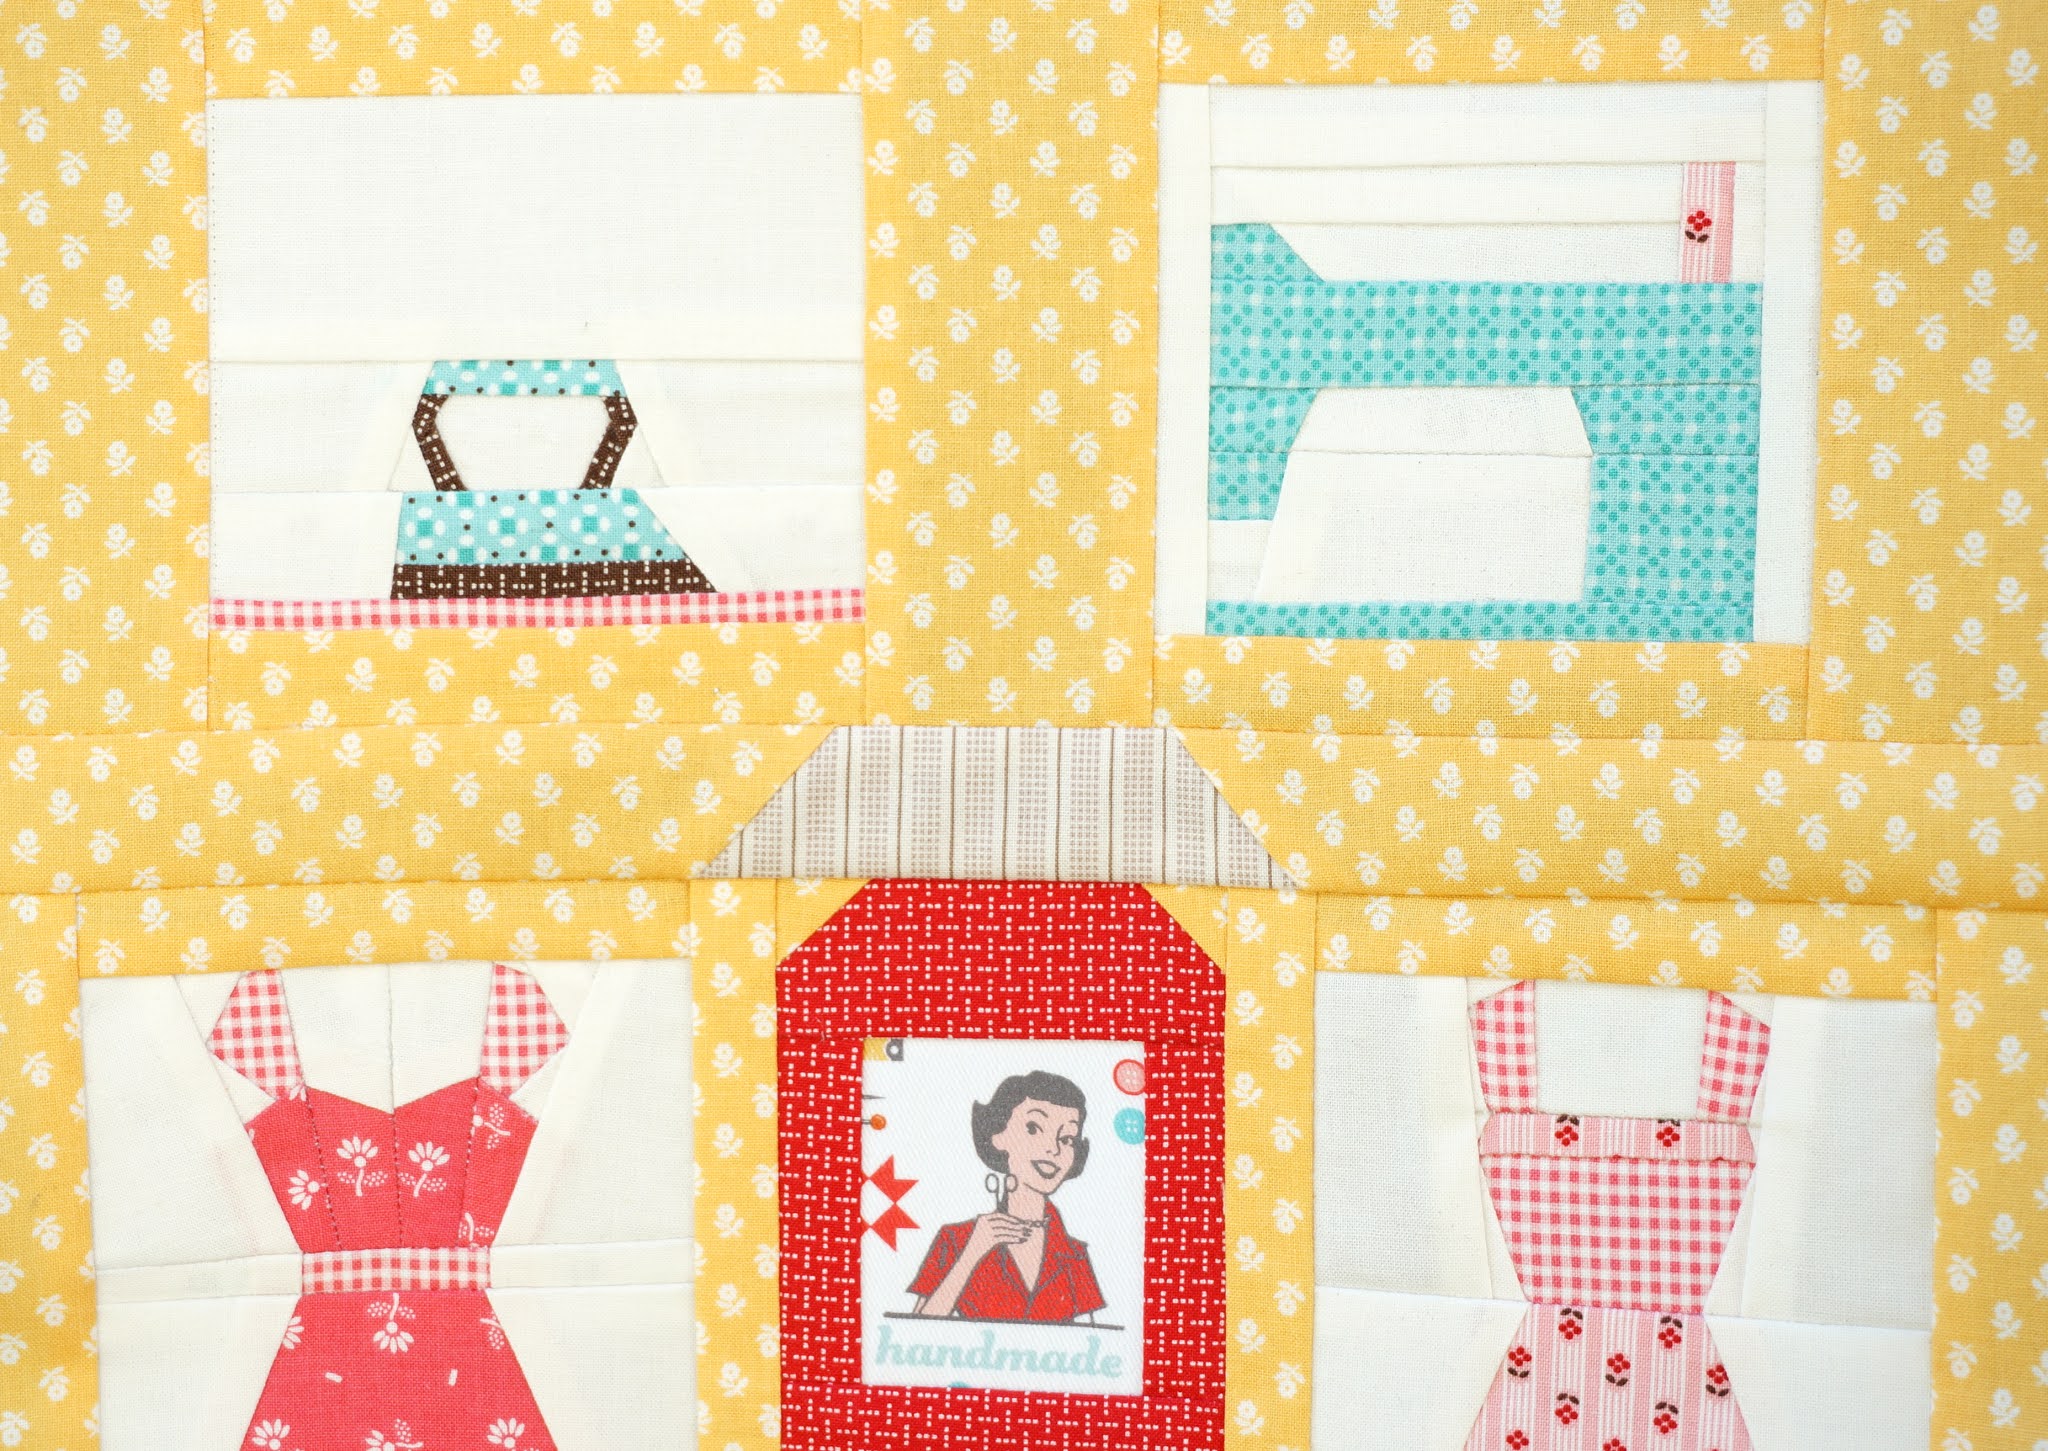
Prim fabric in my Dress Boutique pattern


Hello!  I hope you are getting some sewing time in : )
I have been working on this fun paper pieced pattern!


 I used the new line of fabric "Prim" designed by Lori Holt for Riley Blake Designs. for my new "Dress Boutique" pattern.
I absolutely love this line!  The prints are very small scale and lend themselves to paper piecing patterns.


I just love that teeny tiny flower on the fabric spool on the sewing machine : )


The fussy cut window and door prints are from "My Happy Place" also designed for Riley Blake Designs by Lori Holt.  

My Dress Boutique pattern finished at 12" x 18".  It would make a perfect mini quilt.
You can find the pattern in my Etsy shop


If you use Prim in a project be sure to use the following hashtags in your social media posts
#ILoveRileyBlake
#RileyBlakedesigns
#PrimFabric

I love to see what you make

Happy Sewing!
xo
Charise


7.01.2020

Barbie fabric!

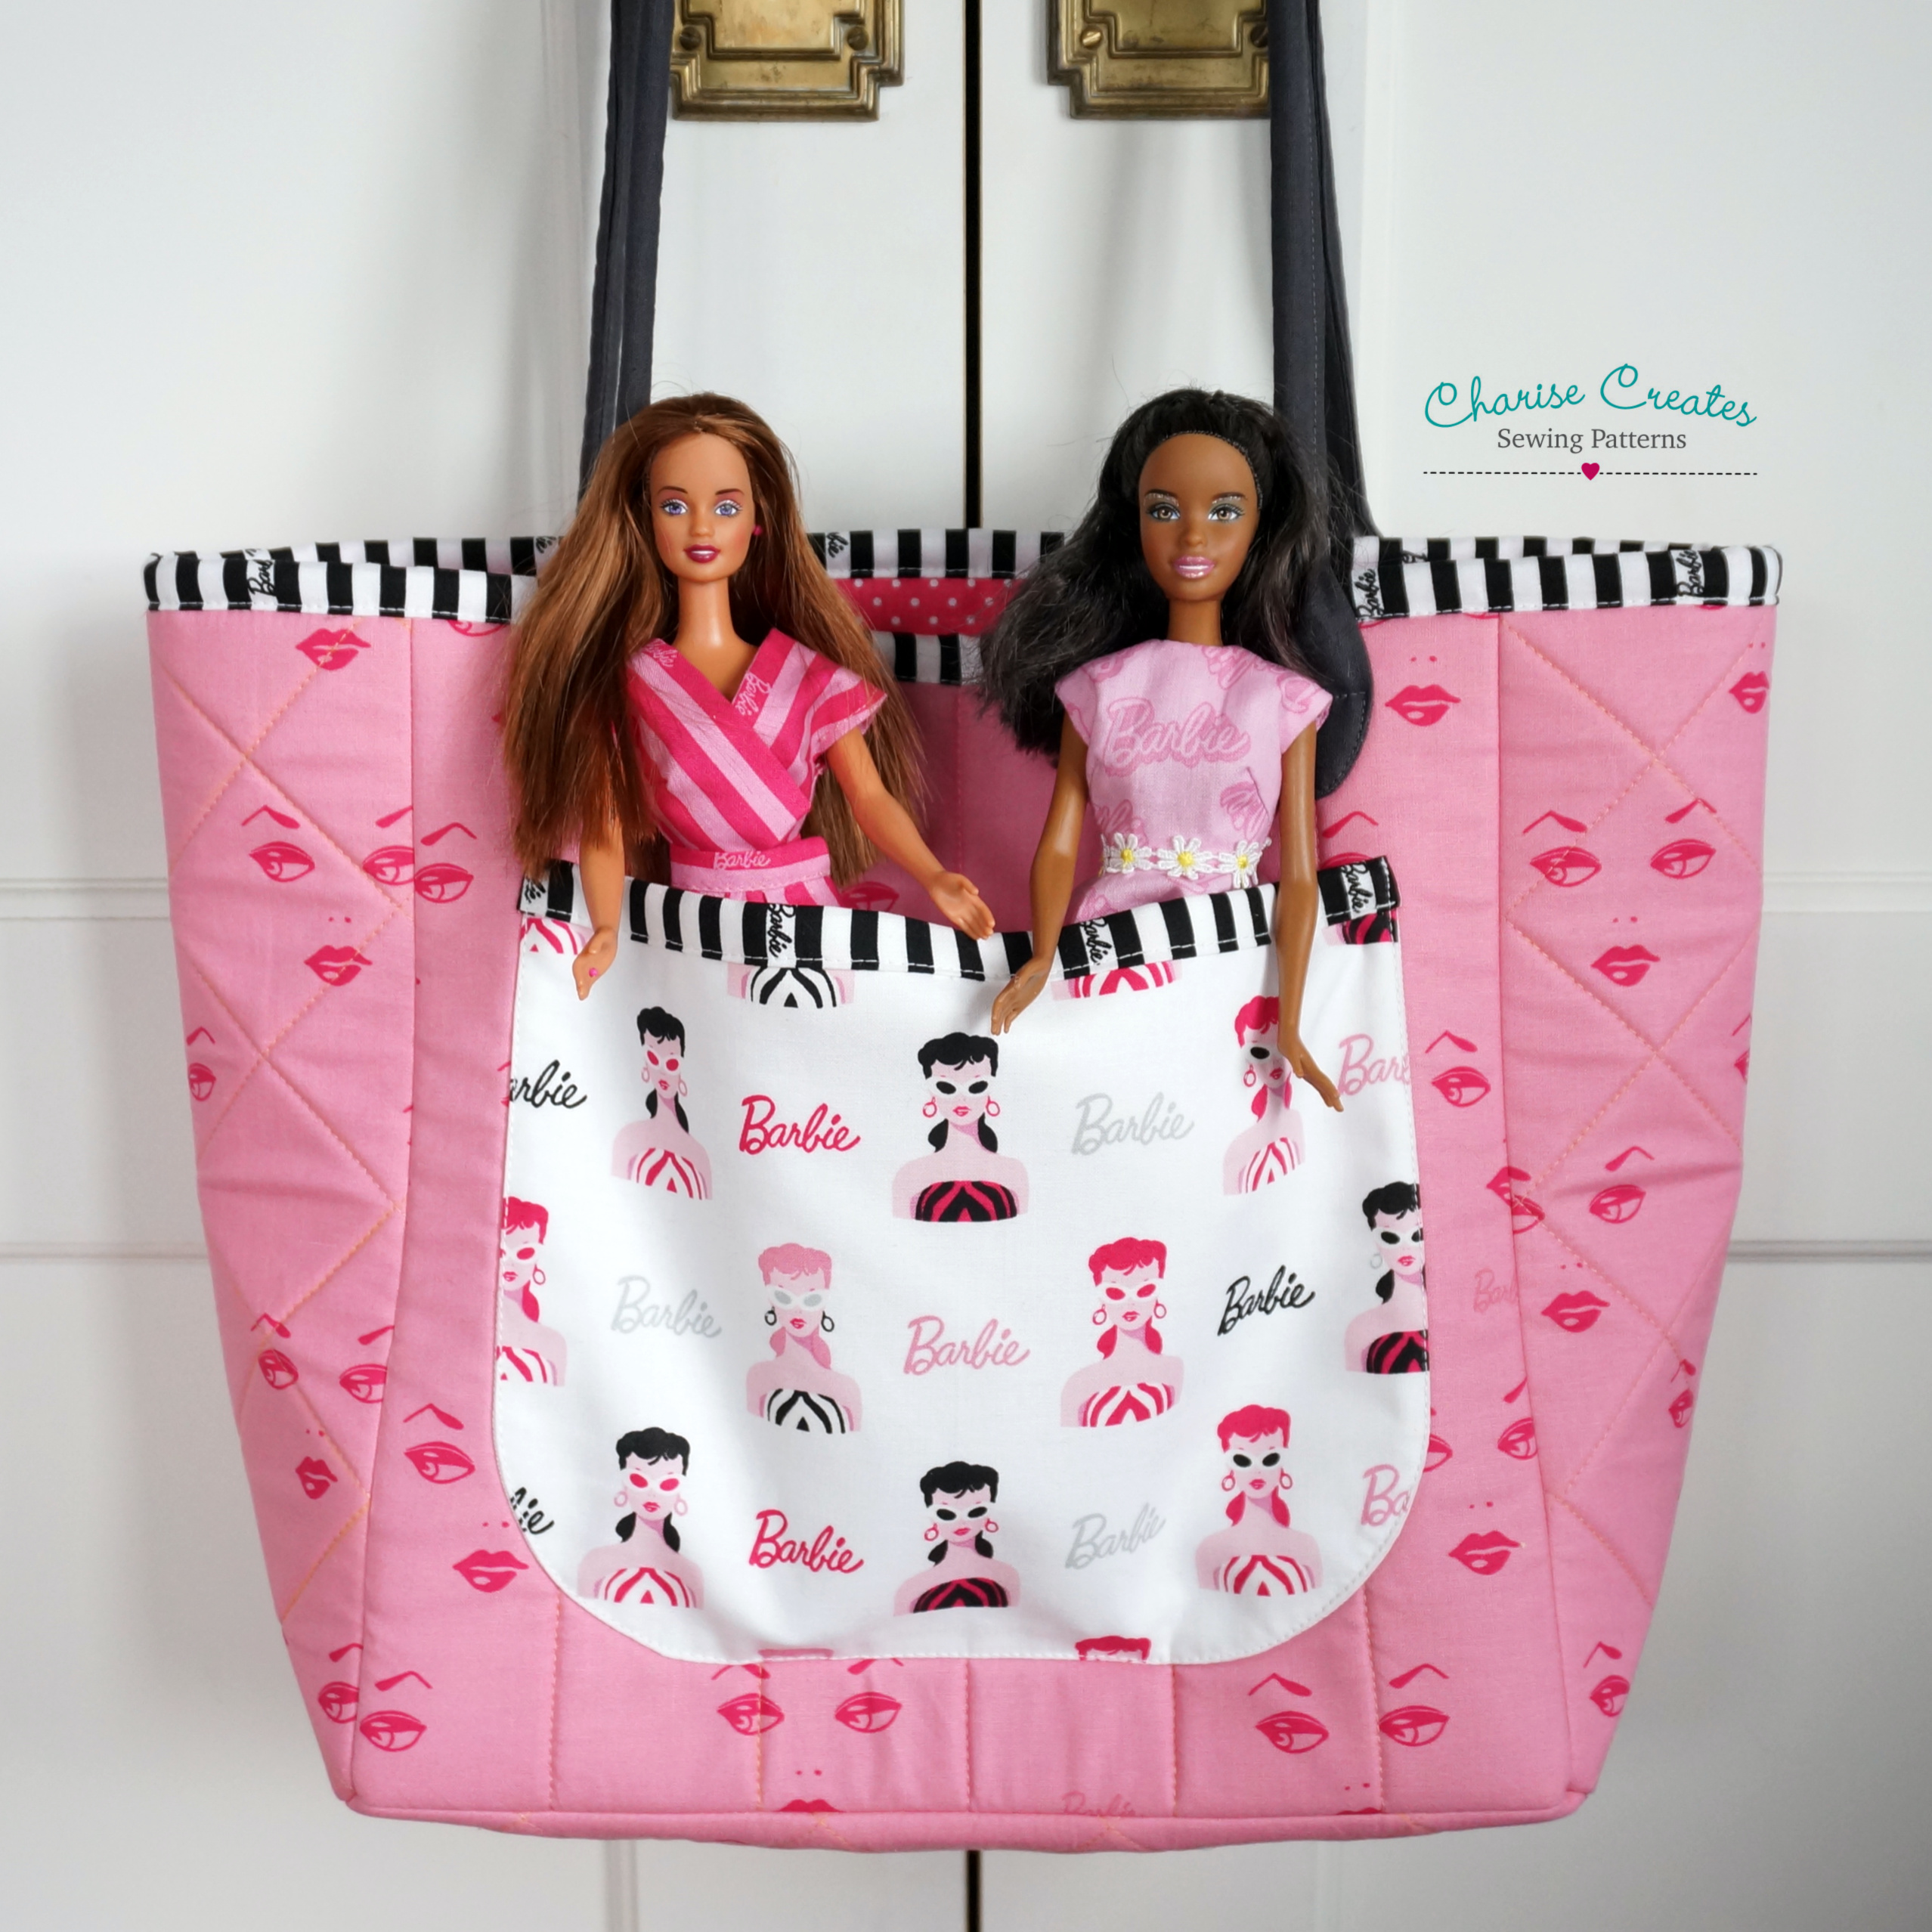
When I had the opportunity to sew up some projects with the new line of Barbie fabric from Riley Blake Designs, I couldn't resist!

I first learned to sew by making clothes for my Barbie dolls when I was 6 years old
 which led to a career as a fashion designer : ) 


The tote is a nice roomy size with a large outside pocket that holds a small Macaroon Pouch perfectly!


Or a couple of stylish Barbie Dolls : )


I used a current Simplicity pattern to make this cute dress. 


The vintage McCalls pattern from 1964 was used to make this dress.


Please be sure to share any projects you make on social media with the hashtag 
#RileyBlakeDesigns
#ILoveRileyBlake
#BarbieFabric

Happy Sewing!
xo
Charise