Showing posts with label free tutorials. Show all posts

8.09.2016

Craftsy Block Party featuring my block "Secret Drawer"


I just received an email from the folks at Craftsy letting me know my block "Secret Drawer" is featured along with 24 more blocks on a blog post called "Block Party"!  You can find the Craftsy
post and all the free blocks [HERE]


"Secret Drawer" is a perfect block to practice your Y seams.  I share an in depth tutorial with step by step photos [HERE]


I created the pattern for my Vintage Block Quilt along.  You can find all the free patterns [HERE]
There are 12 blocks in all, 12" square and a perfect set to make your own vintage quilt!

Happy Sewing!
xo
Charise

1.26.2015

Tips for Sewing with Suede and Leather


I love to use suede as trim on the purses I sew. 
I think it adds a professional look to my projects.


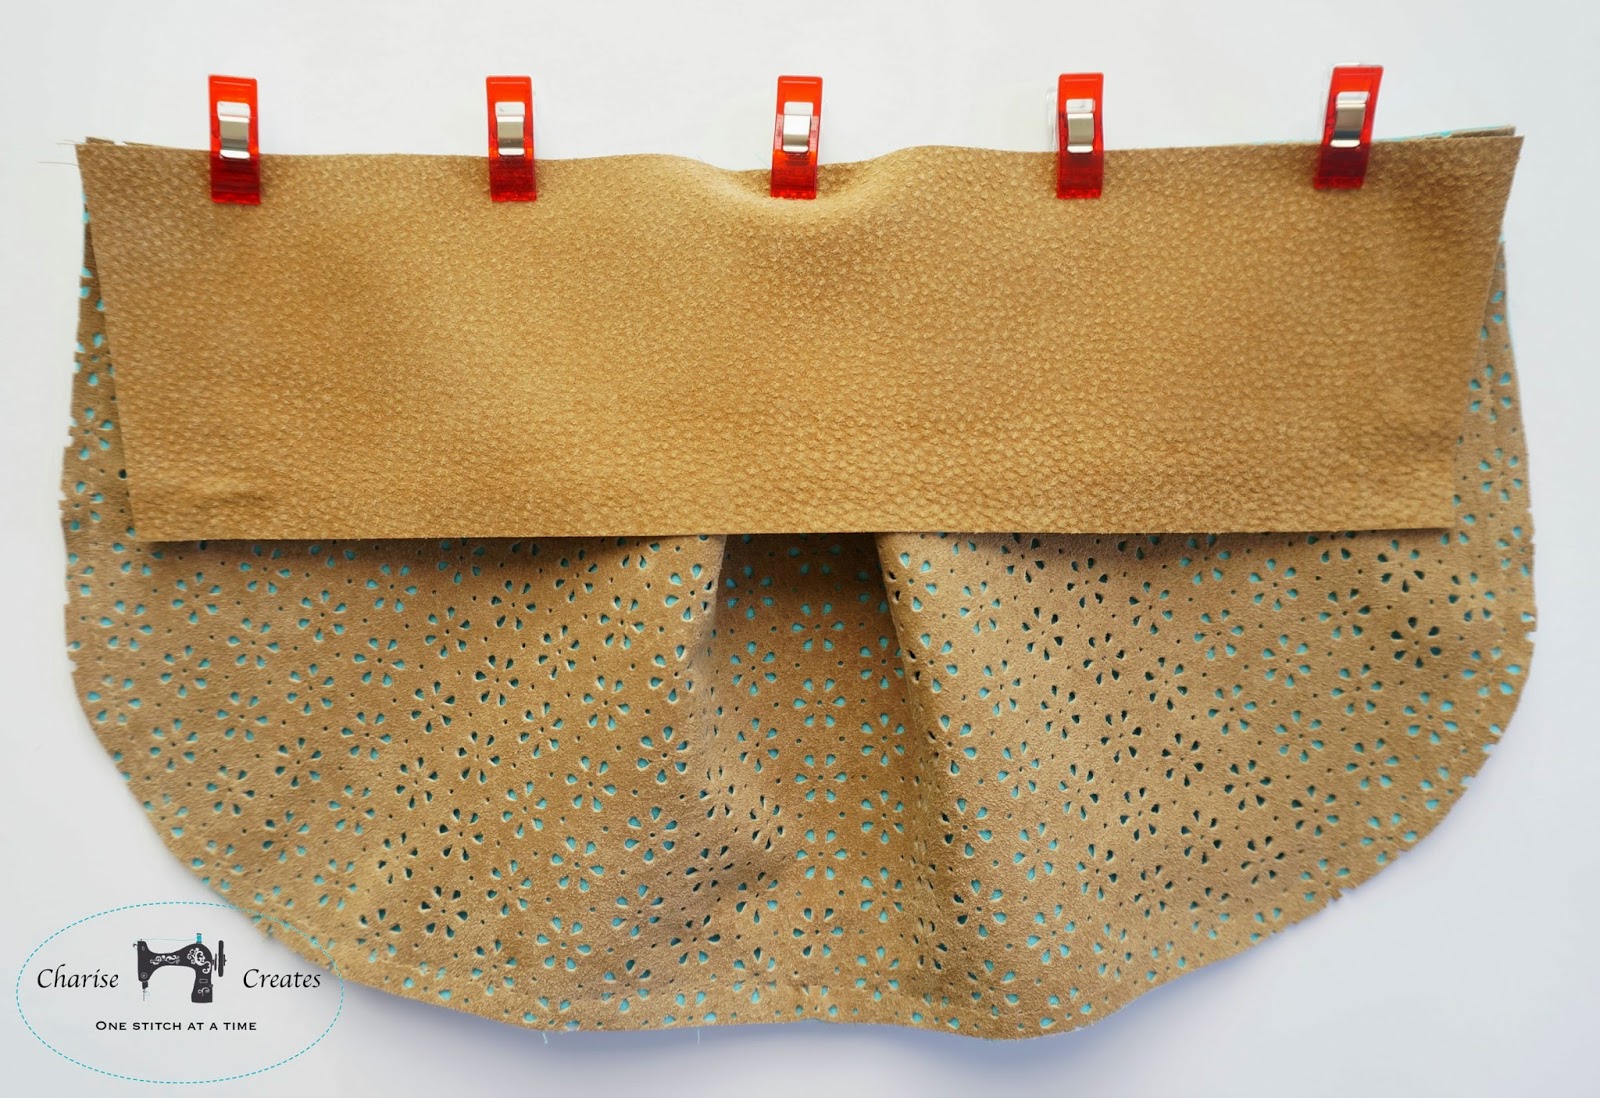
 I was so excited with the results of my suede trimmed “Lovely Gathered Clutch” that I decided to stitch a clutch purse entirely in suede. 

 Here are my tips based on sewing on my home machine. I hope these tips encourage you to take the plunge in sewing with suede and leather! 


 Each one of these clutch purses were sewn on my very simple Singer Home sewing machine!


1. A walking foot is my answer to all sewing on suede except for zippers (see #7 below).  I’ve tried a teflon foot but the walking foot has yielded the best results for me.

2. Use polyester or nylon thread.  If you want your topstitching to stand out, use a heavy weight 100% Polyester heavy weight thread.
3. Attach a leather needle to your sewing machine.  A leather needle is extra sharp and designed for suede/leather sewing.  I like to use a size 18 needle for mid weight suede / leather. 
4. Use a longer stitch length and loosen tension. I set my machine to 3.5.  Be sure to test your stitch length and tension on a scrap piece of suede before you sew your final project.

5. Use non-fusible interfacing to add stability to suede and leather.  To attach the interfacing to the suede/leather piece, apply glue ~ I like to use a fabric glue stick ~ to the perimeter of the sudede/ leather piece and attach the interfacing.  Baste around the outer edge of the piece with a basting stitch 1/4" from the edge.


6. Use clips to hold the seams together.  My favorite clips are from Clover.  Pinning is not an option as it will leave holes in the suede/leather.


7.  For sewing on a zipper, or any time you can't use a walking foot, cut a strip of tissue paper about 1” wide and a few inches longer than the seam you are sewing.  Place the tissue under the seam and the suede will not get stuck to the feed dogs and sewing machine plate when stitching the seam.


Remove the tissue paper when you are finished sewing the seam.


8. To flatten seams, use a brayer.  To keep the seam in place before stitching, apply fabric glue stick to the seam allowance to hold in place as pictured. If you want to hold the seams in place permanently, use permanent contact cement.

I hope those tips will help you feel confident sewing with Suede or Leather!!

xo
Charise

1.11.2015

Pencil Pouch Tutorial


Hi!  So glad you stopped by. Today I am sharing a tutorial for a pencil pouch that uses my Paper Pieced Crayon Block.  
You can find the paper pieced crayon Pattern and Tutorial HERE.

This is a perfect gift and extra special filled with a set of colored pencils or crayons!
I made one for each of my kid's teachers for Christmas gifts.  Enjoy!


Supplies
~ Matching Thread
~ Contrast Thread
~ Sewing Machine zipper foot
~ 1 Paper Pieced Crayon Block - The tutorial and pattern link is HERE
~ F8 (9" x 22")  Linen fabric - I used Robert Kauffman Essex Yarn Dye Linen in color Flax
~ F8 (9" x 22")  Print Fabric
~ 1/4 yard Fusible Fleece
~ 1/4 yard light weight interfacing - I used Pellon SF101
~ 9" (or longer) coil Zipper to match Crayon
~ 2 1/2" length of decorative twill tape or ribbon (optional)

Cut
~ From the Linen:
2 - 2 3/4" x 10", 2 - 1 3/8" x 2 3/4", 10" x 5 3/4"

~Print Fabric
2 - 10" x 5 3/4" lining , 2 - 3" x 1 1/4" Zipper Tabs

~Fusible Fleece
2 - 10" x 5 3/4"

~Light Weight Interfacing
2 - 10" x 5 3/4"

Finished size:
9 1/4" x 5"


Step 1 ~ Prepare the outside and Lining panels

1. Stitch the 1 3/8" x 2 3/4" rectangles to each end of the crayon.
Stitch the 2 3/4" x 10" rectangles to the top and bottom of the crayon.  Trim to 10" x 5 3/4".


2. Fuse the Fleece to the back of the crayon block.  Stitch in the ditch around the perimeter of the crayon.

3. Fuse the 10" x 5 3/4" fleece to the back of the 10" x 5 3/4" linen piece.
Fuse the 10" x 5 3/4" light weight interfacing to the back of the 10" x 5 3/4" lining pieces.

Step 2 ~ Attach the Zipper

4.  Measure the zipper and trim to 10” including the zipper tape.


5. Fold the under the ends ¼” of the 3” x 1 ¼” pieces on the 1 ¼” side towards the wrong side.  Press.  Press in half.


6. Butt the end of the zipper to the fold on the tab.  Pin in place.  
Stich the folded edge with an edgestitch.
Repeat for the other side.

Cut the folded edge and trim the zipper to ¼” beyond the edge stitching. Repeat for the other  side.  


7.  Place zipper face down on the right side of the Pouch Panel.  Place the long edge of the zipper tape matching the top edge of the Pouch Panel and Pin in place. 


8.  Attach the zipper foot to your sewing machine.   Stitch 1/4” away from the raw edge, starting and stopping 3/8” from edge, back tacking at ends. 

9.  Place the lining right sides with the right side of the clutch panel.  The zipper will be sandwiched in between the Pouch Panel and the Lining.  Pin lining in place along top edge.
With the outside panel, wrong side, facing you, stitch, follow the stitching that attaches the zipper to the outside panel.


10. Turn the lining over the zipper. The wrong side of the Pouch Panel will be facing the wrong side of the Lining. Press both panels away from the zipper.  Top stitch along the top edge, ¼” away from the top edge stopping and starting 3/8” from side edge, back tacking at ends.
  
11. Repeat  steps #8-10 for the other side.

12. Fold the twill tape right sides together and position 1/4" below seam at top on the left front side.  Baste in place. (see picture above)

Step 3 ~ Finish the Pouch


13.  Separate the lining from the Clutch Panels.  Place the Clutch Panels right sides together matching the top seams and raw edges.  
Mark the bottom corners with a gentle curve.  You can use a mug or cup to trace the curve.
Fold the lining out of the way toward the center of the panel and pin.  
MAKE SURE THE ZIPPER IS OPEN so you can turn right side out at the end.
Stitch 3/8” from edge starting at the top folded edge of the zipper end. Clip small triangles on curved corners being careful not to clip into the stitching.
Press seam open. 


14.  Unpin the lining panels at each end of the zipper. Place the lining right sides together, matching raw edges.   
Mark the bottom corners with a gentle curve.
Pin around perimeter.  Starting just below the zipper coils, stitch 3/8” from edge,
leaving a 4” opening at the bottom for turning. Clip small triangles on curved corners being careful not to clip into the stitching.
 Press seam open.  

15. Turn right side out and press.  Slip stitch or machine edge stitch the opening in the lining closed.
You have completed your Pencil Pouch.  Enjoy!

xo
Charise

8.26.2014

Sketch Book Cover Tutorial


Just in time for back to school, I designed this handy sketch book cover!
You can find it over at the Sew Mama Sew blog.
I love to have a sketch book in my bag at all times to jot down ideas or just to doodle!  They are also great for list writing and immortalizing all your fabulous ideas!  Since I change my bag often, I designed a sketch book cover that has a handy pocket on the back to keep your pen or pencils.  There is nothing worse than wanting to write down or sketch an idea but not being able to find a pencil in your purse - which happens to me often.  Thus the design for this handy sketch book cover!


The cover has a paper pieced pencil and embroidery detail.


This is also a great project to make for young artists - a perfect portable sketch book with everything in its place!


The handy pocket on the back has a velcro closure.
Perfect for stowing your favorite sketching tools.

You can find the tutorial and pattern at the Sew Mama Sew blog!

Happy Sewing!
xo
Charise

8.25.2014

Coffee Koozie


The Fat Quarter shop is sharing a video and free pattern for this adorable Coffee Koozie. 

I take a cup of coffee with me on my daily walk to take the kiddos to school, so this will come in handy! 
And it is just so darn cute!!


It is perfect for a mini charm pack - or - choose your own fabrics.  I used some of my favorite fabric scraps!  I also found some vintage red buttons in my button stash.


A perfectly easy project, it took me about an hour to sew and a bit more time to pick out the fabrics and cut the 2.5" squares.  If you have a mini charm pack, the project is super quick!


I think this will be the perfect teacher gift!

Happy Sewing
xo
Charise

5.06.2014

Twelve Patch Zipper Pouch Tutorial


I made this twelve patch pouch a few months ago, inspired to use up a mini charm pack of 2 1/2" squares.
It has a bound edge on the top of the pouch which adds a nice detail.


You can also use any panel of fabric that is 6 1/2" x 8 1/2".
This version pictured uses a "cheater print" which looks like patchwork but it a printed panel!
I added the appliqué fabric patches and cute strawberry button.

One can never have too many pouches, so a pouch I made! 
My best friend has the original and I wanted one for myself, too.
I have a Liberty fabric version in the works for my mom - just in time for Mother's Day.
It is a great gift item and fun to fill with goodies for a special someone. (That includes you!) 


Twelve Patch Zipper Pouch
a tutorial by Charise Creates

Materials  

24 – 2 1/2” squares assorted print fabric - a mini charm pack works well
~OR~
2 - 6 1/2" x 8 1/2" fabric rectangles
1/8 yard or large scraps print fabric for the zipper trim
1/4 yard  Print fabric for the lining Matching thread
1/4 yard muslin or solid cotton backing Pins
1/4 yard batting 9” coil zipper or 8" metal zipper
Zipper Foot Marking Pen,  pencil, or Hera Marker (for quilt marking)
Cut

2 - pieces of Batting 7” x 9”
2 strips 1 3/8” x 8 1/2” print fabric
2 pieces of muslin or other cotton (it will be hidden) 7” x 9”
2 strips 1 3/8” x 8 1/2” lightweight interfacing
24 – 2 1/2” squares assorted print fabric
2 rectangles lining 6 3/4” x 8 1/2"

Notes:
~All seam allowances are 1/4" unless otherwise noted
Finished Size:
5 1/2" tall x 8" wide

***Skip to step #4 if you are using a 6 1/2" x 8 1/2" panel***

1) Arrange  the 12 print squares that make up the panel, in your desired design. 
For the pouch pictured, I added in a few of my favorite fabrics mixed in with the mini charm pack.


2)  Stitch each row together.  Press seam allowances to one side, each row in the opposite direction.
3) Stitch the top row to the center row.  Press the top/center to the bottom row. 
Press seams open.
Repeat for the other side side of the pouch.
4) Make a quilt sandwich:
Place the backing fabric wrong side up.  Place the batting square on top.  Place the top panel right side up at the very topPin or baste all layers together.  
5)  Quilt diagonal lines on the patchwork  panel.  The outside quilting lines should start 1/4” in from the edge. Your lines will be approximately 1 3/8” apart.
Trim the panel to 6 1/2” x 8 1/2”.  Repeat for the other side.
6) Fuse the strip 1 3/8” x 8 1/2” interfacing to the back of the print fabric strips following manufacturer directions. Repeat for the other side.

7) Place the printed fabric binding strip right sides together with the pouch panel matching top edges. 
Stitch the strip to the top of pouch panel with a 1/4" seam allowance.  
Press the fabric binding strip towards the top.


8) Fold back the strip to the wrong side so 1/2” is showing on the right side.  Press in place.  Repeat for the other side.


9) If you are using a coil zipper - Shorten the zipper to 8 1/2”.:
 Stitch over the end, 1/4" from the end of the zipper a few times if you cut off the zipper stop.  You will be stitching over the end of the zipper later on - this step will keep the zipper head from zipping off the zipper for now : )


Place the zipper right side to the right side of the fabric strip matching the edge of the zipper tape to the raw edge of the strip.
Using a zipper foot, stitch the zipper to the pouch with a 1/4” stitch.
Repeat for the other side of the pouch.


10)  Place the lining right sides with the right side of the clutch panel.  The zipper will be sandwiched in between the Clutch Panel and the Lining.  Pin lining in place along top edge.

11)   Flip the panel over so the wrong side of the pouch panel is facing you. Using a zipper foot, stitch 1/4”  from top edge, following the previous stitching, back tacking at ends


12) Turn the lining over the zipper  Fold down the strip on the fold line you made 1/2” from the seam edge.  Edge stitch the zipper border stitching through all layers.  Repeat for the other side.


13)     Separate the lining from the outside pouch panels.  Place the outside panels right sides together, and the lining panel right sides together. Match seams and pin in place around the perimeter.  MAKE SURE THE ZIPPER IS OPEN so you can turn right side out at the end. The zipper teeth will face towards the lining.   The zipper tape will face towards the pouch panels.
Stitch 1/4” around the perimeter of the pouch.  Leave a 3” opening on the lining panel.


14) Create the bottom corners by placing the pouch corners right sides together matching the seams.  Press the seams open.  Mark 1" up from the corner.  Stitch on the marking.  Trim 1/4" beyond the stitching.  Repeat for the other side of the pouch and both lining corners.

15) Turn the pouch right side out and give it a good press. Slip stitch or machine edge stitch the opening in the lining closed.


Yoo hoo ~ you are awesome!!!  You now have a completed twelve patch zip pouch.  Enjoy!

Be sure to share your finished pouches over at my Flickr Group [here]. 
 I love to see what you make  :)


xo
Charise 

5.05.2014

Mother's Day Gifts To Stitch!


Mothers day is just around the corner - May 11th to be exact : )
Which means you still have time to make a gift for your mom.
This post is dedicated to some lovely projects to make if you are in need of
some ideas for Mother's Day gift giving!  
All links are provided below.


Hot Pads are a useful and fun gift if your mom likes to cook.
I created the round potholder from a few block patterns in my Etsy shop but you can just as easily use an orphaned quilt block and reuse a project that has been in your stash!
You can find the tutorial [HERE].

The apple potholder is a fun gift.  It us a perfect project to use some favorite scraps.
It would also be lovely in Granny Apple Green, Pink Lady Pink or Golden Delicious Yellow!


A tote bag is always a fun and useful gift!  My tulip tote is perfect for this time of year!  You can find the pattern for the tulip block and tote bag [here].
If you are looking for a simpler tote bag to adorn with the tulip, you can find some free tutorials Here, Here and another Here.


Another simple and fun project is my Ruffled Clutch I designed for Liberty Craft Blog.
Wouldn't it be lovely in natural linen too?


A frame pouch is always a useful gift.  I made the apple pouch with my free apple paper pieced pattern you can find [here].  The tutorial for the frame pouch can be found [here].
Fill it with some sweets or sewing notions!


Or use the pattern to make coasters.....


or hot pads!


There is nothing as lovely as lavender sachets for your clothing bureau.  You can find the pattern for my house sachets here.


A pretty cushion is always a welcome gift.  I seem to not have enough in my house : )
This one is made with my Rose Dream pattern you can find [here].


And this one is made with the Crown of Thorns pattern you can find [here].


Happy Creating!
xo
Charise