3.31.2015

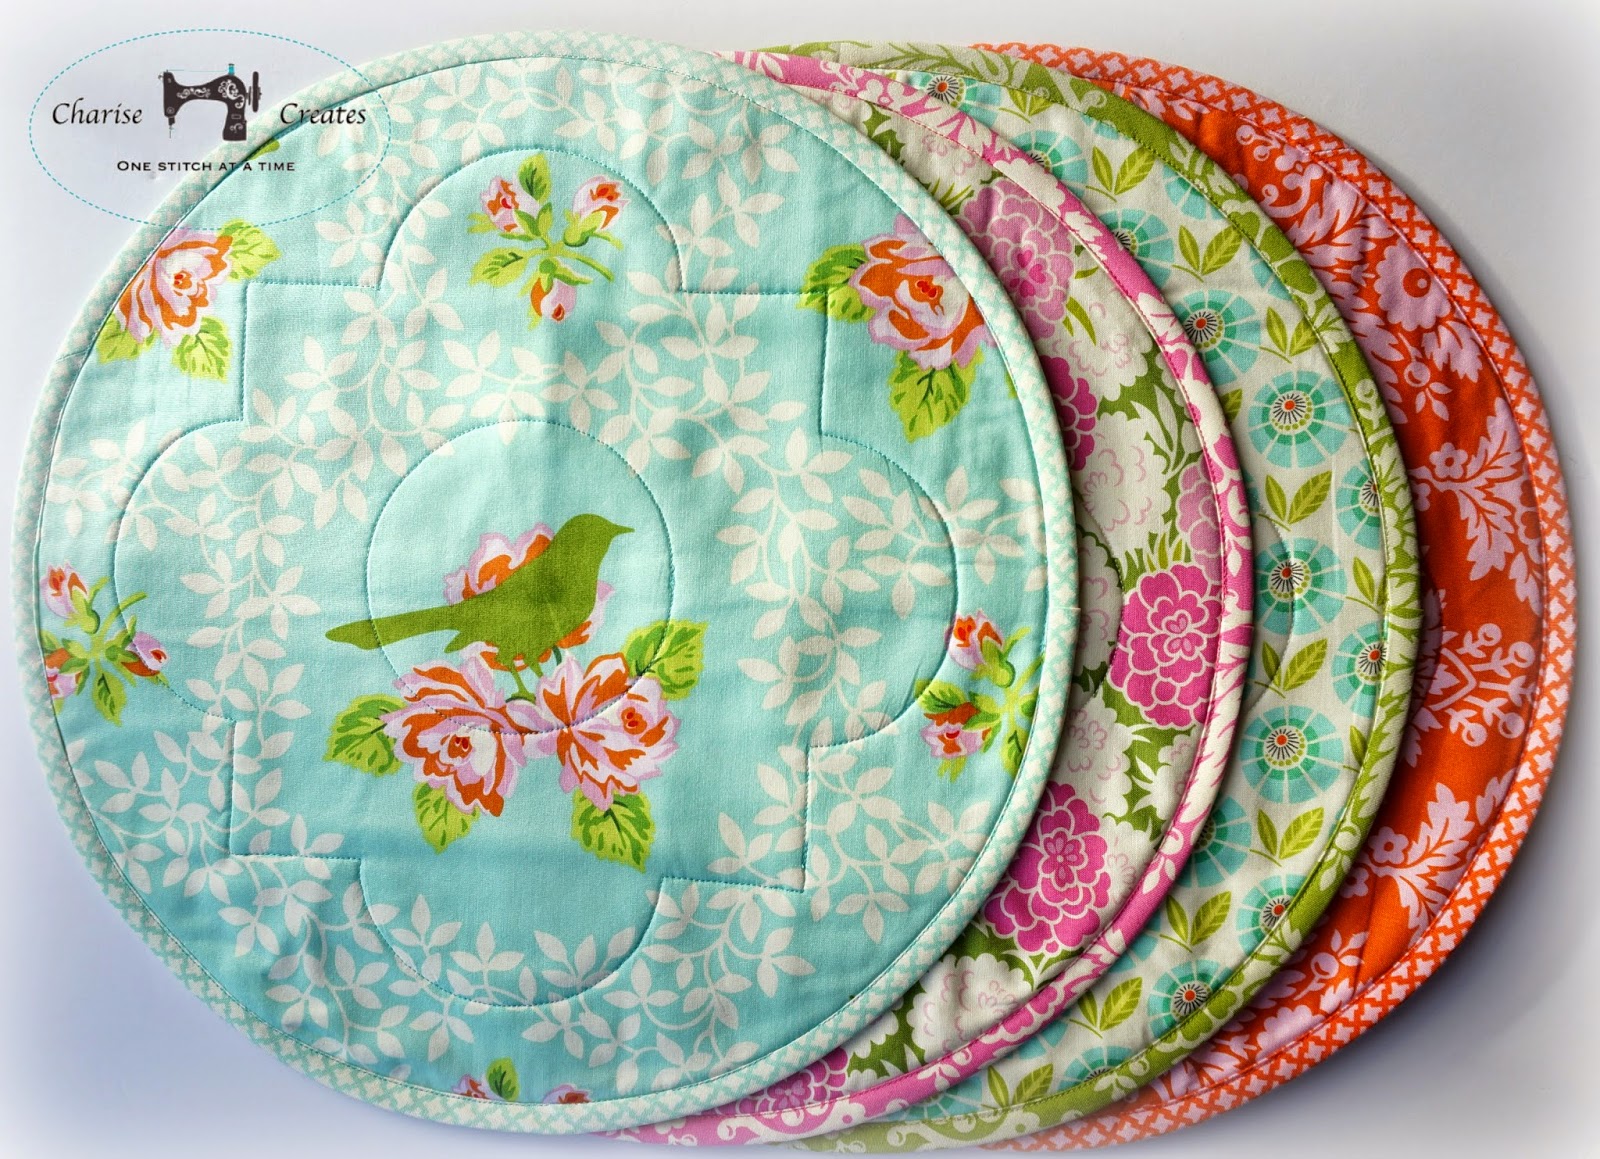
Blossom Placemats and Napkins from Stitch Magazine Sp'15

It finally feels like Spring in the Pacific Northwest!  I bought my first bunch of daffodils just a week ago.
The tulips in my garden are going to bloom soon and my roses are starting to bud! 
I need to get out in the garden and pull weeds that have started to sprout. 


 I was so happy to receive my samples for the Blossom Placemats I designed for Stitch Sp '15!  They will be the  perfect addition to my table and garden tulips to add a Springy feel to the house.


The fabrics I used for this project is from Heather Bailey's line for Free Spirit - "Up Parasol".
I love the colors in the prints - beautiful clear colors in lime, orange, aqua and lilac.
The solid cream fabric is Essex linen in color Linen. 

I also love the reverse side of the placemats - the fabrics are gorgeous together.

I used 4" drunkard's block templates and an 18mm rotary cutter to cut the shapes.
This is much easier and more accurate than using templates.
Unfortunately the company who I purchased the templates from and are listed in the article are not in business : )  You can find them on the internet - just search for 4" drunkard's patch template.

Fast Cutting Tip: 
Use an 18mm rotary cutter and 4” drunkard’s path acrylic template to cut pattern pieces A and B. 
For Pattern piece A - cut 4 1/2” strips. Cut the strips into 4 1/2” squares.  Use the template to finish cutting the pattern piece.
For Pattern piece B - cut 2 1/2” strips. Cut the strips into 2 1/2” squares.  Use the template to finish cutting the pattern piece.
An 18mm rotary cutter is the perfect size to cut small curves.

If you want to make a set for yourself, you can find the Stitch Sp' 15 issue HERE.

Have a Lovely Day!
xo
Charise

3.26.2015

A very Cherry Italian Soda ~ The Paper Pieced Home


 When F  + W media asked me to be a part of the Paper Pieced Home blog hop of course I said Yes!
I have known Penny Layman, the author of the Paper Pieced Home for a few years.  She and Ayumi from Pink Penguin invited me to be a member on the Ringo Pie Bee for the second round.  It was such an honor as I love her work!

Penny has a playful fun style and her pattern was a breeze to put together.
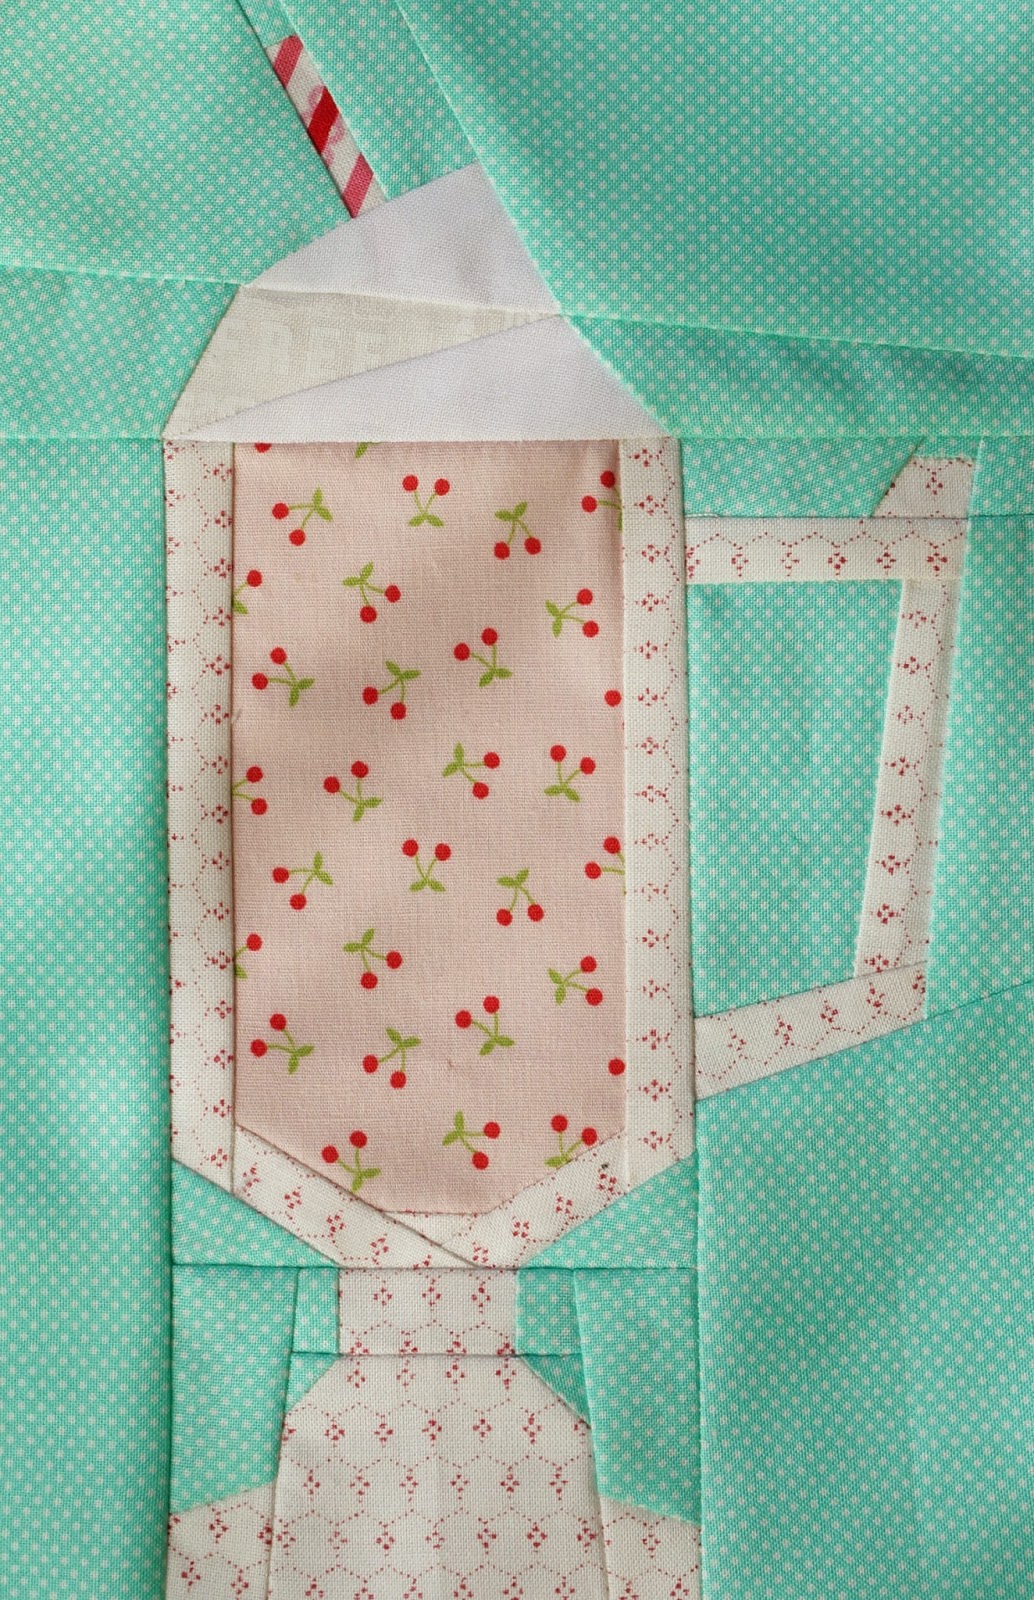
I had a blast making the Espresso Mug pattern but of course I had to give it a bit of a twist.
My mug has a Very Cherry Italian Soda inside : )  

I love the straw detail and the way Penny pieced the whip cream (or foam for a latte ) on top.

Some of my favorite patterns in the book are:
The footstool.  The shape of the legs are brilliant.

I also love the claw foot tub.  My absolute favorite kind of bath tub.

Be sure to check out the other projects and reviews here:

3/16       McCall’s Quilting / Sewing Machine Block
3/17       Love of Quilting / Review
3/17       Sandi Sawa Hazlewood  of Crafty Planner / Watering Can Block
3/18       Quilty Pleasure (Quiltmaker blog) / Review
3/18       Imagine Gnats / Rotary Phone Block
3/20       Verykerryberry / Lion Block
3/21       Artisania / Cast-Iron Skillet Block
3/23       Where the Orchids Grow / Lamp Block
3/24       Katie Blakesley of Swim Bike Quilt / Layer Cake Block
3/24       House on Hill Road / Oven Mitt Block
3/24       Lee Heinrich of Freshly Pieced / BBQ Grill Block
3/26       Pink Penguin / Allie-Gator Block
3/26       A Happy Stitch / Giraffe Block
3/27       Bijou Lovely / Jar Block
3/27       Two Little Banshees / Saucepan Block
3/27       Charise Creates / Espresso Mug Block
3/30       Karen Lewis Textiles / Couch Block
3/31       Poppyprint / Clawfoot Tub Block
3/31       One Shabby Chick / Stack of Books Block
3/31       During Quiet Time / Sleeveless Dress Block
4/06       Pat Sloan The Voice of Quilting / Author Podcast Interview


You can find the book here:

The Paper Pieced Home
 By Penny Layman
Interweave/F+W; $26.99

xo
Charise

3.25.2015

Work in Progress Wednesday ~ Spring Knit Dress


This afternoon I finished a dress!

We are taking a family vacation to Palm Springs and I just had to make a new dress!
I wanted something easy that I could wear with sandals.
Also, a dress I can slip easily over a swim suit.


The fabric is a Rayon Spandex Jersey that I purchased at a local Seattle fabric store.
The drape is lovely.
The cap sleeves are cut on the bias to give the sleeves a nice drape.
The underarm is finished with a double fold self fabric trim.


I am really happy with the neckline finish.  It is a single fold binding that is wrapped around the seam and stitched in the ditch so the stitching disappears.  It is a beautiful neckline finish.


I used my Dritz Ezy-Hem to mark the dress hem.  I overlocked the raw edge and then folded the finished edge to the wrong side.  I lined up the finished edge to the 5/8" line and pressed right on the Ezy-Hem.  It is made out of aluminum so you can press right on it!  I pinned the hem in place and stitched from the wrong side at 1/2".  A Super Easy hem finish.

Head on over to Freshly Pieced for some lovely Works in Progress.
I hope you find some time for creativity today!

xo
Charise


3.24.2015

How will you wear your Anna Blouse this Spring?


I had an absolute blast coming up with these design boards! They are all Spring themed and will give you a few ideas of how to wear your Anna Blouse.  Many of the  items of clothing  and shoes you probably already have in you closet but I have listed the sources for the items so you do a little shopping if you wish : )  All the Anna's are shown with current and/or fabrics that can be found in fabric shops now.

I love this Retro Feminine Look!  The Cotton + Steel Rayon print is so pretty and Springy in the Anna Blouse and looks so cute with The Lovely Gathered Clutch also in Cotton + Steel!
The Border fabric is Dottie Cousin in Bright Plum.  The "Jacks" fabric is Playroom Linen in Aqua.

I love the ease of denim and this skirt (from Anthropologie) is such a perfect basic to have in your wardrobe.

The shoes (also from Anthropologie) are adorable but this look would also be so cute with ballet flats!  I will wear this look for a few more weeks with black knee high boots since it is still a little chilly in the Pacific Northwest!

The trench from Modcloth is the icing on the cake and the perfect staple for your Spring Wardrobe.


I am always looking for ways to pull my look together for running around town doing errands.
These items combines casual clothing items that get dressed up with cute shoes and a blazer.

The Anna shown here is made with an adorable Cotton Lawn from Girl Charlee Fabrics.

I love the large floral print in the Shopper Purse from the lovely gathered purse trio.  It is extra large for your shopping excursions!

Pair these pretty printed items with a pair of cropped jeans and blazer from your closet or you can find the items pictured from ModCloth.  Add some fun colorful clogs from Lotta from Stockholm to top off the look.

If it is still chilly in your locale, you can switch out the clogs for knee high  or ankle boots - a perfect Winter to Spring transitional outfit.


The 70's are back and I couldn't be happier.  I love wide leg pants and these from Anthropologie are adorable.  I love them paired with this version of the Anna Blouse in a  chevron voile print from Cloud 9 fabrics.

Add some retro cool sandals (these are from Korkease) and a trend setting fringe bag.  A piece of modern jewelry tops off this cool look.

xo
Charise


3.22.2015

The Anna Blouse Sew Along ~ Hemming your Anna Blouse


Today I will share a few methods for machine hemming your Anna Blouse.
This tutorial will work for any garment with a machine stitched hem.
This tutorial is for a twice turned hem.  They usually range from 1/4" to 1" depending on the garment.
The Anna Blouse has a 1" hem that has a fold at 1/2" and then again at 1" creating the hem.


Method 1
Using a seam gauge or hem gauge.
You can find hem gauges in your local fabric store.
They are pictured at the bottom middle in the pic above.
I just purchased the fancy green one from Clover which I love.

Make sure the side seams are pressed towards the back.


1) Fold to the wrong side the amount as specified in the pattern you are using.  For the Anna Blouse you will fold up 1/2" using the seam gauge as a guide. Press in place around the entire hem.


2) Fold again the specified amount as per you pattern using the seam gauge to measure.  In this case I pressed up the hem another 1".  Press in place.   Pin in place.


3)  With the wrong side of the garment facing you, start at a side seam and edge stitch along the folded edge.


Method 2
Using a ruler and tailor's chalk

Make sure the seams are pressed towards the back


1) On the right side of the garment, using your c-thru ruler and tailor's chalk, mark a line the distance of the first fold line.  

In this case I marked a line 1/2" from the bottom edge.  
Mark another line on the next fold line.  In this case I marked the second line 1" from the first.

On slippery fabrics I find the Chalk o liner works the best.

2) With the wrong side of the garment facing you, fold the hem to the wrong side along the first line.  Press in place.
Fold up again along the second line. Press in Place.
Pin in Place.

3) With the wrong side of the garment facing you, start at a side seam and edge stitch along the folded edge.

Please share photos of your Anna on my Flickr page and tag with the hashtag #AnnaBlouse on Instagram and Flickr.

xo
Charise


3.18.2015

The Anna Blouse Sew Along ~ Setting Sleeves


Thanks for joining me for another tutorial for sewing the Anna Blouse.  Today I will talk about setting sleeves.  The Anna Blouse has a set in sleeve.  The side seams and under sleeve (underarm seams) are sewn before setting the sleeve.  This is similar to the way a blazer sleeve is sewn in place.


 1) Change the stitch length on your sewing machine to a longer basting stitch length.  Stitch two lines of stitches 1/2" and 3/4" from the raw edge, between the notches, on the right side of the sleeve.   Back tack at one end to secure the stitches.

2) Change the stitch length back to 10 - 12 stitches per inch.
Sew the Under Sleeve (underarm) seam and Hem following instructions.


3) Turn the sleeve right side out.  Turn the garment inside out.
Pull up the bobbin side (wrong side of the sleeve) basting threads on the sleeve.
Place the right side of the sleeve to the right side of the garment.  Match the Under Sleeve seam
to the garment Under Sleeve seam and pin in place.

Match the notches on the sleeve to the notches on the garment and pin in place.
Pull up the bobbin threads on the gathering stitches.


4)  I like to secure the threads on the end without the back tacking, by wrapping the thread around the pin on the opposite side of the gathers at the notch.
Distribute the gathers evenly.  Use the tip of a pin to help move the gathers.

5) With the wrong side of the sleeve facing you, stitch the armhole seam.  Start stitching at the under sleeve seam, continuing to the beginning.  Back tack at ends.

6) Finish the raw edge with a serged or zig zag finish.
Repeat for the other sleeve.

You are almost done!  I will share a few methods for hemming your blouse tomorrow.

xo
Charise


3.16.2015

Sewing Binding the Easy Way ~ The Anna Blouse Sew Along


Sewing binding can be downright tricky, but if you follow my tutorial I promise you will never be intimidated by sewing binding again!

I also use this method for sewing small fabric accessories including potholders and placemats.  You can a tutorial for adding bias binding to round potholders HERE.

Today I will share a tutorial for making and sewing on the binding on your Anna Blouse.

Prepare the binding

I find it easiest to sew the binding if the fold marks are creased prior to sewing on the binding.  It is especially important if you are sewing narrow binding like the binding on the Anna Blouse.

There are two ways to prepare the binding:
1)
Stitch the Center Back Seam.
Fold the neckline bias binding strip in half, wrong sides together. Press
Unfold the strip.  Match the raw edge to the center crease and press.  Repeat for the other side.

2)
My favorite way to prepare binding is to use a binding tool.
You will need a 1/2" flat fold binding maker for the Anna Blouse.
First, Sew the Center Back Seam.
Feed the binding strip through the binding maker.  Press in half.

I like to compare the length of the prepared binding to the pattern.  If the binding has stretched a bit, cut to the pattern length.

Apply the binding ~ No Tie Version

1) Place the binding right side to the wrong side of the blouse.  Match the Center Back, Shoulder and Center Front (CF) notches.  Pin in Place.

With the binding facing you, Start stitching at the Center Back.  Stitch around the neckline until you reach the CB.


2) Fold the binding over to the right side folding under 1/4" on the pressed line.  Pin in place being sure to cover the previous stitching.  I like to lightly press the binding in place.

If you have a tailor's ham, place the ham under the binding and Pin in place.  Press lightly.

3) Edge stitch along the fold starting at CB and continuing around the binding to CB.  Back tack at ends.


Apply the binding ~ Tie Version

1) Stitch the Center Back (CB) seam


2) Place the binding right side to the wrong side of the blouse.  Match the Center Back, Shoulder and CF notch.  Pin in Place.
Starting at CB, stitch around the neckline until you reach the CF. Back tack at ends.


3) On the short end of the neck binding, fold under 1/4" and press.  Repeat for the other side.


4) Fold the binding over to the right side folding under 1/4" on the pressed line.  Pin in place being sure to cover the previous stitching.  Press lightly. Repeat for the other side.

5) If you have a tailor's ham, place the ham under the binding and Pin in place.  Press lightly.


6) Starting at the CB, Edge stitch along the folded edge to the end of the tie back tacking at both ends.  Repeat for the other side of the neckline.  Press.

Join me tomorrow for some sleeve setting fun : )

xo
Charise


3.15.2015

Selfish Sewing Week


I just learned about a fabulous contest called "Selfish Sewing Week".  I love an excuse for a little selfish sewing : ) It is sponsored by Indie Sew and Imagine Gnats.  Indie Sew is a wonderful pattern site featuring clothing and accessory patterns.
Imagine Gnats sells apparel fabrics and patterns.  Both sites are definitely worth taking a look see : )

My Lovely Gathered Clutch Pattern in the fun Cotton + Steel Prints was first on my list and this was just the excuse I needed!  I have a feeling this will be my go to clutch this Spring.  It is A perfect size - not too bit and not too small.


The Denyse Schmidt print for the lining matches the Cotton + Steel Print perfectly!


My other selfish sewing project at the top of my list was turning my Anna Blouse into a dress.  Well....I had some Anna Maria Horner Sinister Swarm rayon challis in my stash. I decided to use it for my first sample, also called a fitting garment or muslin.  You can read more about making a muslin HERE.

The print is lovely but honestly not my usual style, a bit busier than I would normally wear.
It has a beachy, summery feel to it and would be perfect with a pair of sandals on a summer day : )
We are heading down to Palm Springs in a few weeks so I will give it a "wear test" there.


I am really happy with the way it turned out!  I raised the neckline by 3/4".  
You can find a tutorial HERE.  
I also made a flutter sleeve by increasing the bicep area of the sleeve.  You can find a tutorial HERE.

The dress has an A-line shape which I wanted to change to to be fitted at the waist.  
I added a 1" waist tunnel to the inside and inserted 1/2" elastic.  I decided I wanted the waist to be a bit higher - empire style - it sits 2" higher than my natural waist.

The lovely part of adding the tunnel is you can place the waistline wherever you like.  You could position it at the waist or a little lower for a blouson look.


The next dress will have on-seam pockets.  I'm thinking I will use this adorable Heart and Key rayon challis print from Harts fabric.

xo
Charise

Sewing A French Seam


French seams are a wonderful way to finish your seams without using a serger or zig zag stitch.  
It is great for side seams and shoulder seams.   Perfect for Blouses, Dresses and Skirts. 
For the Anna Blouse, all seams are finished with French Seams except for the armhole/sleeve seams.  French Seams work best if the seam allowance is 1/2" or larger and there is no on-seam pockets.  

The Anna Blouse has 5/8" seams which is what this tutorial is based on.

1)
Place your fabric panels wrong sides together matching the raw edges of the seams.
Stitch the seam with a 1/4" seam allowance.

2)
Press the seam open.

3)
Place the panels right sides together and press the seam flat.
Stitch with a 3/8" seam allowance.


4)
Press the seam towards the back panel.

Yay!  Your have a fabulous couture quality seam finish to use in your projects!

xo
Charise


3.13.2015

The Anna Blouse Sew Along ~ Sewing the Keyhole and Neckline Tucks


Hello and Happy Friday.
Today I will share a tutorial in pictures for Creating the Keyhole and Neckline Tucks on your Anna Blouse.


Sewing the Keyhole
This is the most difficult part of the blouse.  Once you get the keyhole sewn the rest is easy peasy! Be sure to Go slowly when stitching the binding to the keyhole and again when completing the final edge stitch.


A.  Clip the top of the keyhole.  Stay stitch around the keyhole 3/16" away from the edge.  ( A scant 1/4")


B. Fold the keyhole bias bindings strip in half wrong sides together along the long edge.  Press.
Unfold the binding strip.

Match the long raw edge to the center crease and press.  Repeat for the other edge. Press.


C. Place the bias binding strip right side to the wrong side of the keyhole.  Match the Center Front notch on the bias trip to the Center Front at the bottom of the keyhole.  Pin in place.

D. Pin the top of the bias binding to the top of the keyhole on both sides.


E. Pin around the keyhole easing the binding on to the keyhole edge.


F. With the front blouse facing you (the bias strip will be on the bottom), stitch the bias binding to the keyhole with a 1/4" stitch.


G. Fold the binding over to the right side encasing the seam allowance and folding under 1/4" on the crease.  Pin in place being sure to cover the previous stitching.


H. Edge stitch around the keyhole. Press.

Sewing the Neckline Tucks

 To Create the tucks you will match the top notches and the bottom dots, folding the fabric on the fold line, for each tuck.


A. With the right sides together match the bottom dots and top notches on each tuck and fold in half on the fold line. Pin in place.


B. Starting at the dot, back tack and stitch to the top notch, back tacking at the end of the seam


C. Press the tuck flat,  matching the fold to the center of the seam.


D. Repeat for the remaining five tucks.  Baste the tucks in place 3/16" from the raw edge ( a scant 1/4")

Congrats!  The hardest part is done!  Join me on Sunday and I will show you how to sew French Seams!