10.27.2013

Sunday Stash


  On a recent trip to Ikea I purchased a pretty little "Isala" cabinet for fabric storage.  My current method is to store my fabrics in plastic bins by color.  This works great but makes it hard to find the exact fabric I am looking for.  I wasn't sure how I would store my stash in the new cabinet until I saw a pic of Angela's stash on instagram.  She uses comic book backer boards to make mini bolts and has a tutorial here


My hope is that this new method of storing fabric will cut down on the amount of time spent picking fabric for projects since most of my stash will be in one space - like a mini fabric store : )


I'm planning on making some large berry baskets for storing the stacks of fat quarters.
Anna's Fab tutorial for making the baskets can be found here.


This is by far my favorite shelf - I love red and pink together!


Sewing has been happening at the Randell House!  I've been working on "petite cottages" for the handmade ornament swap group on Flickr.  I have designed two more houses and will have them available as a PDF pattern soon.  They make fun ornaments and you can also make sachets for gifts any time of year!


And last, a pic of my boys with their new camouflage caps, part of their costume for Halloween!
 
Happy Sewing!
xo
Charise


10.16.2013

Quilted Winter Purse, Stitch Winter '13


There is a chill in the air here in the Pacific NW.  I can't believe it is already mid October!  I've started thinking about Christmas sewing and hand made gifts.
Stitch magazine's Winter issue has been out about a week now and I have one more wintery project in the issue. 
This project would be a perfect hand made gift as well as the tea time coasters from this issue!


Each side has a large pocket that is made from strips of some of my favorite aqua fabrics. 
I have some info about them here.

I used a large vintage mother of pearl button and self fabric loop for the closure.  A self fabric covered button would also work well!

Enjoy your day!
Happy Sewing
xo
Charise

10.07.2013

Strawberry Pouches


[Fabric: Lecien Sweet Broderie by Rosalie Quinlan]

I had a fun sewing day yesterday after being terribly sick for three days.  A girl knows she is really sick when she feels too horrible to sew : )  I missed the last (most likely) couple days of glorious weather in Seattle, but I am thankful to have a wonderful hubs who took care of the kids most of the time I was feeling bad!


[Fabric ~ Border - Sweet Broderie by Rosalie Quinlan for Lecien, Center - Vintage Scrap]

Inspired by the wonderful Strawberry Pincushion Swap hosted by Erin, I made these fun pouches from a pattern I designed for Stitch Gifts 2012.  It is an easy fun project and makes a perfect gift.  Not to freak you out, but Christmas is just under 3 months away!

[Fabrics ~ Border-Lecien "Broderie" by Rosalie Quinlan, Center fabric Atsuko Matsuyama]


This pouch has the addition of a "Fruits" patch and little flower with embroidery.


I found the zipper pulls at my local bead shop.  I used split jump rings to attach them to the zipper. 


 I also found these cute enamelled apple charms - I think an apple pouch is in my future : )
 
Happy Sewing
xo
Charise

10.02.2013

Party Dress


As of today I am caught up on All of my bee blocks.  This one is for Penny in the Ringo Pie Bee.
Penny requested garments and the like and I had already designed this 1950's party dress!
It is definitely similare to my vintage dresses pattern but a little more complicated.


Vintage Dress from Hemlock Vintage Clothing

It is inspired by this vintage dress I found on pinterest.
Making dresses in miniature is so much fun and I have more in the works.
 
Have a lovely day!
xo
Charise

10.01.2013

Tea Time Coasters - Stitch Winter '13


I love this time of year. The weather is starting to cool, a chill is in the air and I look forward to spending many a day inside sewing! I designed this project for Stitch Winter ' 13 with Fall and Winter in mind. These Tea cup coasters combine my passion for paper piecing and scrappy quilting projects.
Scrappy patchwork projects are so fun and a great way to use favorite scraps!


I combined some of my favorite fabrics from Suzuko koseki - Picture window, Francophile stripe, Marguerite Daisy and Newspaper Text print.  You can find the first two prints at sew me a song. 


 I also used some of my favorite stash fabrics - Moda 1974, Moda Sweet and Whitewash from Lecien.


Happy Sewing
xo
Charise

9.25.2013

Berries in a Basket


I haven't done an online swap in ages.  When Erin asked me to join her strawberry pin cushion swap I knew it would be the perfect one.  I purchased this pattern for the strawberries and was led to this adorable version for the flower tops from this website.  I used wool felt for the flowers and adorned the center with french knots.  Seed beads would be adorable as well!
If you don't want to buy a pattern I found some great tutes to make strawberry pincushions and sachets.    Down Grapevine Lane has a fab pattern HERE


The strawberry cap is make from two layers of fabric that I fused together using Pellon Wonder Under.  I then cut our the shape and glued it to the top with fabric glue. You can also add a slip stitch or blanket stitch around the edges.


The basket is from Anna at  Noodlehead and is a wonderful and easy project!  I'm going to make a bunch for fat quarters and "works in progress" for my sewing table! 


The strawberries and the baskets are fun, addictive projects and I can't wait to make more!
 
 
xo
Charise
 

9.14.2013

Destashing and Sample Sale


I love to make things and collect fabric : )
My space is small and a girl can only sew so many things and carry so many purses so I've decided to do some destashing in my shop!


I have listed some fabric bundles and am in the process of listing some handmade goodies.
You can take a peek here.  : )

Have a lovely evening!
xo
Charise

9.06.2013

Quilt Essential


 I was thrilled when Erin Harris asked if it would be OK to include my tulip paper piecing block in her new book, Quilt Essential!  Her blog, House on Hill Road is one of the first blogs I read and it is still one of my favorites!

It is a wonderful resource for new and more advanced quilters!  The book is well organized and is as lovely inside as it is on the outside!

I'm headed to Orcas Island for the last vacation of the season!  Wishing you a fabulous weekend!

9.04.2013

Vintage Block Quilt Along - Bluebell #8


Thank you for being so patient for the next block in the Vintage Block Quilt Along.  I'm way behind but I promise there will be 12 patterns total!!!
I was acceped as a contestant for "Sew Mama Sew" - The Super Online Sewing Match and I've made it to the final round, so I've been busy with that!  It has also been an incredible summer here in Seattle so the boys and I have been exploring our beautiful city and surroundings as much as possible!

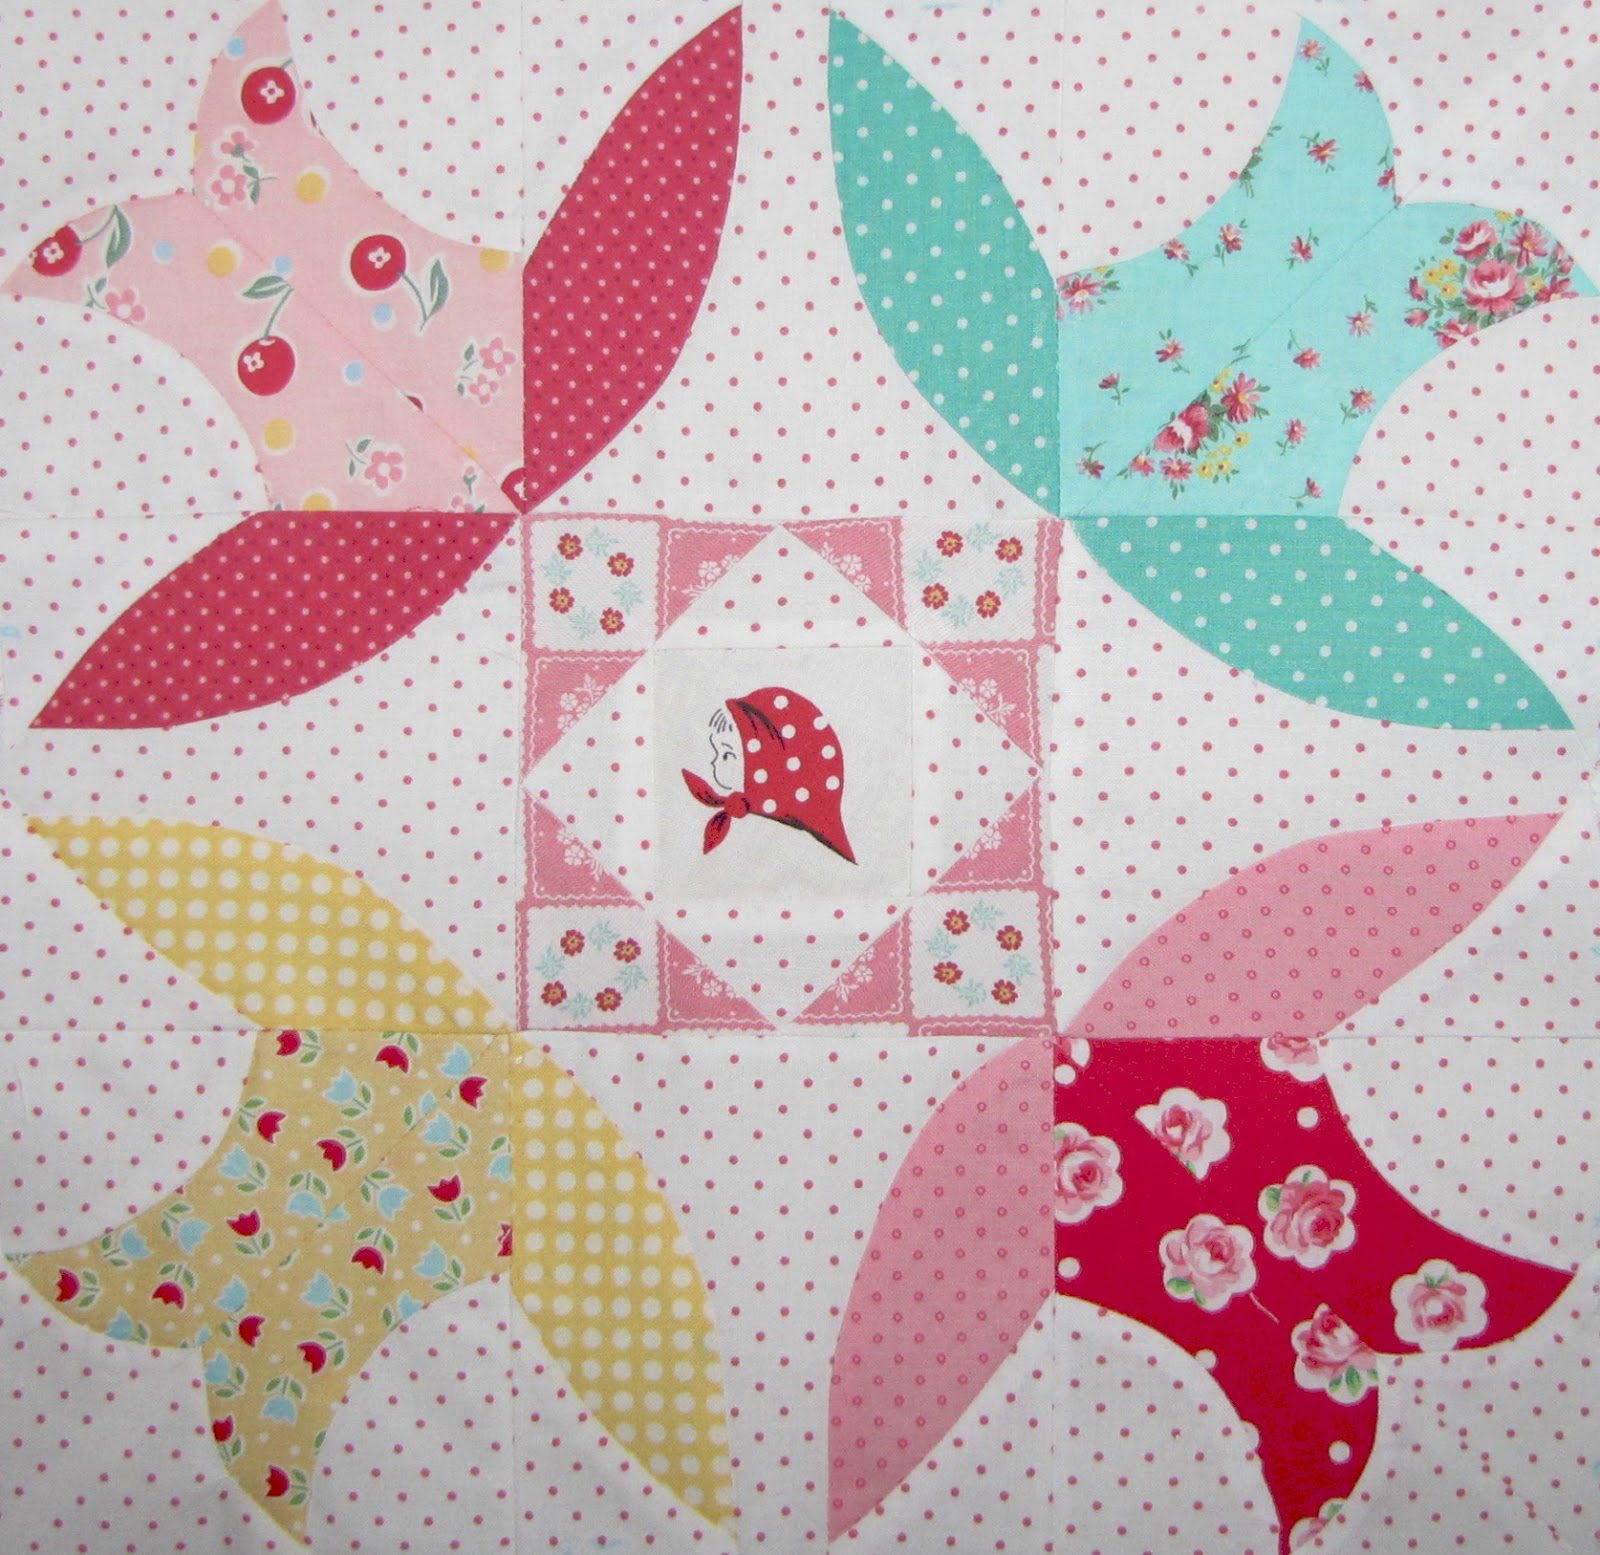
The pattern I'm sharing is a Kansas City Star Pattern ~ " Blue Bell ".  The first page is the block layout with the sections marked for reference.  The second and third pages have the pattern templates and the fourth page contains the optional "window box" center square pattern.

The pattern can be found [HERE]


Materials:
8 different F8 printed quilting cottons or large scraps 
 1 - 4 1/2" x 4 1/2" square or see the pattern for the inside square I used for my block
1 FQ background fabric
Thread
Rotary Cutting supplies
Spray Starch - so helpful to get out the creases on curved seams!!!

Note:  All seams are 1/4"


1. Cut
4 each pattern piece.  Accurate cutting is important!!!
1 - 4 1/2"  x 4 1/2' square for center - or various scraps to create the "Window Box" center square.
Window box pattern is page 4 of the PDF pattern.  It is a foundation paper piecing pattern.  

**Note - I marked each background piece with the Letter and the outside edge***


2. Arrange the pieces as you want your block to be.  *Pls note, the center was left empty because I wasn't sure how I would fill it when this picture was taken.  The original pattern shows a single printed square.*


3.  Divide the larger block into 9 - 4 1/2" block.


4.  Creating The Leaf Sections.
Stitch D to E. 
Fold each seam in half and find center, finger crease.  Pin in center and edges.  Stitch on the inside curved edge - in this case - D.


5.
Stitch F to D/E.
Fold E in half and crease to mark.  Fold D and F in half and crease to mark.


6. Pin D to F at the center and each end taking into account your 1/4" seam allowance.
Stitch on the curved inside edge - piece F.


7. Create the flower blocks.

Stitch B to C, folding each seam in half (see step 5).  Pin at center and edges taking into account the 1/4" seam allowance.  Attach A to B/C.
Complete by stitching both sides of the flower together matching seams.

8. Creating the Window Box center square - optional.
Refer to the pattern on page 4.  Foundation paper piece the square or cut each template and add 1/4" seam allowance.


9.  Finishing the block
- Stitch the top row of three blocks together matching and pinning seams.  Repeat for the center and bottom rows.
- Stitch the top row to the center row.  Stitch the top and center rows to the bottom row.


Congratulations - You have completed Block #8 in the Vintage Block Quilt Along!!!

If you have any questions, Please leave a comment and I will respong on the comments page : )

Cambie #2 AND I can hear a pin drop : )


I love my boys - love them to death but I am soooo happy they have started school. 
We have had a wonderful summer - trips, concerts going to the pool but I am ready for the Fall and more sewing and pattern designing!
With some of my free time today, I am working on Cambie Dress #2 in Nordika fabric by Jeni Baker from Art Gallery Fabrics!

I finished the final project in the Super Online Sewing Match - (sigh of relief).  It was such an honor to be chosen and I learned a lot along the way -
like I actually enjoy making custom fit garments for myself  : ) 
The final project was Sewaholics Cambie dress.  It is a pretty, girly design.  I made a few changes but really wanted to keep the feeling of the original design.  I ordered the Nordika fabric for this dress but got it too late to use for the final dress.  Since I spent so much time on the pattern I decided to go ahead and make another one!  I still have to add the lining and hem it.  I love the border print in this dress!
The yellow one I made is lovely but soooo Summery.  Our warm days of summer are coming to an end so I really wanted a version that would go with black boots and a cute cardigan to wear for Fall.  This needs a cute skinny black belt too!


I'll have the pattern and tute up tonight for the next block in the Vintage Block Quilt Along.
Tks for being so patient.
 
 
Had to sneak in a pic of my cuties : )
Enjoy your day!
 
xo
Charise

9.03.2013

The Cambie Dress Adventure - Super Online Sewing Match

Thanks for stopping by to check out my last garment for the Super Online Sewing Match!
Everyone has left such nice comments along the way. 
It really means so much to me - thanks for cheering me on : )


The project for this challenge is Sewaholic's Cambie dress.  I love the dress - it is so cute. 
I was drawn to the A-line version which I saw myself wearing more often.


   This dress required three muslins to get the design and fit right!  It was definitely worth the effort - the fit is fabulous and I will be making at least one more for Fall. 
 No matter how simple the style is, I always, create a muslin to make sure I like the design details and the fit of the garment before I stitch into the actual fabric.

This round my inspiration came from a wonderful book on 40's style fashion and a pair of darling shoes I purchased - cheap - at  Anthropologie a few years back.  I happened to have a lovely cotton jacquard fabric in my favorite color -  yellow - that goes smashingly with the shoes.  I think finding a fabric I wanted to use was the biggest challenge.  I decided on the jacquard because it has a summery feel!

*A little note - those of you who watch Project Runway - this weeks challenge was to design a dress inspired by a pair of shoes  : )   *


I decided to change the darts to princess seams and add an empire seam line under the bust which is a more flattering style for me.

White piping was added to the pockets, waist and empire seams. 


I added curved pockets with piping - similar to the A-line skirt I created in Challenge #1.


The upper pocket bags are lined with a pretty coordinating fabric.


Once single vintage button was added to the upper neckline.
I purchased these button on Etsy - real glass vintage buttons! It was fun to put one to use : )

 
The invisible zipper starts 5" below the top neckline edge to create a slit for a fun little back detail.


The invisible zipper turned out splendidly down to matching the piping at the back waist.  See this post for a tip on getting your piping to match.


The bodice is completely lined with the same pretty floral print that was used for the pocket lining.
The neckline was gaping a bit so I used a handy technique of Staying the neckline.
See below for a tutorial.
I love the hanger view with the lining showing : )


The Skirt is lined with a soft white cotton.


The hem is faced with the same pretty floral.  Click here for a quick tute to add a hem facing to your garment.


Summer is almost over here in Seattle but I hope to find a special occassion to wear this little number!
I think a girls night out is in order : )
 
 Fixing a Gaping Neckline - or - Staying a neckline.

This is such an important tip for sweetheart and other neckines.  I was so bummed - my dress was almost finished and the neckline was OK  - but not perfect.  It was gaping a bit but then  I remembered learning about learning how to stay a neckline from a tailoring class!  The perfect solution to this problem!  The basic idea is to stitch a piece of fabric that is slightly shorter in length than the seam you want to fix - basically easing the strip of fabric to the neckline to eliminate the gaping neckline.

Materials -
I used selvage from mid wt. quilting cotton which I cut to 1/2" wide.


1. Measure along the seamline on the portion of the neckline you want to ease - or bring closer to the body.  In my case, I measured inside the neckline straps along the seamline and measured 7 3/4".  I decided to cut my tape 1/4" smaller - or 7 1/2".
To determine how much fabric to ease onto the tape, pin out the gaping neckline and use that measurement.

2.  Fold the tape in half and mark.  Place the marking at the center front neckline making sure the tape covers the seam.  Pin in place on the lining side centered on the seam line.

3.  Pin the edges to the place you want to start easing your neckline.  In my case, just inside the straps.
Pin in place.  Also pin along the seamline to the center front, easing in the neckline.  Be sure your stay tape is centered on the seamline.

4.  Flip the garment over and stitch the tape to the neckline following the previous neckline stitching. Be sure to stitch just inside the seam allowance.

My "Go to" book for couture sewing techniques is Claire B Shaeffer's "Couture Sewing Techniques".

Thanks to Beth and Kristin for a fun contest.  It was lots of work but also lots of fun.  It was so nice to meet new friends via Sew Mama Sew. 

xo
Charise