8.18.2024

Mansfield Park Projects


When I had the chance to make a project with Jane Austen's House - "Mansfield Park" fabric from Riley Blake Designs I just couldn't resist!  

Following is a description of the line from Riley Blake Designs:

"Jane Austen’s novel Mansfield Park, first published in 1814, tells the story young Fanny Price, who is sent to live with her wealthy relatives, the Bertrams, at the age of ten. As she grows up, she develops deep feelings for Edmund Bertram, the only person at Mansfield Park who shows her true kindness. 

Mansfield Park is the third in our new series that features original prints and exclusive quilt kits. Each collection corresponds with each of Jane Austen’s six novels!" 


The fabric line is just beautiful and I was drawn to the period appropriate colors of red, sand and pale blue.

The line includes sweet florals, stripes and a lovely print of the Mansfield Park Landscape in pretty muted browns, reds, sky blue and turquoise.

The fabrics were perfect for making a tote and a cottage zipper pouch.


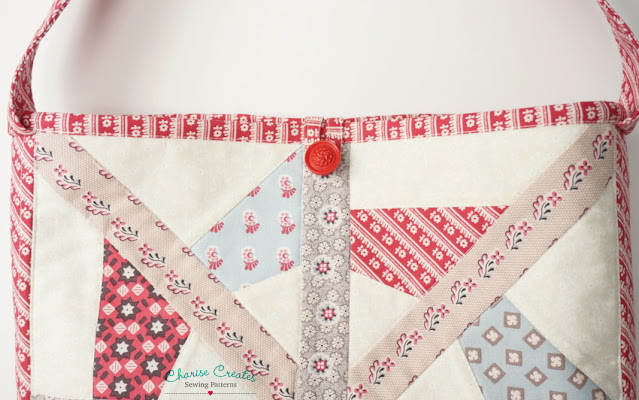
I used the Crown of Thorns pattern to adorn one side of the "Curved Tote."

 It is a free pattern on my blog you can find [HERE] 

The tote is designed for any 12 1/2" unfinished / 12" finished quilt block.


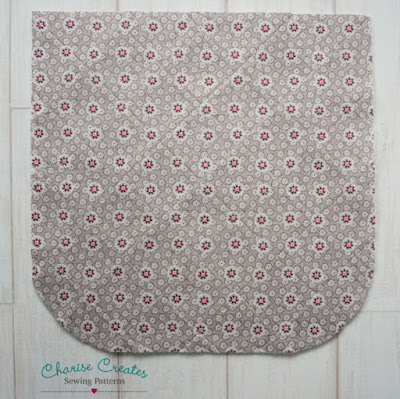
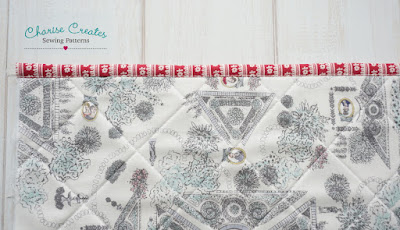
The back of the tote has an extra large pocket.  I used the "Mansfield Park Landscape" print for the pocket and bound it in the lovely "Lady Bertram" diagonal stripe.


The top edge of the purse is also trimmed with the Lady Bertram print and features a loop and button closure.  I had fun picking a vintage button from my button stash!

You can find a free pattern and tutorial for the Curved Tote Pattern at the bottom of this post.


The Curved Tote needed a companion so I designed this sweet Curved Zipper Pouch.


The front of the pouch features my Cottage Quilt Block pattern which you can find [HERE]

I had loads of fun fussy cutting the windows and door with the Mansfield Park Landscape print : )


I love the heart zipper! 

The zipper is from Sunny Day Supply.


Be sure to tag your photos of projects made with Mansfield Park with the following hashtags:

#MansfieldParkFabric #ILoveRileyBlake #RileyBlakeDesigns

Happy Sewing

Charise : )


Curved Tote Pattern 

12" x 12" finished

Fabric - 42" wide

Print #1 - 1/2 Yard

Body: 1 - 12 1/2" x 12 1/2"

Print #2 - 1/3 yard

Outer Pocket: 1 - 10" x 12 1/2"

Print #3 Lining -  1/2 yard

Lining Body: 2 - 12 1/2" x 12 1/2"

Lining Gusset - 1 - 2 1/2" x 33 1/2" 

Print #4 - 5/8 yard

Straps: 2 - 2 1/2" x 36 1/2" ,  Gusset: 1 - 2 1/2" x 33 1/2" ,  

Pocket Lining: 1 - 10  x 12 1/2"

Button Loop:  4 1/2"   x   1 1/4"

Top Pocket Binding: 1 5/8" x 13"

Top Tote Binding: 1 5/8" x 31"

12 1/2" quilt block 

Fusible Fleece - 1 yard

Body - 2 - 12 1/2" x 12 1/2"

Pocket - 1 - 10" x 12 1/2"

Gusset - 1 - 2 1/2" x 33 1/2"

Medium Wt Interfacing - 1/8 yard

Strap: 1 - 2 1/2" x 36 1/2"

Supplies:

Button - 1/2" or Larger


SEWING INSTRUCTIONS

1) Fuse the batting to the wrong side of :

the #1 - 12 1/2" Print #1 Square, 12 1/2" quilt block, Gusset and one of the #2 Outer Pocket.          

Mark and Trim the batting around the corners of the #1 Print - 12 1/2" square ,  12 1/2" quilt block, and # 2 - 10" x 12 1/2" Pocket Rectangles using the corner template.


2)  Place the Pocket pieces wrong sides together.  Quilt as desired.  I used a 2" diagonal diamond pattern.


3)  Quilt the Remaining pieces in Step #1 as desired.


4)  Fold the the fabric strips: Button Loop -  4 1/2"   x   1 1/4", Top Pocket Binding -  1 5/8" x 13",  and Top Tote Binding - 1 5/8" x 31" in half wrong sides together.   
Press and unfold the strip.  
Fold the raw edge to the crease line and press in place.
Fold in half and press.


5)
 
Stitch both long edges of the Button Loop - 4 1/2" x 1 1/4" with an edge stitch.
Form a loop and baste across the top edge 1/4" from the raw edge.

6) Place the  binding on the wrong side of the top pocket matching raw edges, Right sides together .  Stitch the binding to the top edge with a 1/4" stitch.


7)  Wrap the binding to the front panel, folding under the raw edge on the fold line.  Edgestitch in Place.


8)
Place the Pocket on the 12 1/2" square.  Baste around the side and bottom edge.  


9)
 
Place the loop at the top center the pocket panel.  Baste in place.


10) 
Fold the gusset in half lengthwise to find the center point.  Match the center of the gusset to the bottom center of the Purse Panel.  Pin in place.  Pin the gusset to the Panel matching raw edges.

Stitch with a 1/4" stitch.  Repeat for the other side.  
Turn right side out and press towards the purse panel.

**Repeat to make the Lining. 


11)
Edge stitch the perimeter of the purse panels.


12) Make the Handle:

Fuse the 2 1/2" x 36 1/2" interfacing to the wrong side of one handle.
Place the second   2 1/2" x 36 1/2" rectangle right sides together with the interfaced handle.
Stitch each long edge with a 1/4" seam allowance.  Press seams open. 
Turn right side out.  Press flat.
Edge stitch each long edge.


13)
Place the handle on the top gusset edge right side together.  Baste in place.
Place the lining inside the outside tote panel, wrong sides together.  
Stitch the top edge with a 1/4" seam allowance.


Fold on end of Top Tote Binding strip 1/2" towards the wrong side on the short edge.   Place the folded edge right sides together with the lining at one of the side seams matching the top raw edges.  Pin in place continuing along the entire top edge. 


When you reach the beginning of the seam, overlap the folded edge 1/2".
Trim the tape.  Stitch with a 1/4" seam allowance.  


14) 
Wrap the binding to the front , folding under the raw edge on the fold line just covering the stitching.  Edgestitch in Place.

15)
Attach a button centered on the 12 1/2" front panel,  3/4" below the top edge.


Enjoy your Curved Tote!

8.15.2024

Always in Season "Jam Jars" Zipper Pouches


Always in Season by American Jane is an adorable new fabric collection with a vintage feedsack feel made modern with some beautiful large scale florals. 

There are floral and geometrics prints and include a gingham fat eighth panel and an adorable panel print.

The fabric are shades of red, sky blue and navy blue, green, and yellow. 


I made my "Favorite Block Zipper Pouch" which features your favorite 6" quilt block. 

The Jam Jars is a new pattern and is perfect for this pouch.


Jam Jars is a cute new 6" block that include both Strawberry and Lemon designs.

I used the adorable Red Small Floral print for the strawberry and Yellow Criss Cross for the Jam jar.


I went with a cool colored palette for the the Lemon Jam Jar. 


The back of both pouches feature the beautiful Large Floral in color white.

Find the patterns here:


I couldn't resist adorning the pouches with a cute zipper pull. 

The strawberry is from Rose Garden Patchwork


The Yellow flower charm is from Sew Be.

Be sure to tag your creations with the following hashtags (I love to see what you make!):

#AlwaysInSeasonFabric #ILoveRileyBlake #RileyBlakeDesigns

Happy Sewing!


8.08.2024

Old School fabric featuring my Crayon Zipper Pouch and Sketch book cover


I had so much fun working with the new line of fabric, "Old School", designed by J Wecker Frisch for Riley Blake Designs.
I am a fan of Janet's artwork which adorns her many lovely fabric lines. Old School is a wonderful collection of grammar school themed fabrics.


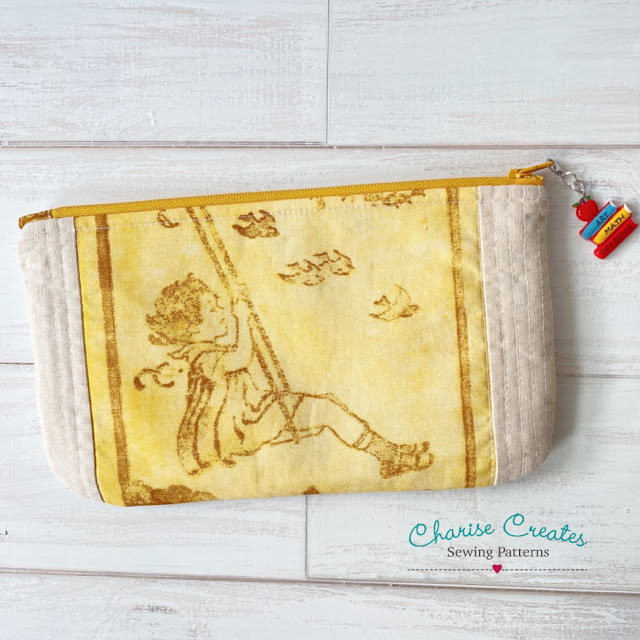
The first project is my Paper Pieced Crayon Pouch and it is a Free pattern on my blog!


I used the School Books panel for the paper pieced crayon and on the back of the pouch. I adore the artwork of the little girl on the swing!


Find the Paper pieced Crayon Pouch pattern [HERE]


The second project is a sketch book cover using my Large Sketch Book Cover pattern.

The image on the front is also from the School Books panel and I bound the book cover with the Red Dictionary print.


The inside of the cover includes space for a sketch book, pens and pencils and a zipper pocket.

If you make projects with "Old School", be sure to tag your photos on the social media with the hashtags - #ILoveRileyBlake #RileyBlakeDesigns #OldSchoolFabric

Happy Sewing!

Charise


7.30.2024

Home Town Holiday Basket Bag and Open Wide Pouch


 Hi!  I had the opportunity to make a few new projects with the new collection from Lori Holt – Hometown Holiday. Home Town Holiday is a fun, cheerful line of fabrics which include holiday themed fabrics as well as adorable florals, plaids and text prints.


I designed a new bag I call the Basket Bag which is a large bag with decorative piping detail, a top zipper closure, inside pocket, and side seam loops for adding a shoulder strap.


The Bag is adorned on one side with my foundation pieced pattern – “Flowers in Vintage Bottles”, enlarged to a 12″ finished block.


The second side of the bag features the beautiful Chapel Print with side panels in the gorgeous School House Wreath print.


I used the cute Berry Christmas print to make the hexagon zipper end.


Of course I had to make a pouch to go with the Basket Bag : ) I couldn’t resist trying the new pouch pattern from Zakka Workshop – Wide Open Tube Frame Pouch.

I used my Spring Butterly foundation paper piecing pattern to adorn one side of the pouch. I reduced the pattern to 85% of the original which fit the pouch perfectly!

The Pouch is such a fun and easy make! It only took about an hour to assemble. (Not including paper piecing the butterfly) 


Be sure to share your projects using Home Town Holiday fabric with the hashtags:
                                 #ILove Riley Blake #HomeTownHolidayFabric #RileyBlakeDesigns
                                                                              Happy Sewing!