
3.30.2011


3.28.2011
Hand Stitching
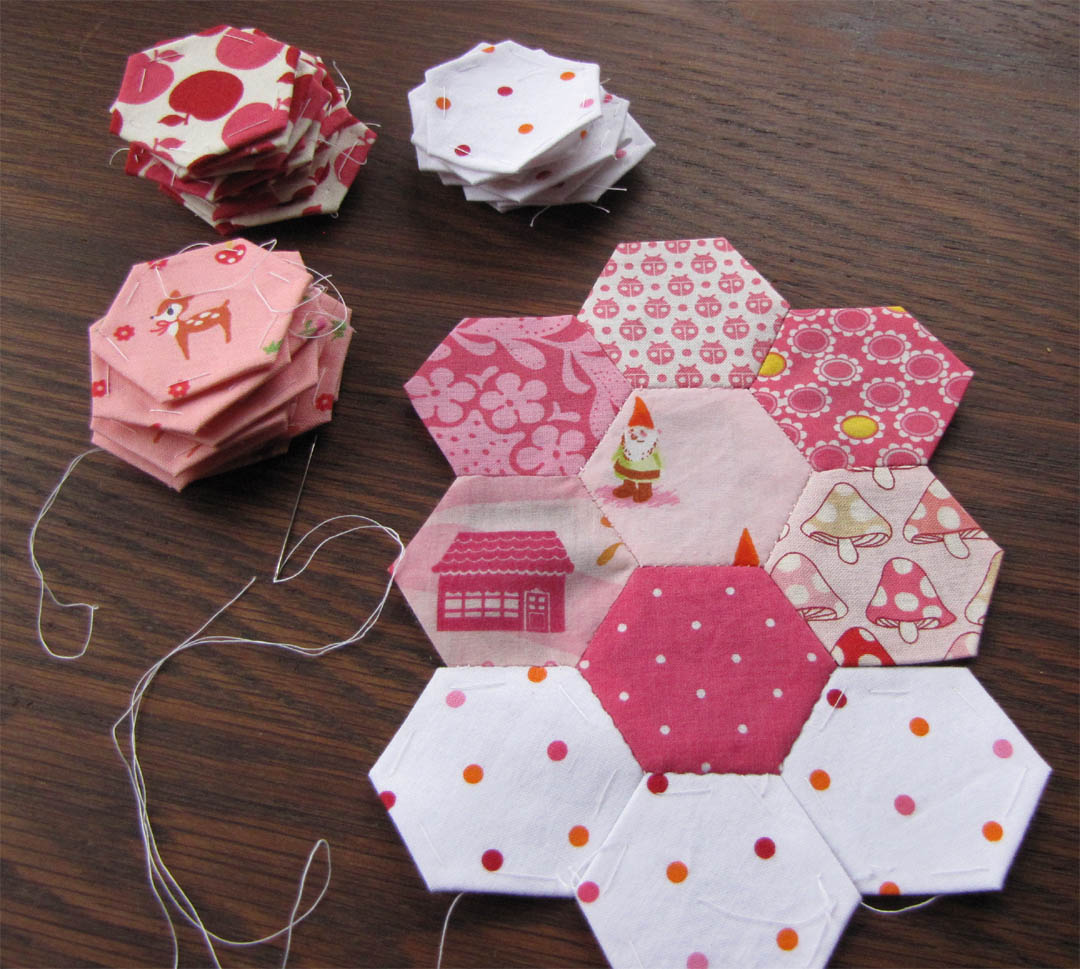
 Originally this sweet little patch of hexies was made for the back of the double wedding ring pillow in the previous post. But I couldn't do it. I Couldn't put those sweet little hexies on the back of a pillow and just occasionally see them. So I decided I would make a pillow. Then I remembered seeing the quilt below in this wonderful book. Yes, you can see where this is going.
  As I'm writing this I was thinking I should actually count the number of hexagons in that quilt. Each consecutive ring include six more hexagons than the previous one. I'm crazy, I know, but it would be an amazing quilt. Nope, on second thought, not counting, just gonna go for it.
I love having these as a hand sewing project to keep my hands busy while watching TV in the evening.  My original stack for this project. If this becomes a quilt it will definitely grow.........
  Wish me luck. I have a feeling this will take a very long time : )
 My original stack for this project. If this becomes a quilt it will definitely grow.........
  Wish me luck. I have a feeling this will take a very long time : )
 3.27.2011
My first quilted project
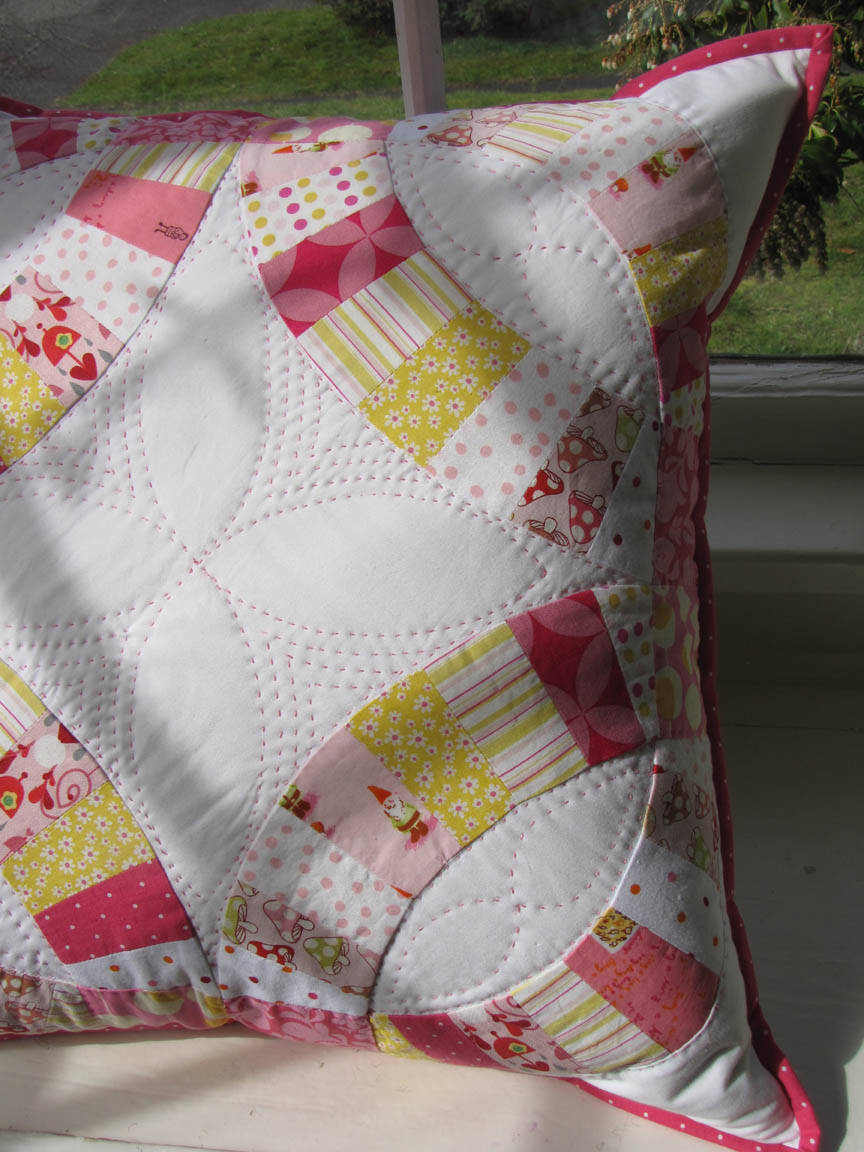 Months ago I started the Pickle dish quilt along from Aneela's website here. I have lots of the arcs sewn but I was dying to see this made into something. Hence the pillow. It is my first quilting project and I absolutely loved doing the hand quilting.
  I doubt I will do this for the actual quilt though it is lovely!
 Happy Sunday and Sewing!
 3.13.2011
A Saucer for the Tea Cups
A few weeks ago I started playing around making some tea cup blocks. I like them so much I think they will become a quilt. I felt they needed a bit of relief, so I came up with this:
 I'm really happy with the way it turned out. It is all machine pieced and was pretty easy to do.
I think it will make a pretty quilt!
 I'm off to a quilt show in Monroe, WA. Can't wait as I've never been to one before.
Happy Sunday and Happy Sewing!
3.07.2011
Traveler Quilt Block
 This week I joined a group to help make a quilt for an expectant Miss.
 Parameters were using some Heather Ross fabric and I chose the color Red. I tried my hardest to make it gender neutral (we don't yet know the gender of the baby) and I think it turned out well. It is suppose to be an "improv block". Though I did plan a bit so it wasn't done entirely by the seat of my pants. I couldn't resist adding a wee bit of pink.
The boys got along rather well this afternoon and I was able to sneak in this bit of sewing!
2.28.2011
A finished bag
Yay! A finished project. I'm embarrased to say I started this one a few years ago!
I'm happy with the way it turned out and it is larger than it looks so it will hold all my stuff! The pattern is Amy Butler's Madison Bag. The instructions were great and it was really easy to put together
 I Love the removeable flower detail. I used a mother of pearl button for the inside as well as a lovely little antique brass button.
 Happy Creating!
2.25.2011
Another Tea Cup Block and A Nice Little Surprise
After yesterday I really wanted to make another tea cup block. I love this one. The secret is hand sewing the handle.
 I redid the handle on the original and it came out really well!
 I think I'm addicted to making these as I am working on a third. Looks like it will become a quilt someday!
 I had a nice little surprise lastnight. I was going through my box of silver chains and I found the necklace below. It didn't look like this. It was a sad little mess in knots - I didn't even know it was a necklace! Happy to have it as I made it and forgot about it years ago.
And lastly, a lovely little stack of fabric. I bought the solids today and love how they look with some of my existing stash!

Happy creating!
2.24.2011
Playing
I had a bit of spare time this afternoon and decided to try out this quilt block. It is from the book Quilting Line and Color. It is my new favorite quilting book. The projects are very minimalistic and predominately white based. The quilts are beautiful - true works of art.


2.01.2011
Another Give - away!


Check out Heather's blog for yet another give - away! This is the new line by Denyse Schmidt and I just love it. Check out True Up for more on this line!
1.30.2011


1.29.2011
A Good Thrifting Day ! ! !
 I had a fun day doing a bit of thrift shopping. Jay watched the boys and I was free to browse! I found two flat twin size sheets, two pairs of vintage pillowcases, 1/2 yard of lovely blue fabric and a few sewing notions.
 The sheets and pillowcases remind me of the wonderful collection from Urban Chiks by Moda. Image is from True Up.
I've seen some incredible quilts made with vintage sheets and pillowcases on Flickr. Check out this beautiful one by Jeni. She also has a flickr shop and sells pieces of vintage sheets for an incredibly reasonable price.

The boys are busy playing with papa so I'm going to sneak in a little sewing time!
Happy weekend to you!
1.28.2011
Portrait Series

I've been working on a new group of jewelry pieces I'm calling the portrait series.
I like to cut or saw a design into the back of the bezel (cup that holds the stone) to add interest and make it special. And my necklace will sometimes flip around to show the back so I think it is really quite lovely to have a pretty image on the back. This is # 3 and my second favorite.

This is my fourth and favorite. I like the thicker lines used by cutting with a larger blade.
 This is my second attempt.
 This is my first attempt.

Here is the front with the lovely Crazy Lace Agate Stone.
 This is my second attempt.
 This is my first attempt.
Here is the front with the lovely Crazy Lace Agate Stone.
1.21.2011
I Love my Featherweight

Ok. So I am the absolute lamest blogger on the face of the earth. Can I even call myself a blogger when I haven't posted anything since November?
Anyhow, we had a lovely holiday. Jay waded across a river to get our tree. It was beautiful and about 17 feet tall. (He left 4 feet by the riverbed and cut 4 feet off the top when we got it home!) The boys had a magical Christmas and were terribly sad to see it end. Luc kept saying "It is Christmas tomorrow" days after it was over!
I have been doing a bit of sewing the past few weeks. Mostly working on a few different quilts. Last year, I bought a Singer Featherweight for myself for my birthday. I bought this particular model because it was made the year I was born. I took a class on servicing the machine last summer but I never actually did any sewing on it.
Well...lastnight I decided to plug it in and I Love It. It is a wonderful little machine. It makes the most beautiful stitches and if so sturdy.
Here's to 2011, doing lots of sewing and actually finishing projects!

11.07.2010
Jewelry Show


So I've been working on a few pieces to put in the House Show at Danaca Design. Some are reworks of older pieces. A few are brand new pieces I'm pretty excited about!
The party is this Saturday in the U-District and includes work from those of us that work at Danaca Design. We created beads that were fashioned into a necklace that will be auctioned to raise funds for a student from Seattle Public Schools to pay for metalsmithing classes at Danaca.
Check out the link above for all the details!
10.23.2010
A House Remodel - The Epic Before and After
We purchased our 1908 Madrona Box Style House 5 years ago in December.
It has been quite an adventure. My husband Jay and I had been looking for a bigger home and desperately wanted to restore a classic house.
 This pic is during the remodel. Jay removed all the double hung windows and restored them. The windows that are where the wood is attached are the original leaded glass windows.
*********************************************************************************
Front Door Before
 We found the front door and all the matching hardware at a 1908 Four Square style house that was being demolished in the Eastlake area of Seattle.
 Front Door After
***********************************************************************************
The Original Front Door

The beautiful door After
 *********************************************************************************
The Front Entry
 This is a view from the front door into the entry. We took 3 feet from the kitchen to add a powder room which is at the back of this picture.
 Yep, that's me removing the tile from the oak hardwoods in the entry!
 After Hallway into the Powder Room.

The beautiful door After
 *********************************************************************************
The Front Entry
 This is a view from the front door into the entry. We took 3 feet from the kitchen to add a powder room which is at the back of this picture.
 Yep, that's me removing the tile from the oak hardwoods in the entry!
 After Hallway into the Powder Room.
***********************************************************************************
Staircase

Staircase during the remodel after gutting the area.
 Staircase After.
Another view before
 And after.
*************************************************************************************
The Dining Room
 Before
 And After
 Before
 And After
 Before
 And After
************************************************************************************
The Dining Room Fireplace
 Before
 And After
**********************************************************************************
Dining Room into the Kitchen

Before
 And After
Dining Room into the Kitchen

Before
 And After
**********************************************************************************
Living Room
 Before
 And After
Before

After
 **********************************************************************************
Living Room
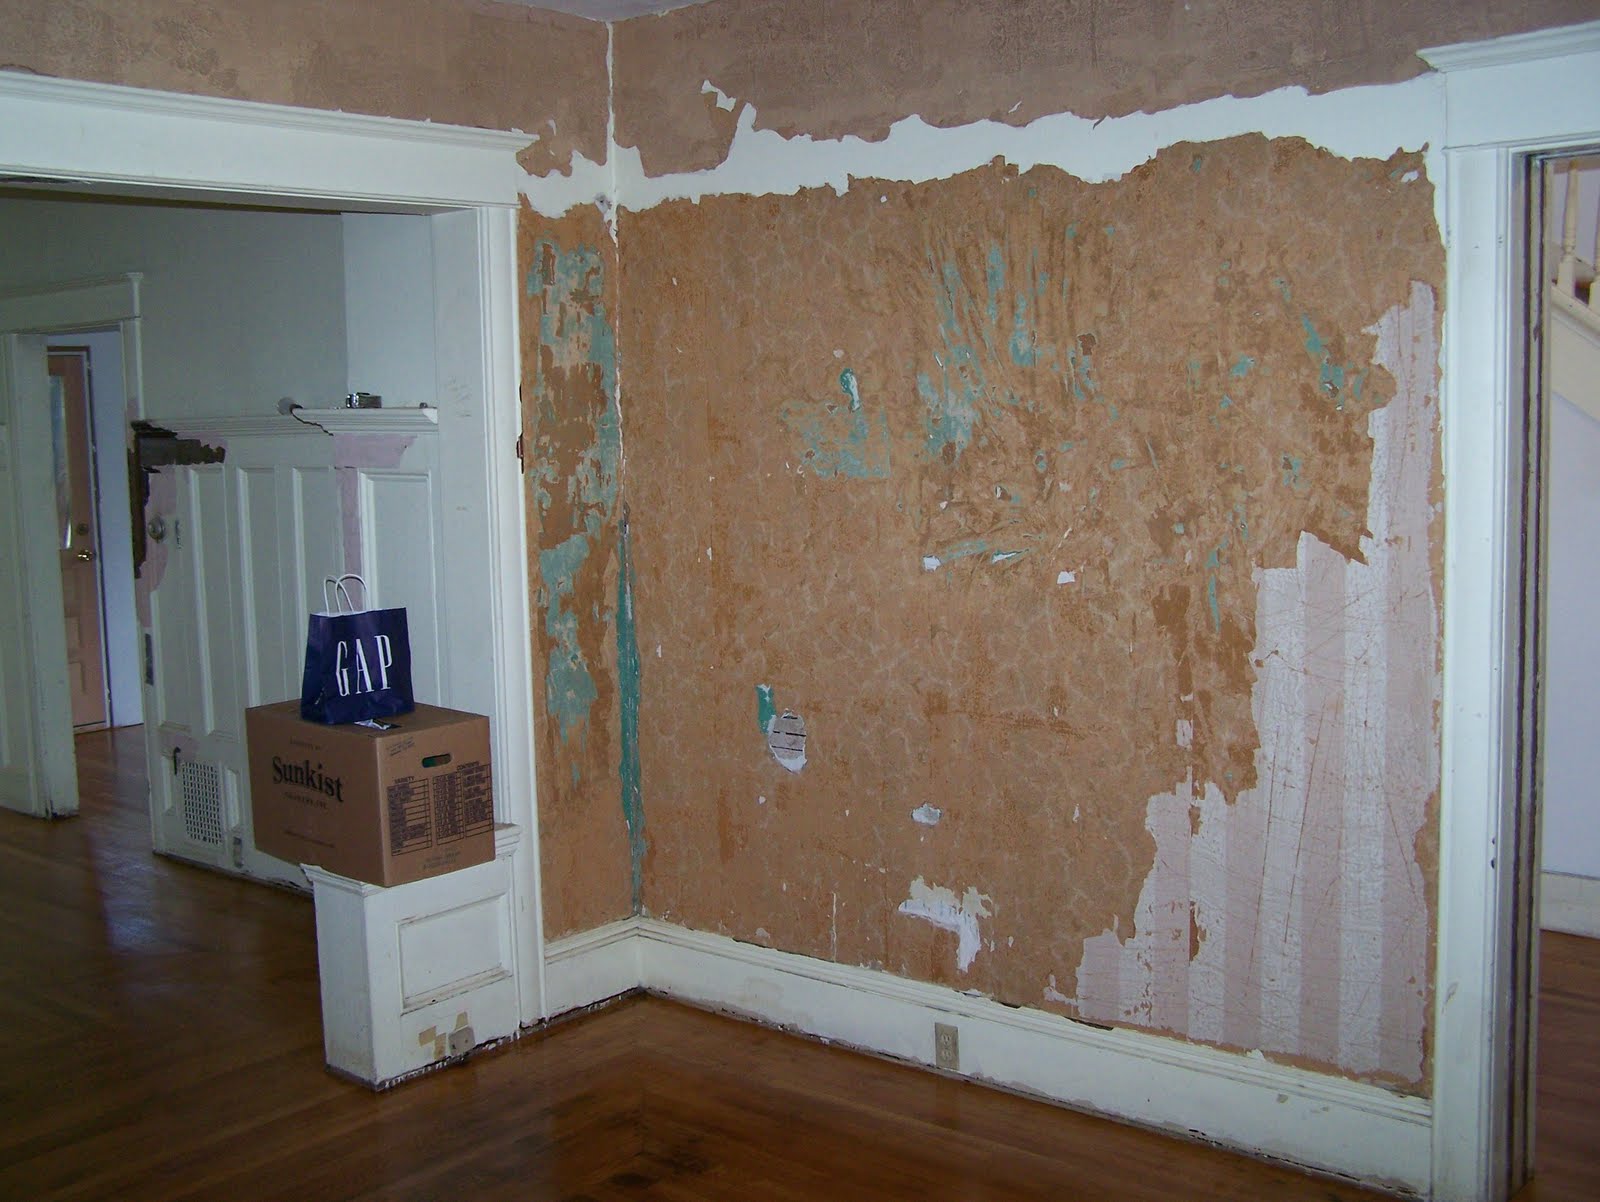 Before
 And After
***********************************************************************************
More Living Room

Before

After
**********************************************************************************
My Favorite View from the Kitchen to the Dining Room
My Favorite View from the Kitchen to the Dining Room
 **********************************************************************************
Kitchen
 Before

 After
After Before
 After
After During
***********************************************************************************
Lets Walk down the hallway to the East Bedroom

 Hallway Before and After
*********************************************************************************
East Bedroom
 Wow that was some nasty carpet!

 Before and After. Lots of room for the boys to play. We added sconces to the nook which holds a twin size bed.

***********************************************************************************
West Bedroom
 This was by far the worst room of all. The window was broken and there was water damage on the ceilings.

Another View


 A view of the landing from the South Facing Bedroom.
 Before
 After
After**********************************************************************************
More Kitchen
 Before
 After
After**********************************************************************************
Even More Kitchen


************************************************************************************


************************************************************************************
Landing. Lets head upstairs!
 During
***********************************************************************************
Lets Walk down the hallway to the East Bedroom

 Hallway Before and After
*********************************************************************************
East Bedroom
 Wow that was some nasty carpet!
 Before and After. Lots of room for the boys to play. We added sconces to the nook which holds a twin size bed.
***********************************************************************************
West Bedroom
 This was by far the worst room of all. The window was broken and there was water damage on the ceilings.
Another View


 A view of the landing from the South Facing Bedroom.
***********************************************************************************
Hallway to West Bedroom


***********************************************************************************
West Facing Bedroom

This is a during photo. Post gutting of the upstairs and post floor refinishing.


 Nook in West Bedroom
 True Before of the West Bedroom

After of the same corner
*********************************************************************************
Upstairs Bathroom
 Unfortunately I don't have a true before of the bathroom. Lets just say it was beyond horrible. Have you ever stopped at a gas station restroom that hasn't been cleaned for years? It was that bad!!
 New hex tile floor.
 We salvaged the claw foot tub from a 1908 Four Square on Eastlake that was being torn down to build town houses. It was quite a score. We salvaged all the five panel fir doors, period door hardware, the beautiful front door and light fixtures!
The sink and vintage Mixer faucet came from a local salvage store.


***********************************************************************************
West Facing Bedroom

This is a during photo. Post gutting of the upstairs and post floor refinishing.


 Nook in West Bedroom
 True Before of the West Bedroom
After of the same corner
*********************************************************************************
Upstairs Bathroom
 Unfortunately I don't have a true before of the bathroom. Lets just say it was beyond horrible. Have you ever stopped at a gas station restroom that hasn't been cleaned for years? It was that bad!!
 New hex tile floor.
 We salvaged the claw foot tub from a 1908 Four Square on Eastlake that was being torn down to build town houses. It was quite a score. We salvaged all the five panel fir doors, period door hardware, the beautiful front door and light fixtures!
The sink and vintage Mixer faucet came from a local salvage store.


Subscribe to:
Posts (Atom)