12.22.2021

Cook Book Fabric and a Kitchen Cupboard Quilt


 "Cook Book" is the new line of fabric from Lori Holt of Bee in My Bonnet for Riley Blake Designs and it is ADORABLE.  

Kitchen themed and vintage inspired, I absolutely love all the Vintage Feedback style fabrics.

I decided to shop the Paper Pieced patterns in my Etsy shop to come up with the perfect design for this cute fabric.  A kitchen themed quilt seemed like the perfect project.  

I used Riley Blake Natural linen for the background and Riley stripe for the binding.

The quilting by Ashley at Hen House quilting is just perfect!


The creamer and sugar pattern uses "Mums" print in color cottage with Riley Blake Swiss Dots.


Love Mug is so adorable in Riley Gingham and the sweet "Cherry Turnover" print.


The Tea Kettle Pattern perfectly showcases the "Luncheon" print in coral.  It works perfectly with Riley Blake Swiss Dot.


I loved how the tea cups turned out using my Tea Time pattern. 

I would love a set of cups with these designs!


These nested mixing bowls are just adorable and work so well with Riley Gingham!


Cook Book "Fruit" print is the perfect print for these 

"Jam Jars and Fruit" blocks!


The Kitchen Canister Blocks are absolutely perfect in the Cook Book "Stamps" Print.  The pattern will be available in my Etsy shop soon!

If you make a project with Cook Book, be sure and tag your photos with the following hashtags:

#CookBookFabric #RileyBlakeDesigns #ILoveRiley Blake

Happy Sewing!

xo

Charise


12.08.2021

Quilt Fair from Riley Blake Designs and a Log Cabin Zipper Pouch tutorial!


Quilt Fair is the absolute cutest new line of fabric designed by Tasha Noel for Riley Blake Design.

It is hard to pick a favorite print but I think the "Quilt Fair Main" print is my favorite.  I love the cute illustrations!

I wanted to make a couple of projects that showcased the adorable prints and had a quilting theme.

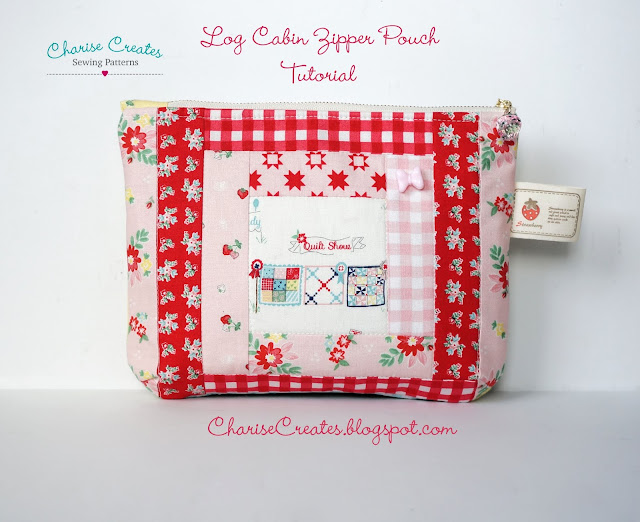
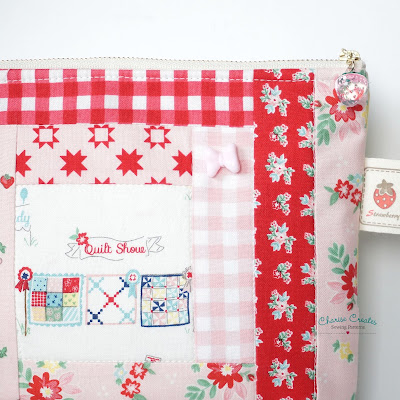
My Log Cabin Zipper Pouch and Log Cabin Purse showcase all the sweet prints in a traditional Log Cabin Block Design.

I used my Fussy Cut Heart Pattern for the center of the Log Cabin Purse.  It showcases the Quilt Fair Print so perfectly! You can also use any 6" finished quilt block for the center.  Pattern is in the works and will be available soon!


I also made this fun log cabin zipper pouch and I created a free tutorial!  It is a perfect gift just in time for the holidays!

Log Cabin Zipper Pouch Tutorial

7" x 9" finished

Supplies

F8 (9" x 22") 12 different prints for logs (strips)

2 - 3 1/2" fussy cut square

1/4 yard lining fabric

2 - 8" x 10" batting

8" metal zipper (measure from top of zipper pull to zipper stop.) or 9" or longer coil zipper shortened to 8 3/4", measuring from top of zipper pull to bottom edge of zipper.

4" length twill tape (optional)

Cut:

2 - 1 1/2" x 3 1/2"

4 - 1 1/2" x 4 1/2"

4 - 1 1/2" x 5 1/2"

4 - 1 1/2" x 6 1/2"

6 - 1 1/2" x 7 1/2"

2 - A Lining

1 - 1" x 2" tab for zipper

Pattern:

link [HERE]

All measurements include 1/4" seam allowance.

1) Make each log cabin pouch panel:

  Using the diagram as a guide, add strips to the center 3 1/2" square as indicated on the pattern.   Make 2 Log Cabin Panels.


2) Place a Log Cabin Panel on a batting rectangle.  Quilt as desired.  I quilted the panels on my pouch using a "Stitch in the Ditch" technique.


3) Place the Lining pattern on the panel and mark.  Cut around the marking.  Stitch the darts.   Press the darts. 


11. Turn the pouch right side out and press.  
Slip stitch or machine stitch the opening closed.

I hope you find time to make yourself or a special someone a log cabin pouch!


Be sure to tag your projects made with Quilt Fair fabric on social media with the hashtags:

#ILoveRileyBlake  #RileyBlakeDesigns #QuiltFairFabric


Happy Sewing!
xo
Charise


10.24.2021

Liberty Fabrics "Flower Show Midsummer"


Liberty Fabrics are some of my favorites.  I was so excited to design and create a project for the new fabric line from Liberty Fabrics - Flower Show Midsummer, from authorized distributor Riley Blake Designs.

 The Flower Show quilting collections from Liberty Fabrics celebrate the ‘Best in Show', bringing together botanical designs from across Liberty’s iconic print archive. 

Flower Show Midsummer is a beautiful collection of Liberty favorites inspired by a sunny meadow.  

My project is a quilt made with a variation of the Drunkards Path block in vintage patterns referred to as Love Ring for the flower, and The Oklahoma Wonder for the secondary block.

If you'd like to make a quilt, I found a similar design HERE.  

I used a 6" Drunkards quilt block acrylic template I purchased years ago on Etsy to make 24" blocks.  The finished quilt is 72" square. 

Isn't the quilting beautiful?!  Ashley from Henhouse quilting did such a wonderful job with the clamshell allover pattern which was her brilliant idea!


The quilt background is Swiss Dot in color Hot Pink and is backed with a cute yellow gingham from Riley Blake Designs.


If you make a project with Flower Show Midsummer, be sure to tag your photos on social media with the hashtags

#FlowerShowMidSummerFabric #ILoveRileyBlake #Riley Blake Design

Happy Sewing!

xo, Charise

10.12.2021

Harmony Placemats and a Napkin Tutorial


Harmony by Melissa Lee for Riley Blake Designs is the most adorable collection of nature themed prints.


My favorite is the "Oh Deer" print in Blush and I used it for the center of this hexagon placemat as well as the napkin border.


There are so many beautiful prints ~ bees, bee hives, meadows, and a sweet floral.

If you follow me on this blog or Instagram you will recognize a theme in my most recent designs.  It seems hexagons have taken hold and all my hexagon project ideas are coming to fruition.

  The latest hexagon project is a placemat, and the Harmony collection works perfectly. 

 The bee hive and deer prints are so perfect for fussy cutting.

The Buzzing Meadow print is a perfect print for the perimeter hexagons and works so well with the Fussy cut centers.  The Natural linen is from Riley Blake Designs.


The placemats are bound with Swiss dots in Yellow from Riley Blake Designs.

You can find the placemat pattern in my Etsy shop - Charise Creates.

Please share projects you make on social media with the hashtags:

#HarmonyFabric #ILoveRileyBlake #RileyBlakeDesigns


And of course a placemat needs a matching napkin!

The napkins are a free tutorial!

Enjoy!

Napkin Tutorial

by Charise Randell

FABRIC - Based on 44/45” wide fabric

-1/2 yard Solid Linen (makes 2)

-Print Fabric:  1/4 yard (makes 2)


OTHER SUPPLIES

-matching thread

-fine pins

-Rotary cutter

-Cutting mat

-acrylic ruler


 CUT Cut the following for each napkin:

Print Fabric - 1 strip 6” x 17 1/2”

Solid Linen 1 - 17 1/2” square

FINISHED SIZE

16”


SEWING INSTRUCTIONS:


1) On the top long side of the print fabric strip, Press under 1/4” to the wrong side.  Place the strip at the bottom of the linen square with the folded edge on the top.  Match raw edges and pin in place.  Edge stitch the top folded edge.  Baste the other raw edges to the linen square.


2) Press 3/8” to the wrong side on each napkin edge.  Press again 3/8” from the first line.


3) Mark a diagonal line as shown.  Cut on the line.

Fold diagonally with right sides together matching the raw edges of the cut edge.


4) Stitch from the fold to the first fold line 3/8" from the edge with a 1/4" seam allowance. Back stitch at the beginning and end of stitching.  Trim the corner.   Repeat for the three remaining corners of the napkin.


5) Turn each corner right side out turning under 3/8".  Press.  With the folded edge facing you, edge stitch around the perimeter of the napkin.